The focus of this HowTo is to set up ROKIT for the first time (Robotics Kit by Bosch Rexroth) and to gain an understanding of the technology generally.
Prerequisite:
ctrlX CORE X5/X7 with following apps:
ROKIT Navigator Client V2.0
ROKIT Locator Client V2.0
ROKIT Locator Server V2.0 (only for one AGV application)
ctrlX OS - Motion V3.6
ctrlX OS - PLC V3.6
ctrlX OS - Container Engine V3.6
ctrlX OS - Node-Red V3.6
You will find them either under the ctrlX OS apps or under this link.Register here for pre-release for Locator and here for Navigator.
System Architecture
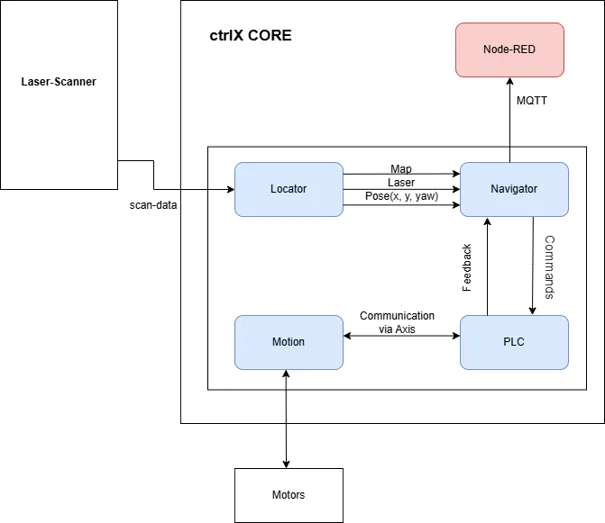
The diagram above illustrates the interaction between ROKIT Locator, ROKIT Navigator, the PLC and the Motion App. Here is an explanation of the interaction between these apps:
Localization & Path Planning: The ROKIT Locator processes the incoming scans to determine the exact pose (x, y and yaw). It provides the pose and the current map of the ROKIT Navigator. The ROKIT Navigator receives VDA5050 commands from the MQTT Dashboard and implements control loops for motion control using information from the ROKIT Locator. It sends these motion commands to the PLC.
Machine Logic: After the Navigator sends the movement commands to the PLC, the PLC handles low-level machine logic, translates the commands into axis profiles and communicates with the Motion app.
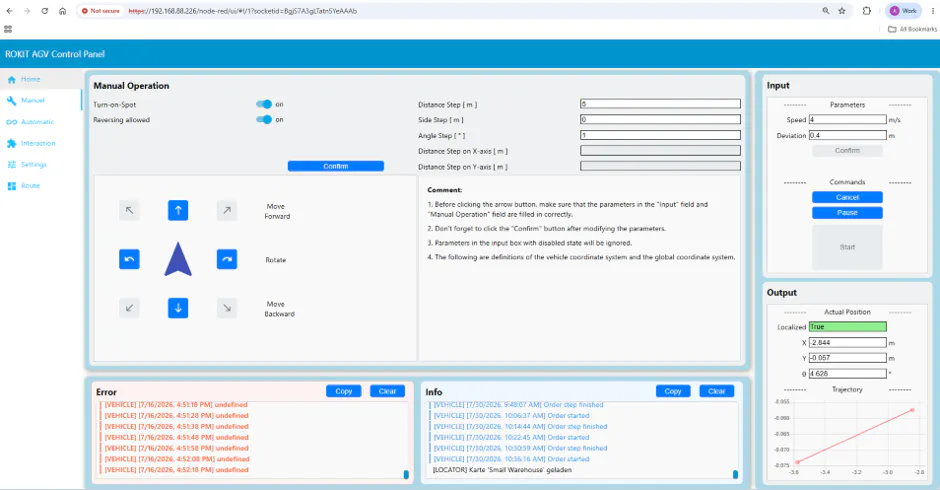
Dashboarding: The Navigator publishes system status and operational data via MQTT, which can be visualized in Node-RED or fleet management systems. Using this dashboard, users can send commands via VDA 5050 protocol to the ROKIT Navigator.
Starting the PLC projects and configuring the motion app
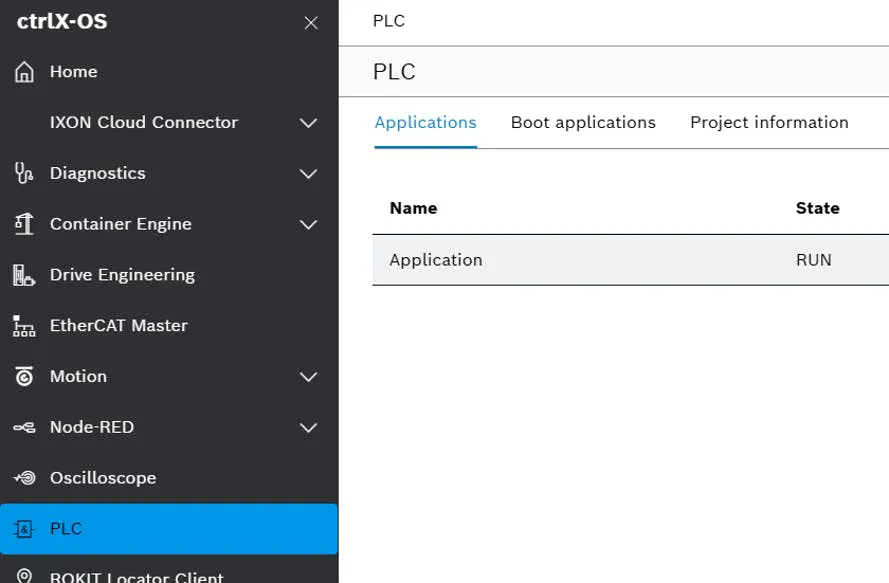
Running the robot requires some kind of logic in which vehicle physics, SafeMotion, etc. are defined. This is mostly done in the form of a PLC program. After starting the PLC program, you should also be able to see in ctrlX OS that the PLC is running.
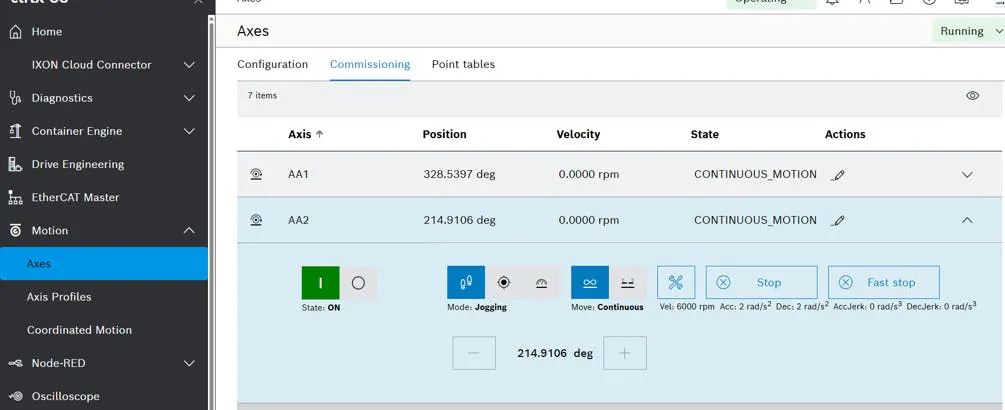
Here is a screenshot of the common axis configuration for different drives in the motion app. The axes will be commanded by the PLC project through the axis interface.
Configuration of the ROKIT Locator and Navigator
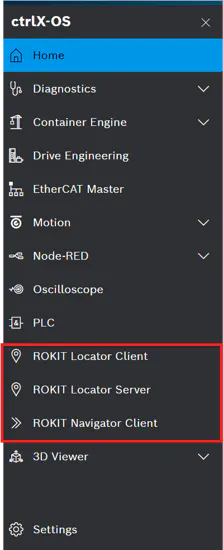
When signing in to any of the three ROKIT modules (ROKIT Navigator Client, ROKIT Locator Client, and ROKIT Locator Server), you will be prompted to sign in with a username and password. The default username is "admin"; the default password is "bbZGs3wFsB35" and can later be changed in the settings.
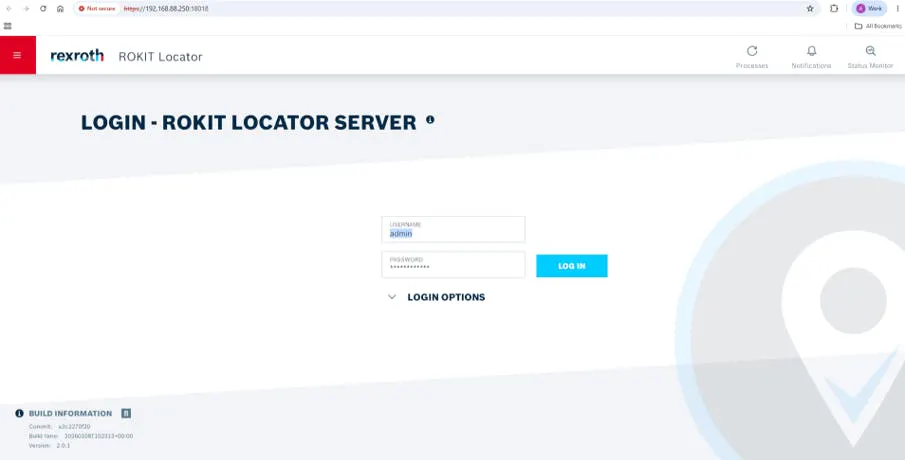
First, you can log in to the ROKIT Locator Server and add a new vehicle in Home > Fleet Manager. Every setting for the ROKIT Locator can be configured from the ROKIT Locator Server settings page.
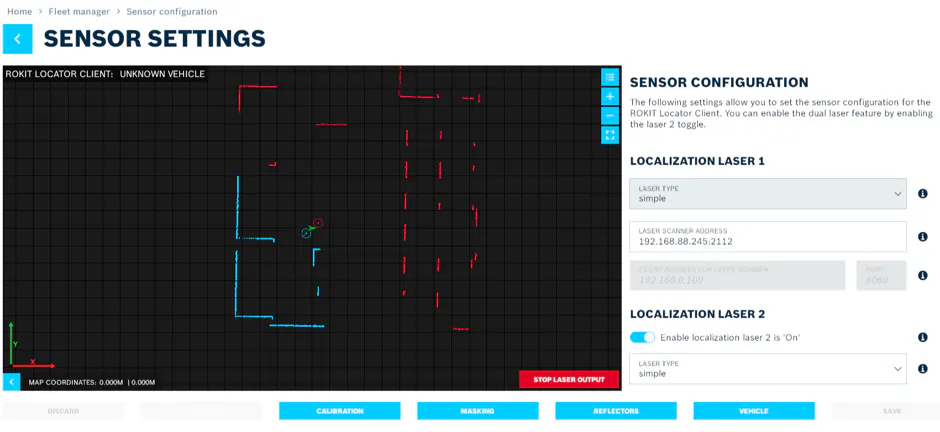
Now you can configure the sensor connection under Sensor Settings. Depending on your laser scanner, you can select the correct laser type and enter the address of the laser scanner. If you want to use two laser scanners for localization, you need to activate the “Enable Localization on Laser 2” button.
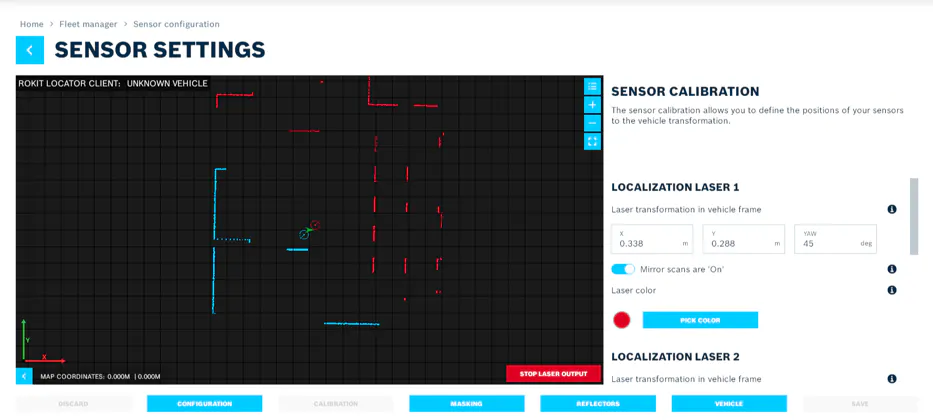
Now you need to add the transformation parameters for localization laser 1 (and laser 2) during the calibration.
After the laser scanner and the frame are configured, you can start to recording a map on the Home > Quick Start page. You can then move around the environment unit the map is fully covered and visible in the ROKIT Locator interface. It is recommended to move around the map at least twice times from different directions.
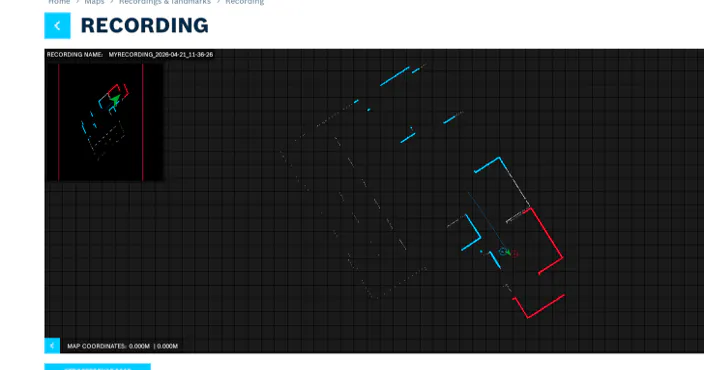
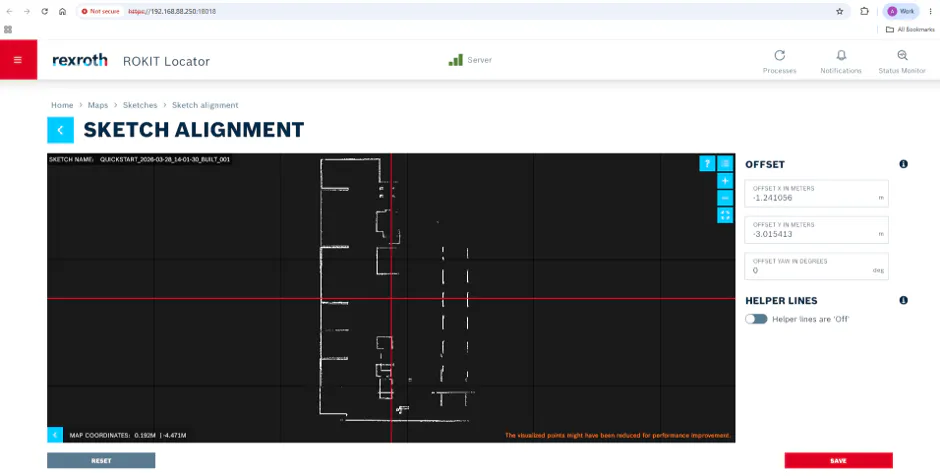
You can edit and align the recorded map under Home > Maps > Sketches. Afterwards, you can use the edited sketch and assign it to the vehicle.
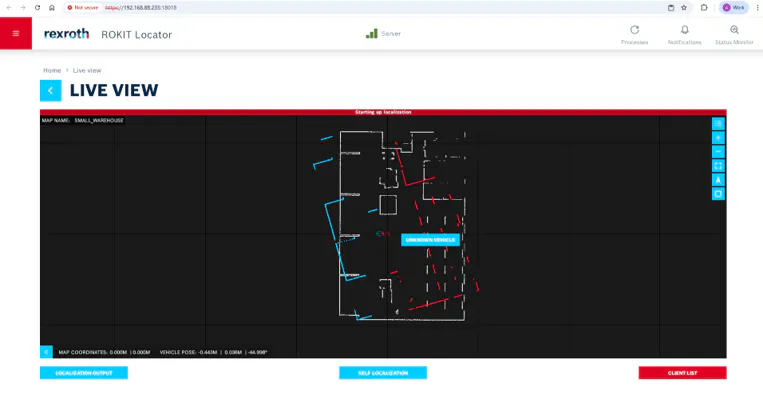
Now you can open the Live View and start the localization for this vehicle. (Home > Live View > Client List).
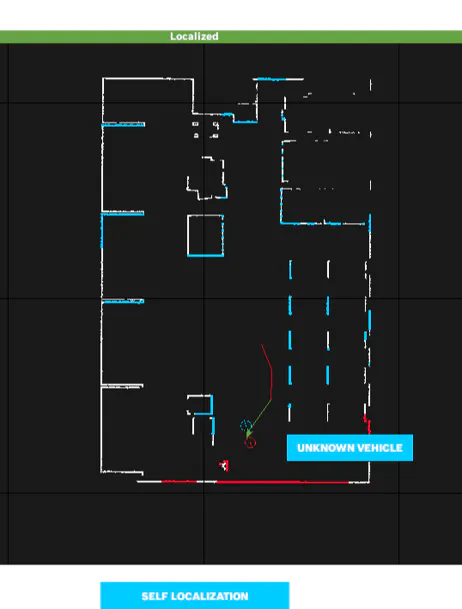
You can localize the vehicle by performing self-localization, or by driving the vehicle around (e.g., via Foxglove). After a while, the ROKIT Locator will be able to calculate its current position. Once the vehicle has been localized, you can start configuring the ROKIT Navigator Client.
All the settings for the ROKIT Navigator Client can be configured from the Home > Configuration page of the ROKIT Navigator Client.
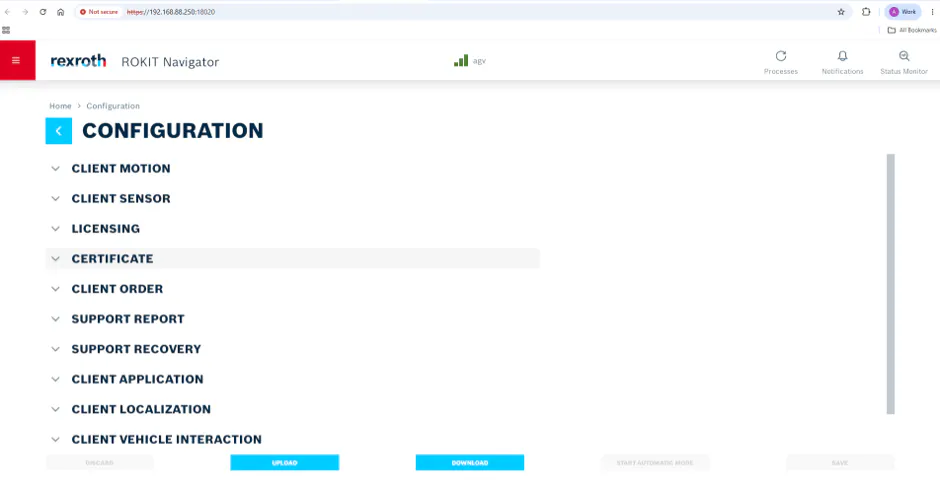
The following configuration is an example a basic example configuration for ROKIT Navigator. Optimization and customization for your specific application may be required.
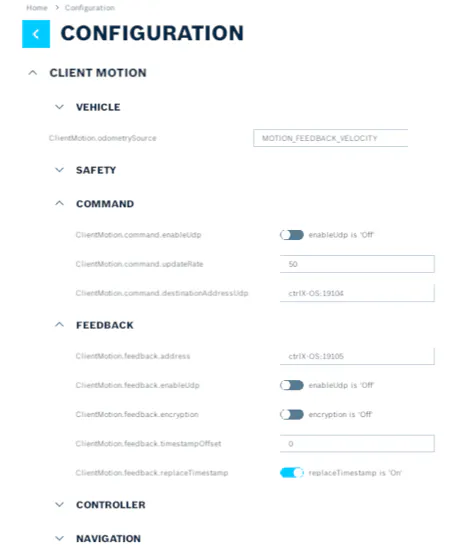
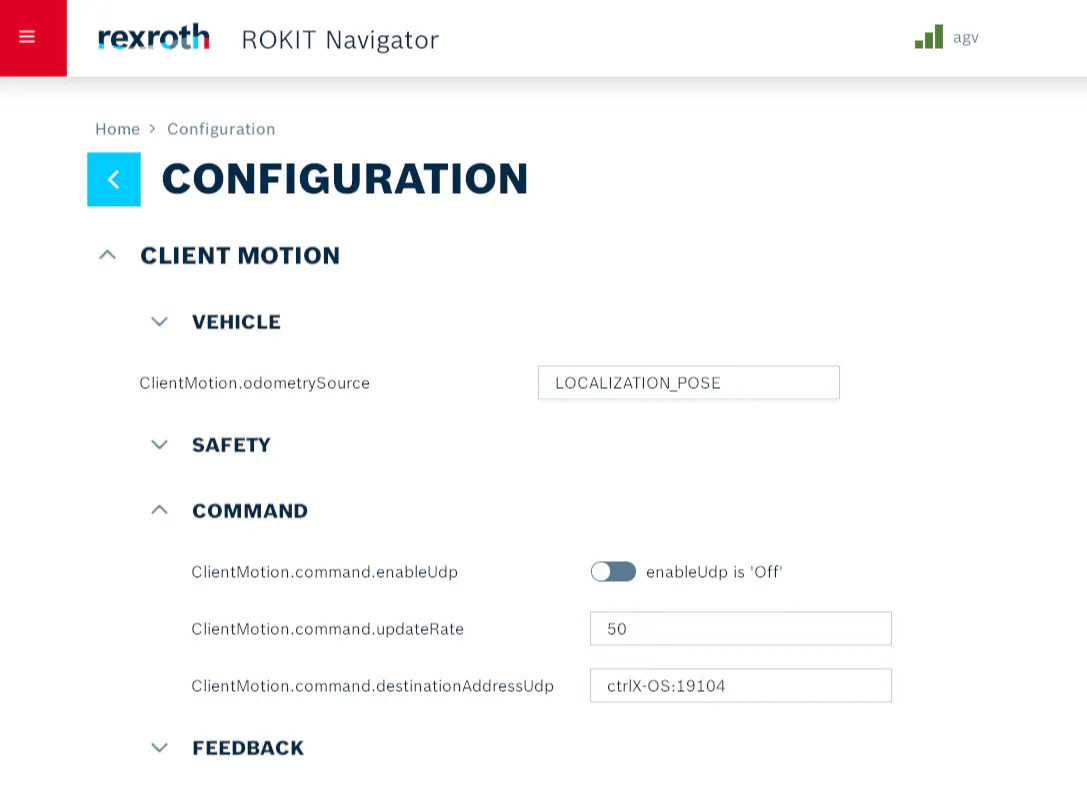
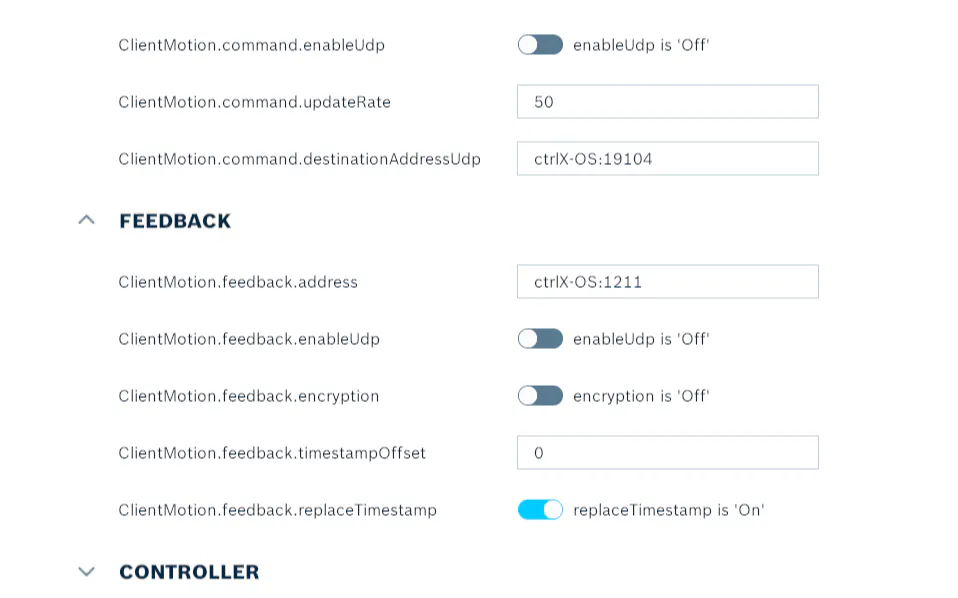
In the Client Motion section, you can set up the interface between the ROKIT Navigator and the vehicle controller (in this case, the PLC).
In the Client Sensor section, you can configure the connection to the laser scanner (through the ROKIT Locator) for e.g. obstacle avoidance.
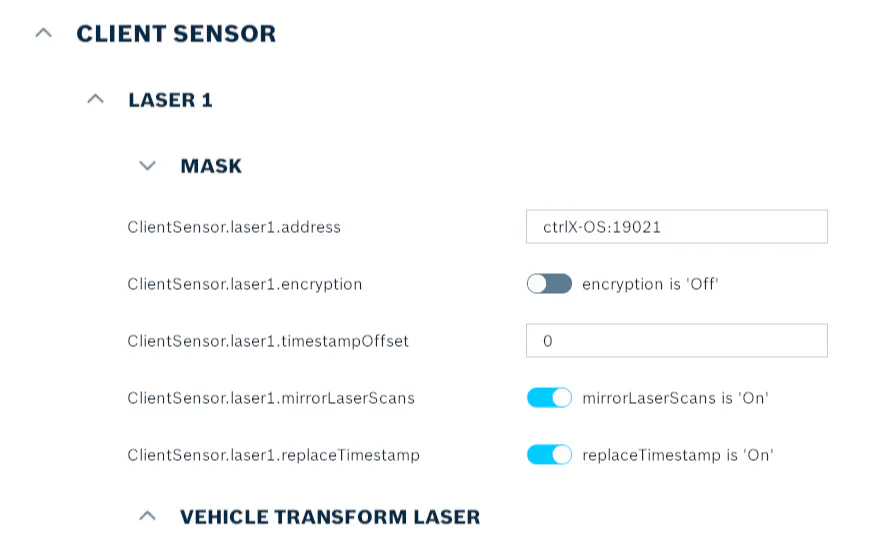
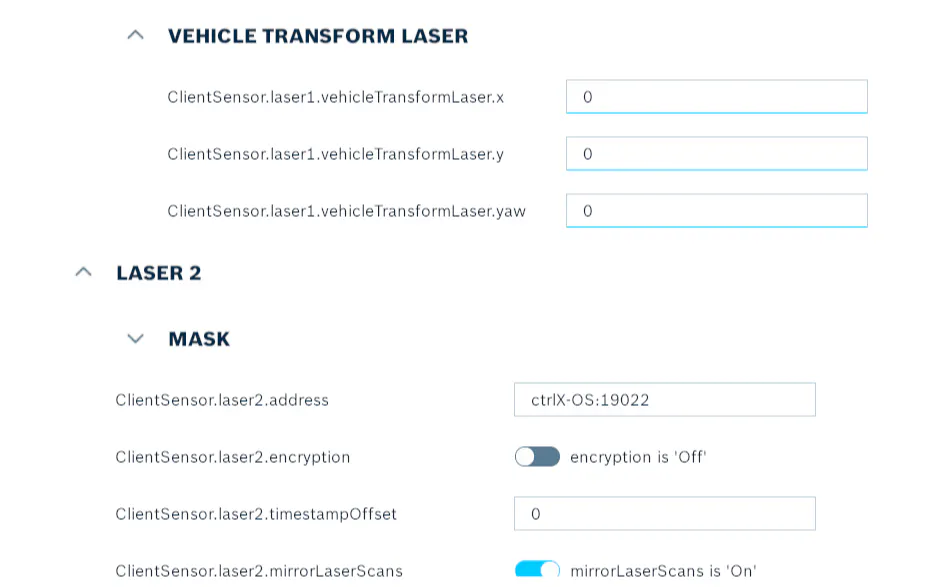
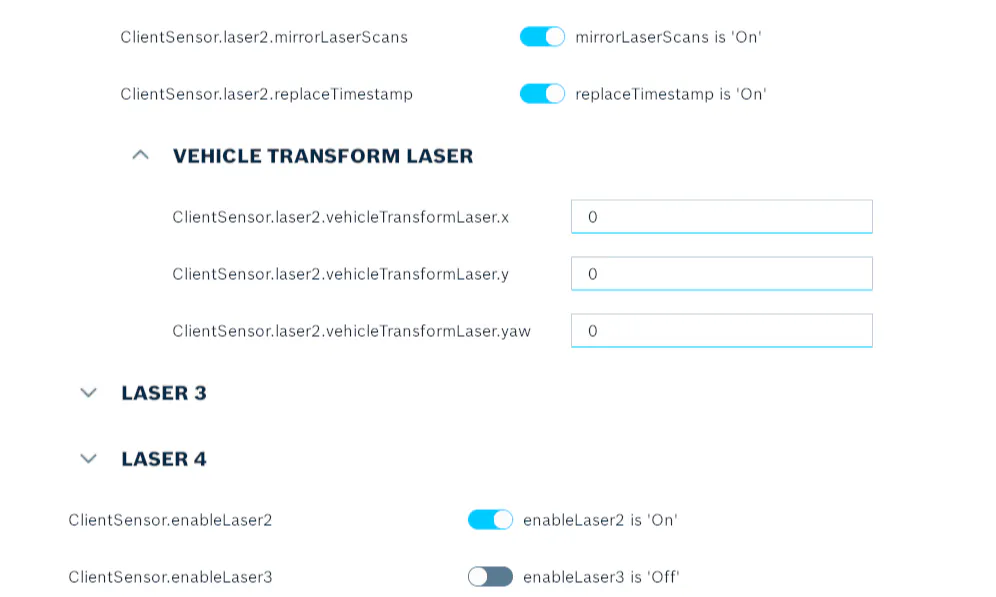
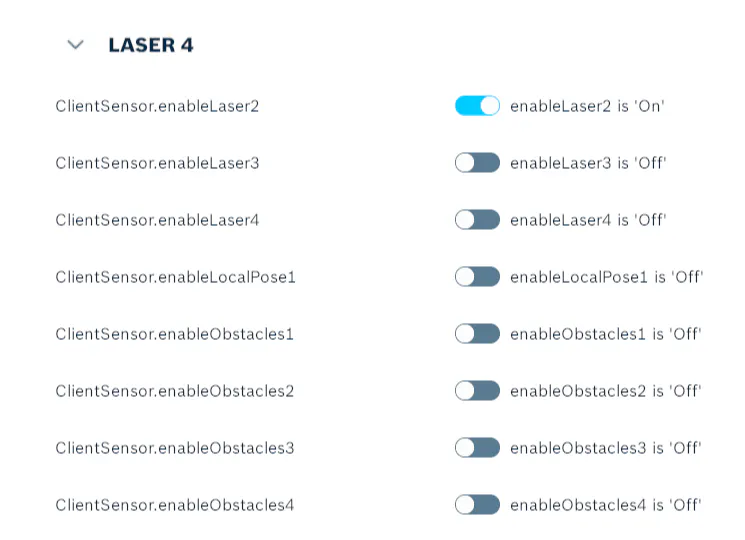
In the Client Order and Client Application section, you can configure the interface to the Fleet Manager or to the Node-RED dashboard. Please be aware that the IP address of your MQTT server may be different from that shown in screenshot.
The ClientOrder.vda5050.mqtt.interface, ClientOrder.vda5050.mqtt.versionOverwrite, ClientApplication.manufacturer, and ClientApplication.serialNumber parameter determine your MQTT topic for the interface to the Node-RED dashboard/ Fleet Manager.
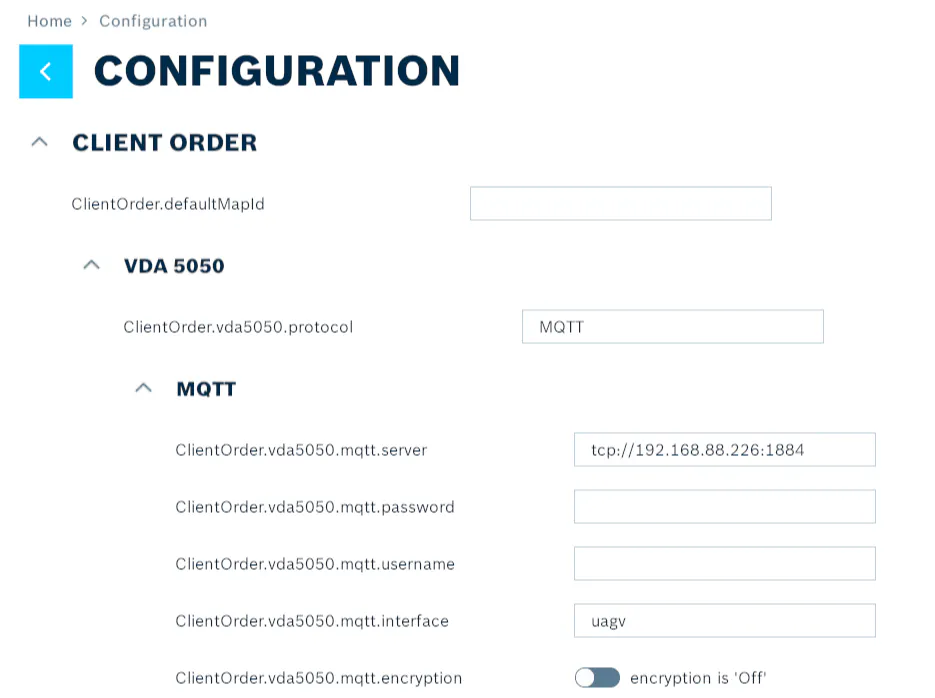
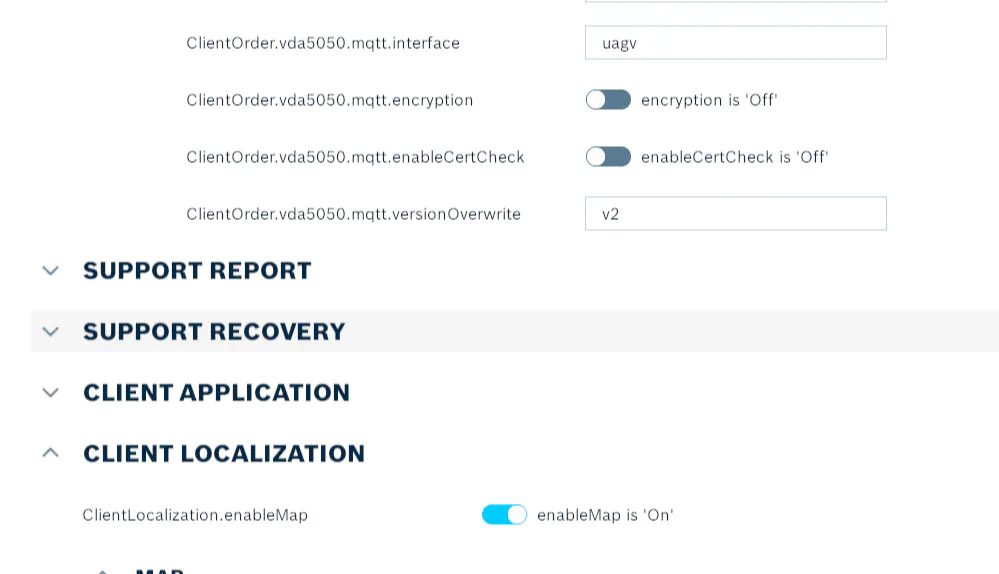
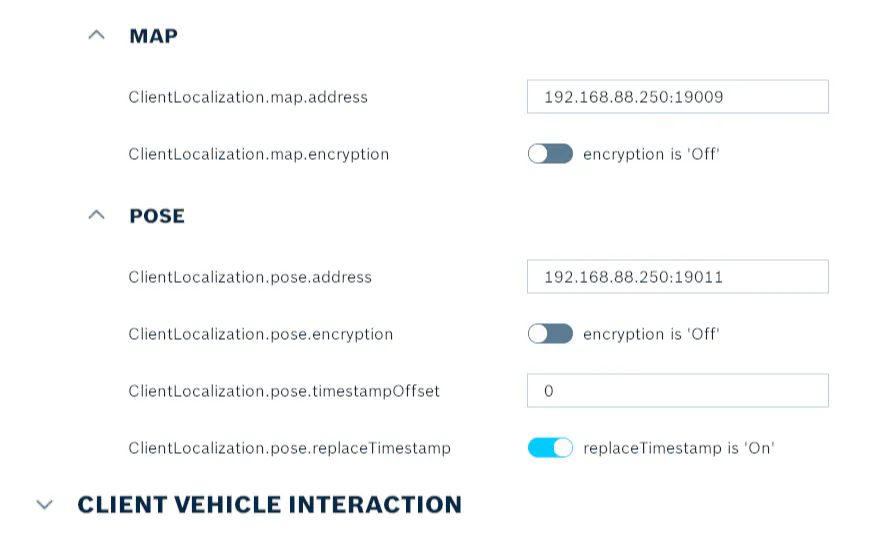
After configurating the ROKIT Navigator client, you can save it and configure the Node-RED dashboard (see this link) or your Fleet Manager. Finally, you can start Automatic Mode on the Navigator Client and send commands from Node-RED dashboard.
Related Links:
Regarding configuration tuning, you might also want to take a look at this HowTo.