This post covers the default configuration of the ROKIT.Box with a VDA5050 interface.
This product is meant to be mounted on manually operated vehicles e.g. forklifts. There are three main components, the Bosch Rexroth PR2200.2 IPC, the LiDAR Sensor and the Wi-Fi client. The IPC does not have a Wi-Fi interface therefore an external client is necessary to achieve connectivity. The LiDAR Sensor is the main data source used for localization. The IPC hosts the software components, including the ROKIT Locator and the ROKIT Navigator. The VDA5050 interface will connect to the MQTT Broker.
The VDA5050 as a standardized communication interface protocol provides several benefits to industrial environments. It eliminates the need for multiple vehicle management systems and allows manually operated vehicles to be visible within the system. This can for example be used to implement collision prevention or more advanced traffic planning. It also enables the combination of vehicles from different manufacturers within a single fleet, helping to avoid vendor lock-in and to choose best-suited vehicles for specific tasks.
Hardware :
Bosch Rexroth PR2200.2 - ROKIT.Box
LiDAR Sensor (recommended Pepperl+Fuchs OMD60M-R2000-B23-V1V1D-HD-1L, Sick LMS151-10100)
Wi-Fi Client (recommended Phoenix Contact WLAN FL1120 / 1122, Modas MC2X8-A-SL-M12 + Netzteil NT100-240-M12 + Antennen)
Software :
Other dependencies :
MQTT Broker
Network (Firewall / ACL Activation)
Architecture :
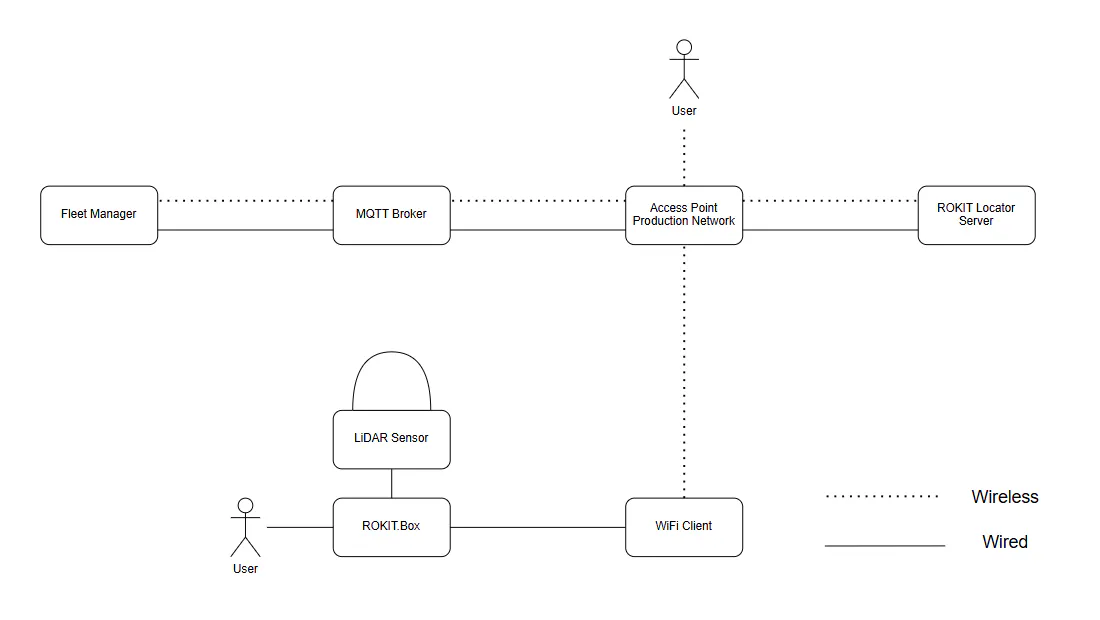
1. Preparation
Request the following Information form the Customer :
Requirements to connect the Phoenix WLAN FL 1120 / 1122:
Wi-Fi Connection details → e.g. Network SSID, PEAP Credentials
IP-Address → Available after providing the MAC-Address of the Bosch Rexroth PR2200.2 - ROKIT.Box
MQTT Broker connection details:
IP-Address / Port : _________________________ /_________________________
User / Password
ROKIT Locator Server:
IP-Address / Port : _________________________ /_________________________
Software can be found at the Collaboration Rooms :
https://www.boschrexroth.com/de/de/myrexroth/myrexroth-home/collaboration-rooms/
2. Network Requirements
The ROKIT Locator Server needs to be installed on any VM or physical machine. There needs to be a connection from the ROKIT.Box devices to this server. Please make sure to set up firewall rules accordingly.
To receive a static IP address for the Bosch Rexroth PR2200.2 ROKIT.Box it is usually necessary to provide the MAC address of the network interface that will be used to connect to the network.
Read out the MAC address of the Bosch Rexroth PR2200.2 - ROKIT.Box : _________________________
It is also recommended to note down the serial number of the Bosch Rexroth PR2200.2 ROKIT.Box to distinguish between different end devices later.
Read out the serial number of the Bosch Rexroth PR2200.2 ROKIT.Box : _________________________
Important: Make ports available also to other network zones, if you need to connect to the ROKIT.Box from them.
The following (default) ports are required for operation :
ROKIT Navigator Client → MQTT Broker : Request from Customer
ROKIT Locator Client → ROKIT Locator Server : 21638, 18018
Browser → ROKIT Locator Server : 18018
Browser → ROKIT Locator Client : 18019
Browser → ROKIT Navigator Client : 18020
3. Configuration
3.1. Bosch Rexroth PR2200.2 - ROKIT.Box
Ethernet Configuration :
Connect to the Bosch Rexroth PR2200.2 - ROKIT.Box
The XF6 interface has a static IP address (192.168.1.1) and DHCP enabled you need to either assign your computer interface an IP address in the same range e.g. 192.168.1.50 or connect the device to any DHCP server.
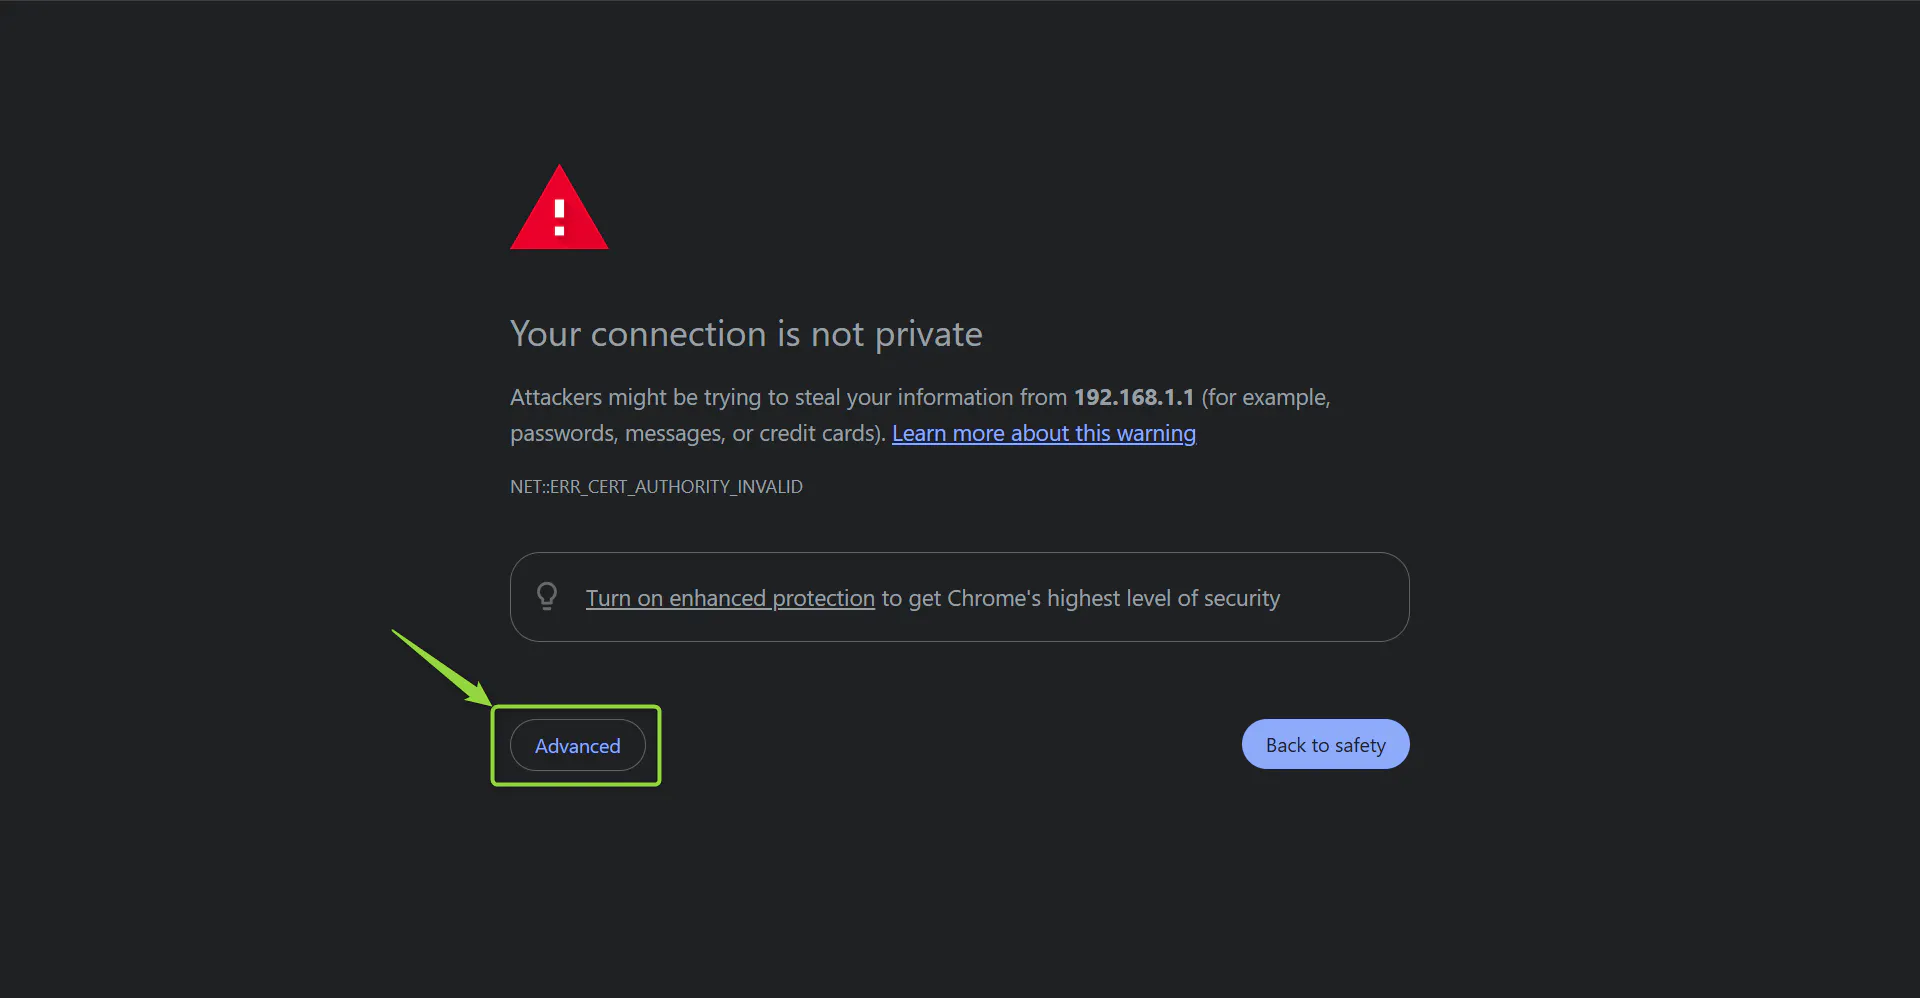
Open a browser and type the address.
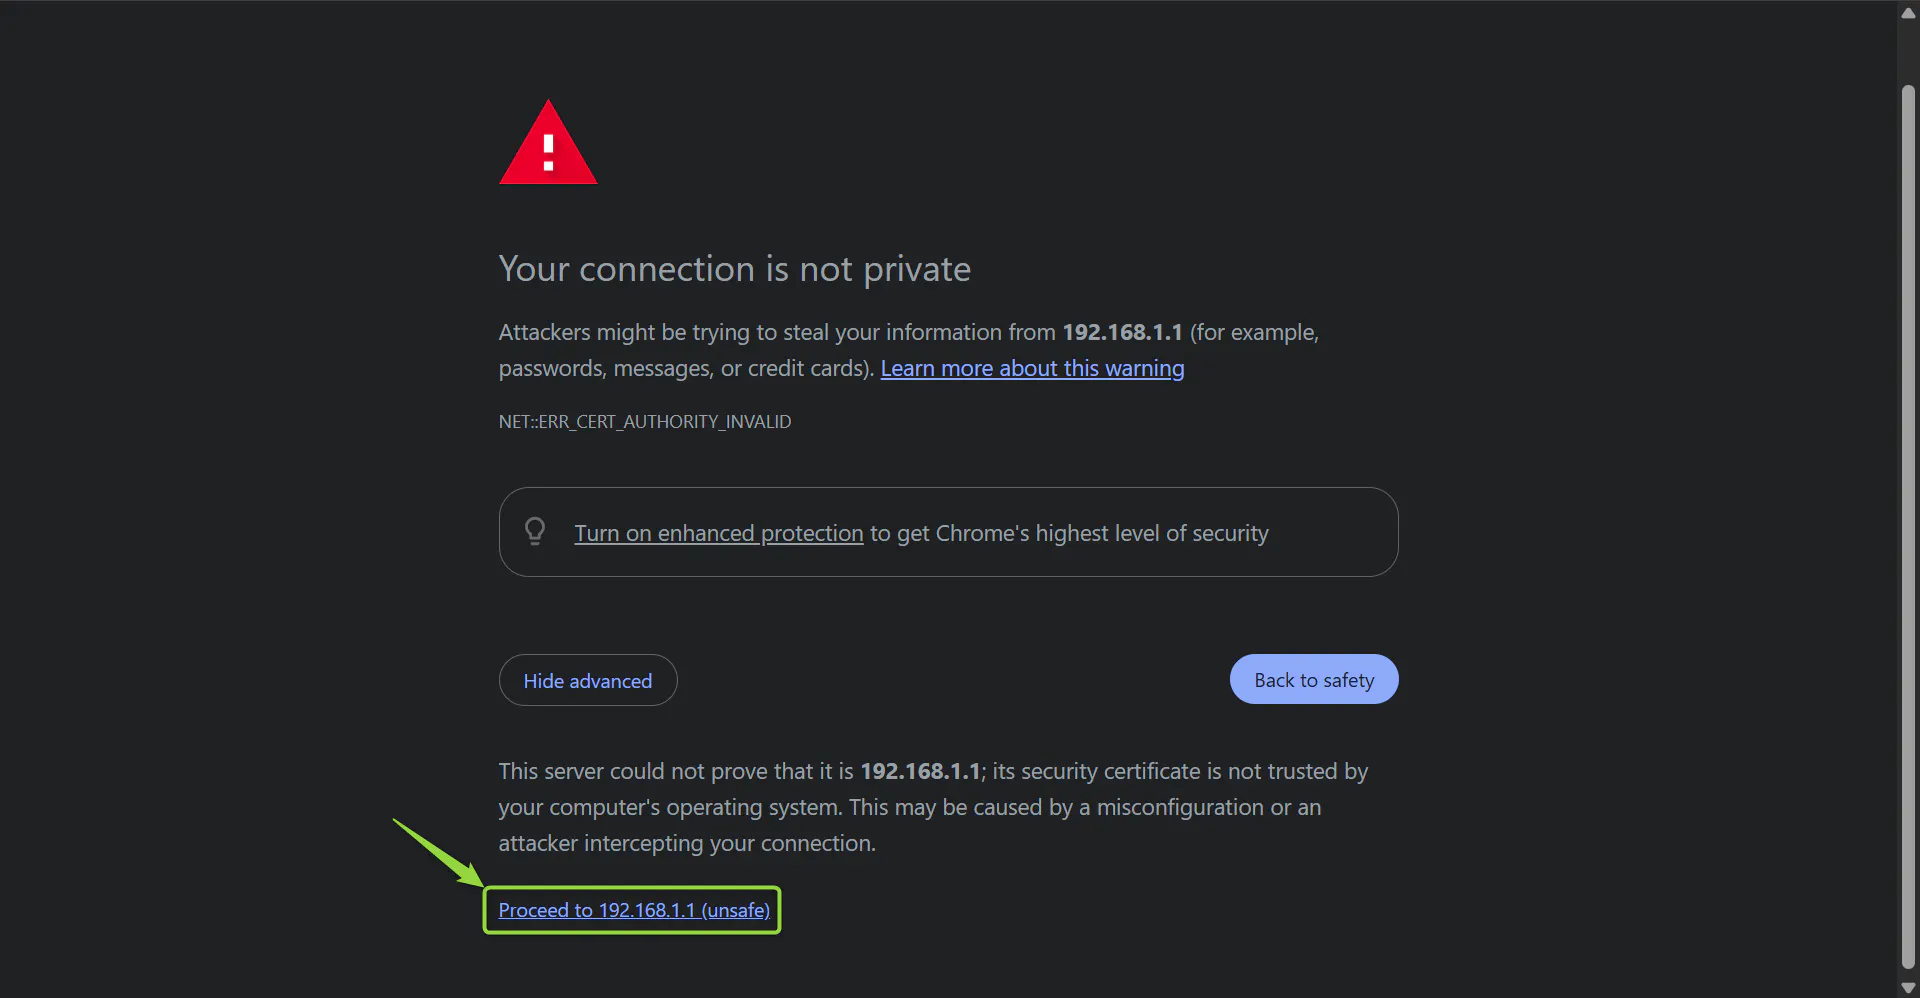
Press on Advanced.. and then Accept the Risk and Continue.
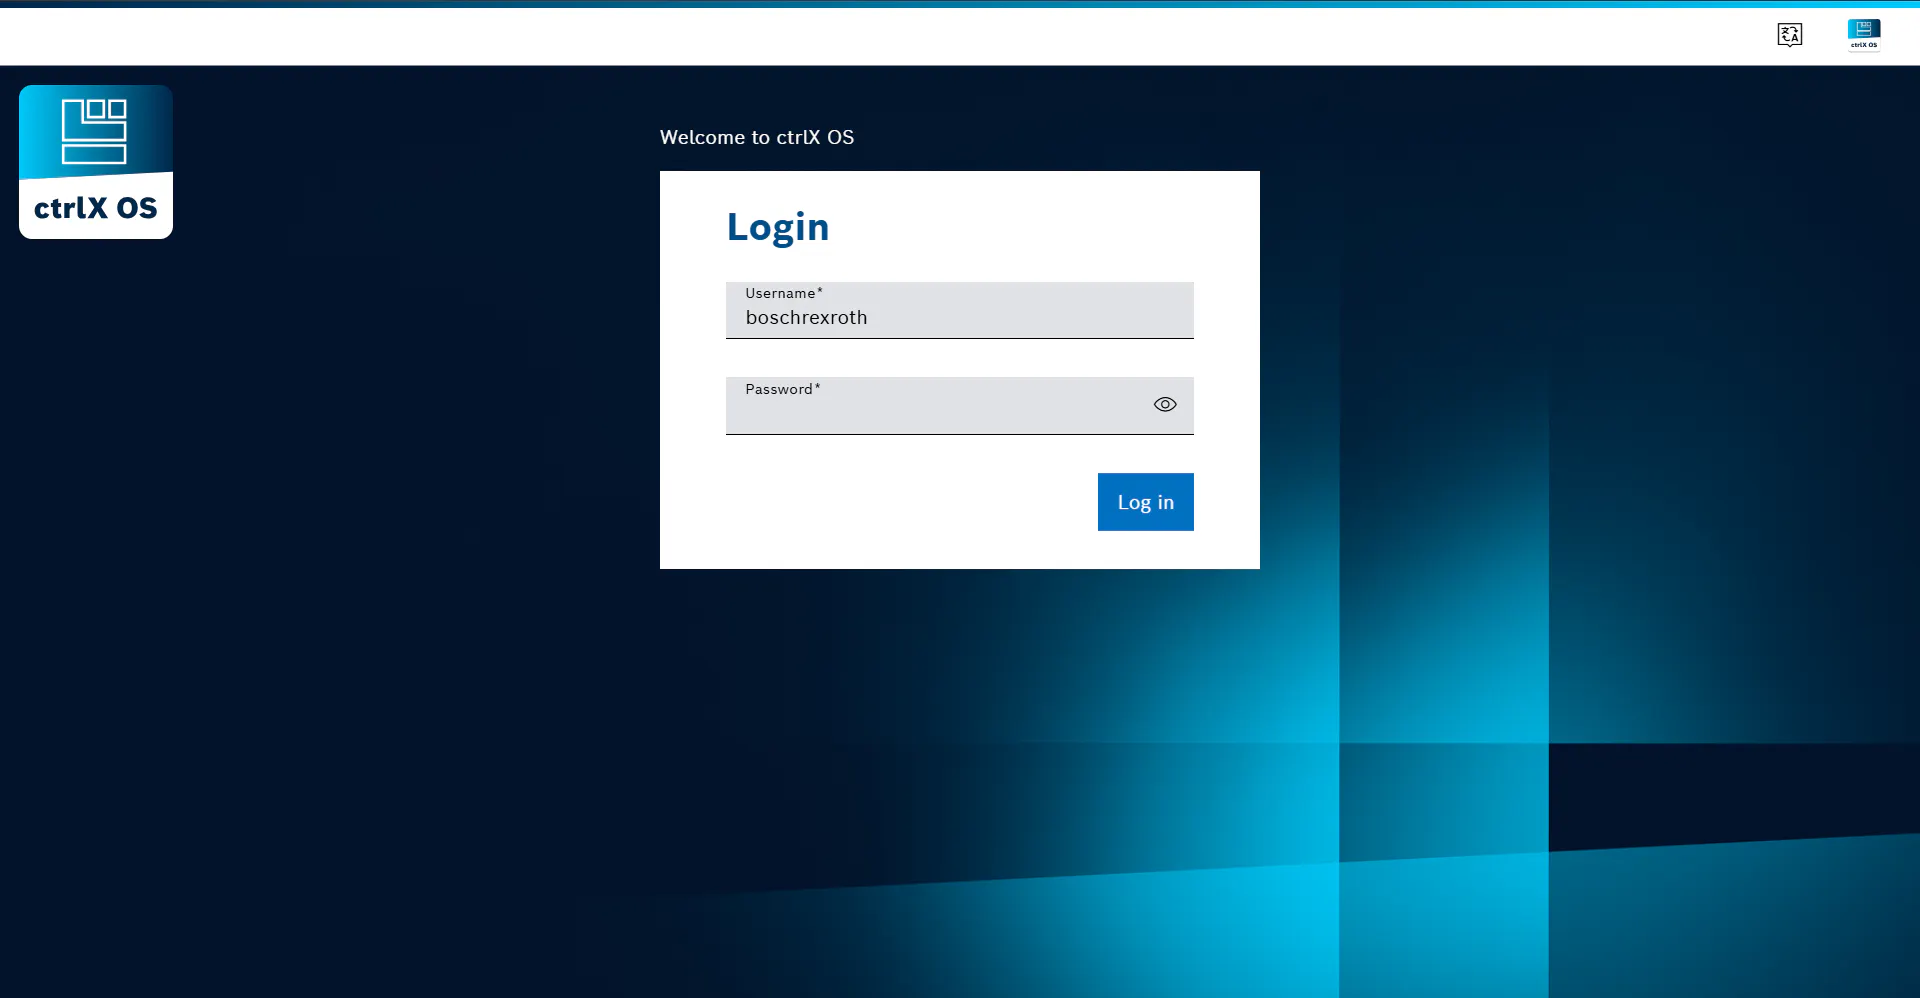
This will prompt you the login screen, the first time default login is boschrexroth for both user and password.
You will be prompted to change this.
Configure the interfaces.
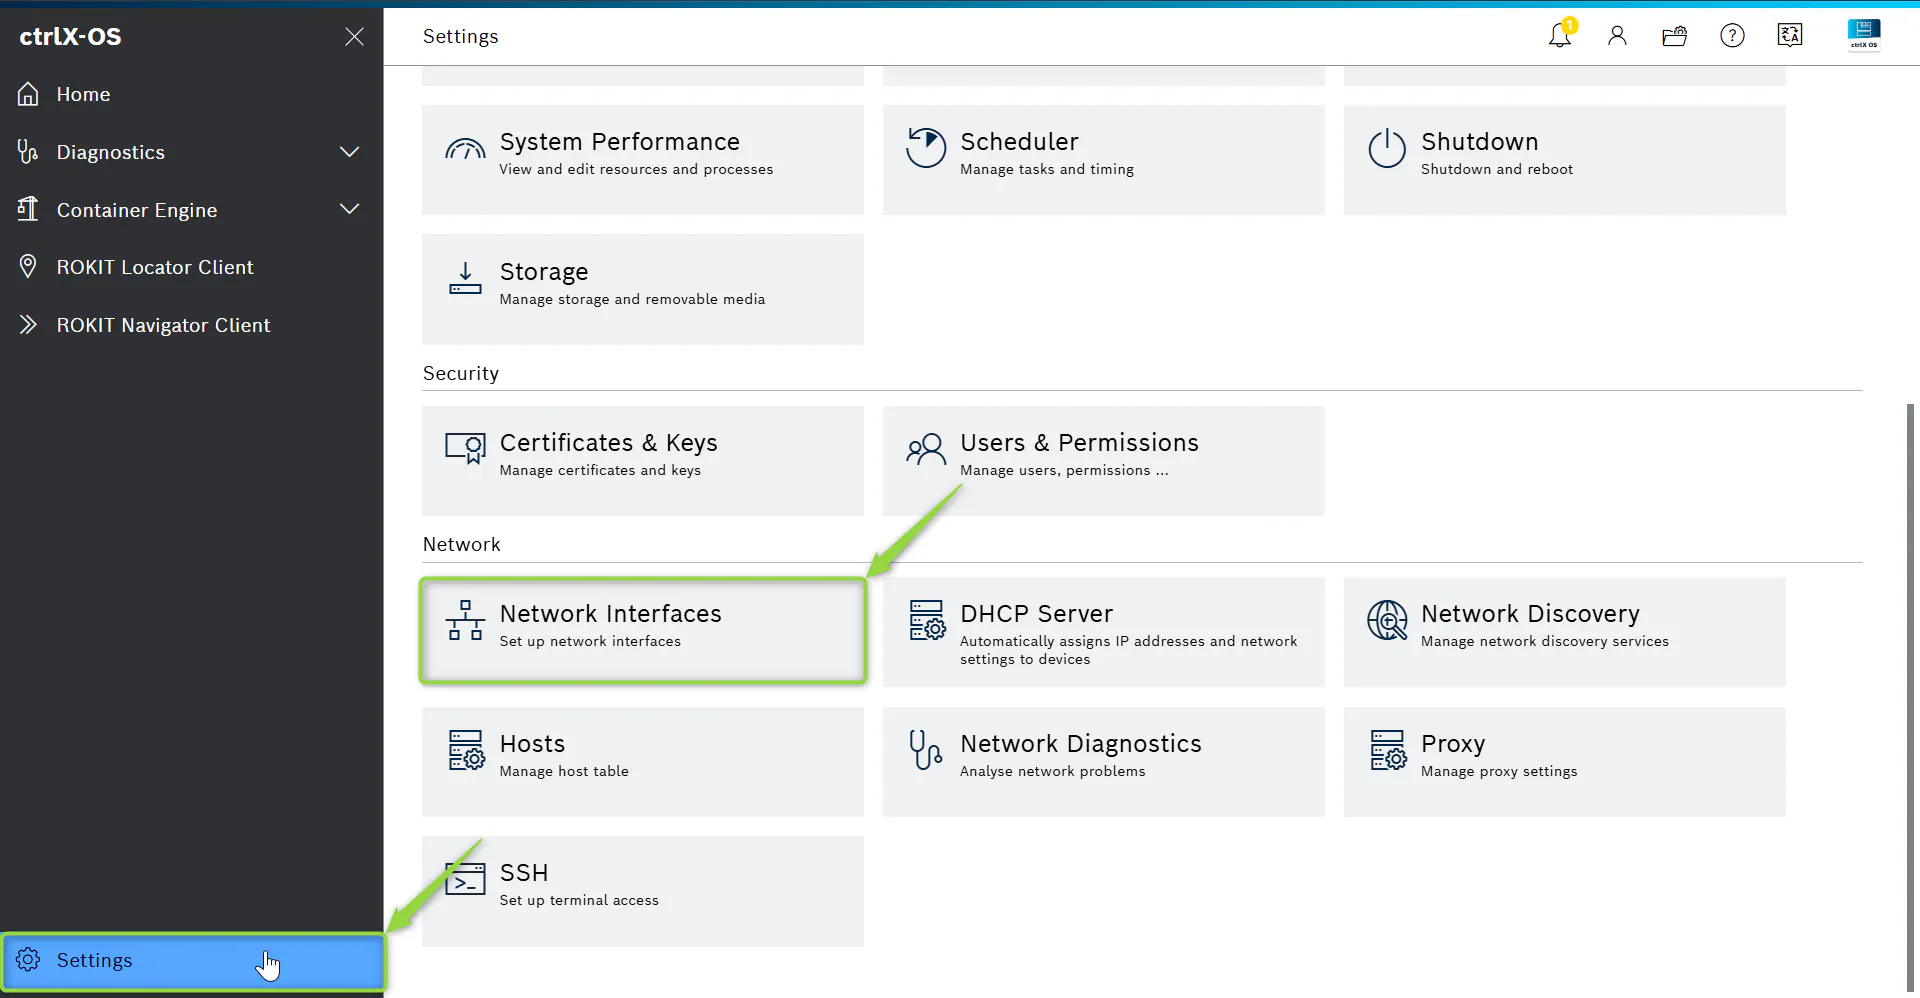
Once logged in press on Settings in the bottom left corner.
Click on Network Interfaces.
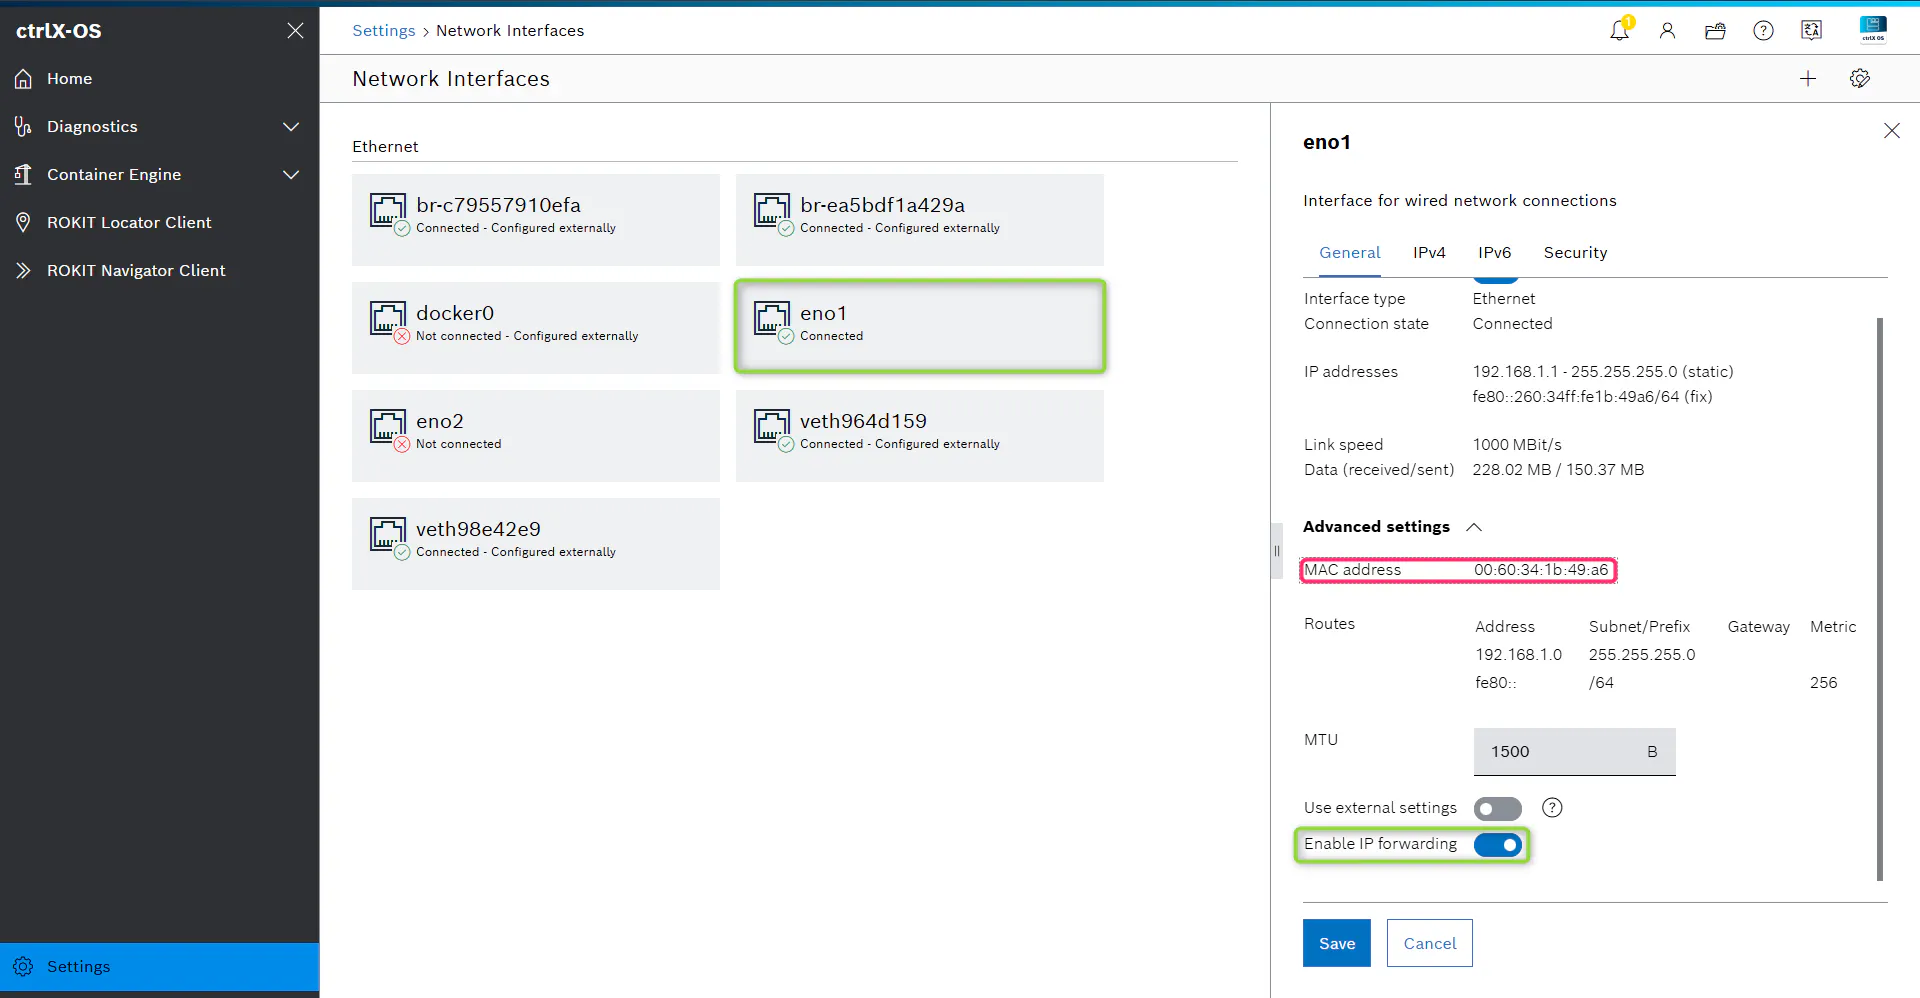
Click on eno1 and Enable IP forwarding.
AT THIS POINT NOTE DOWN THE MAC-ADDRESS OF THE eno1 (XF6) Interface.
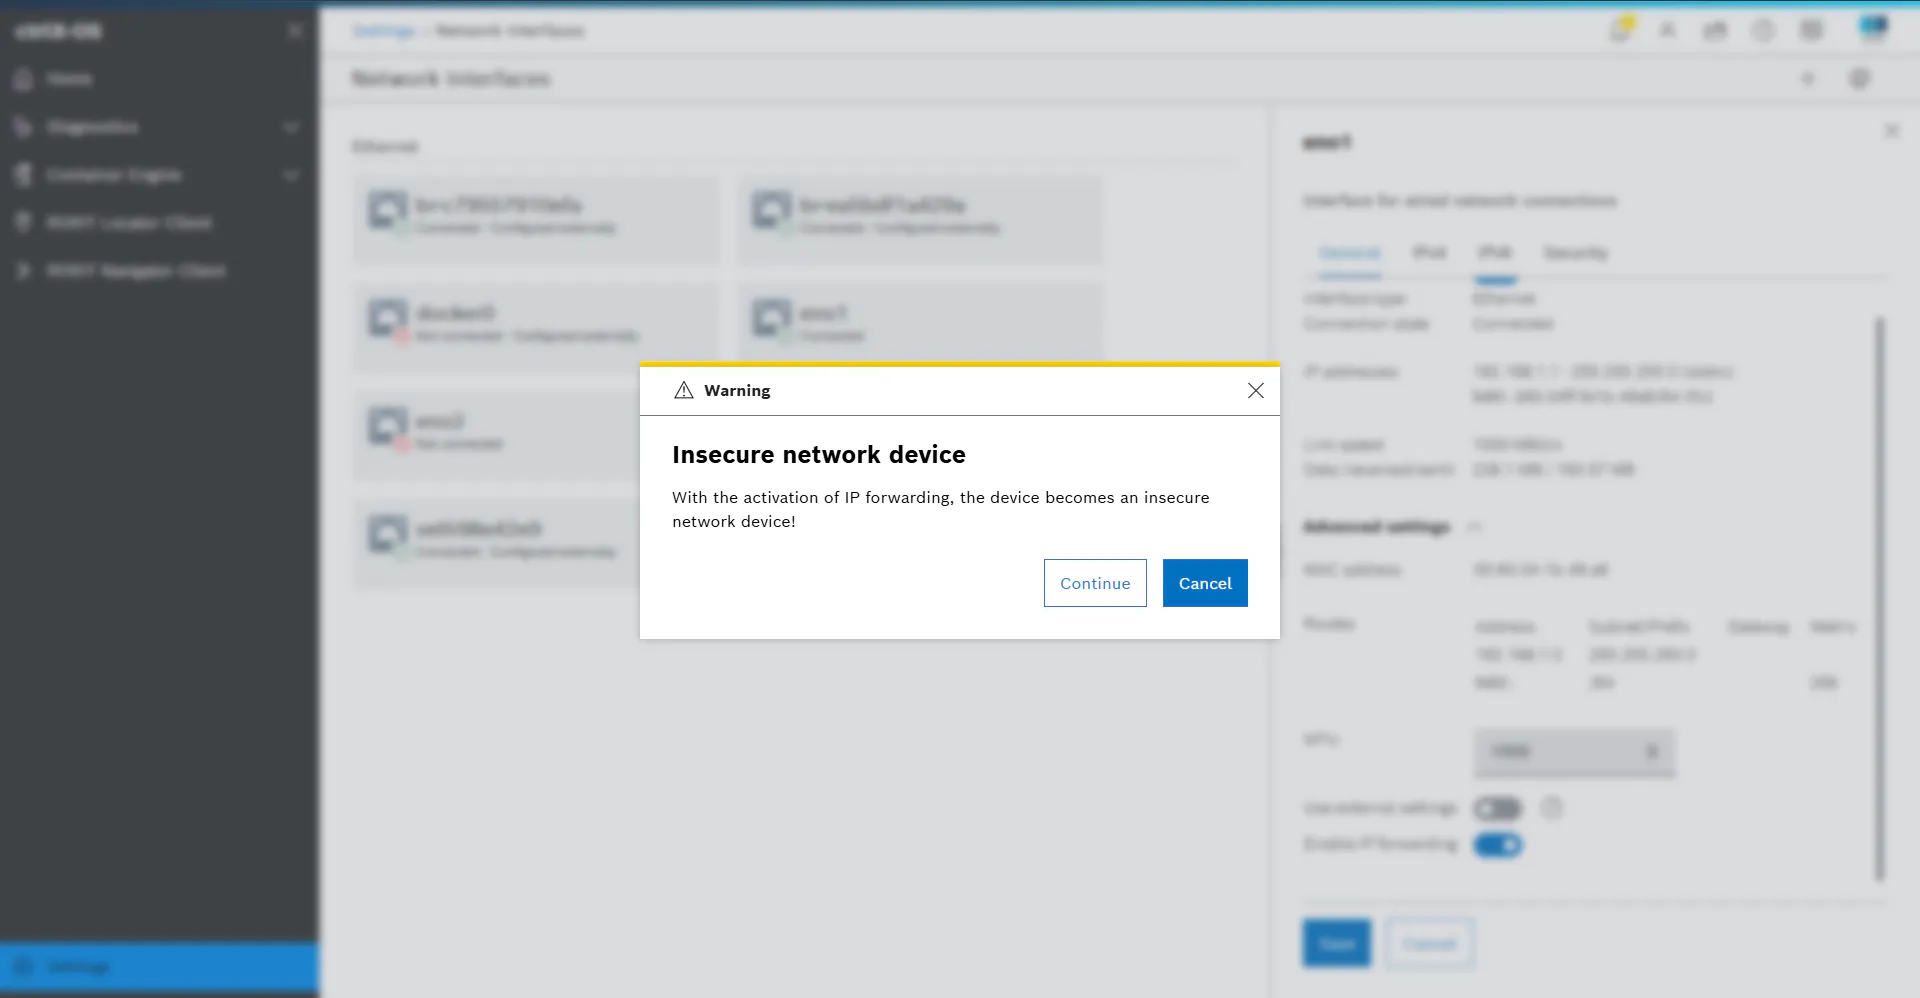
Save.
Continue this warning.
Click on eno2 and Enable IP forwarding.
Click on IPv4 and change the IP address to 192.168.0.10 for Sick LMS151. Save.
Also Continue the warning.
Note: If your sensor has an IP address in the range of 192.168.1.X make sure to change the static IP address of the eno1 interface to something else to avoid conflicts.
You are done configuring the network interfaces of the Bosch Rexroth PR2200.2 - ROKIT.Box
Disable Real Time Processing :
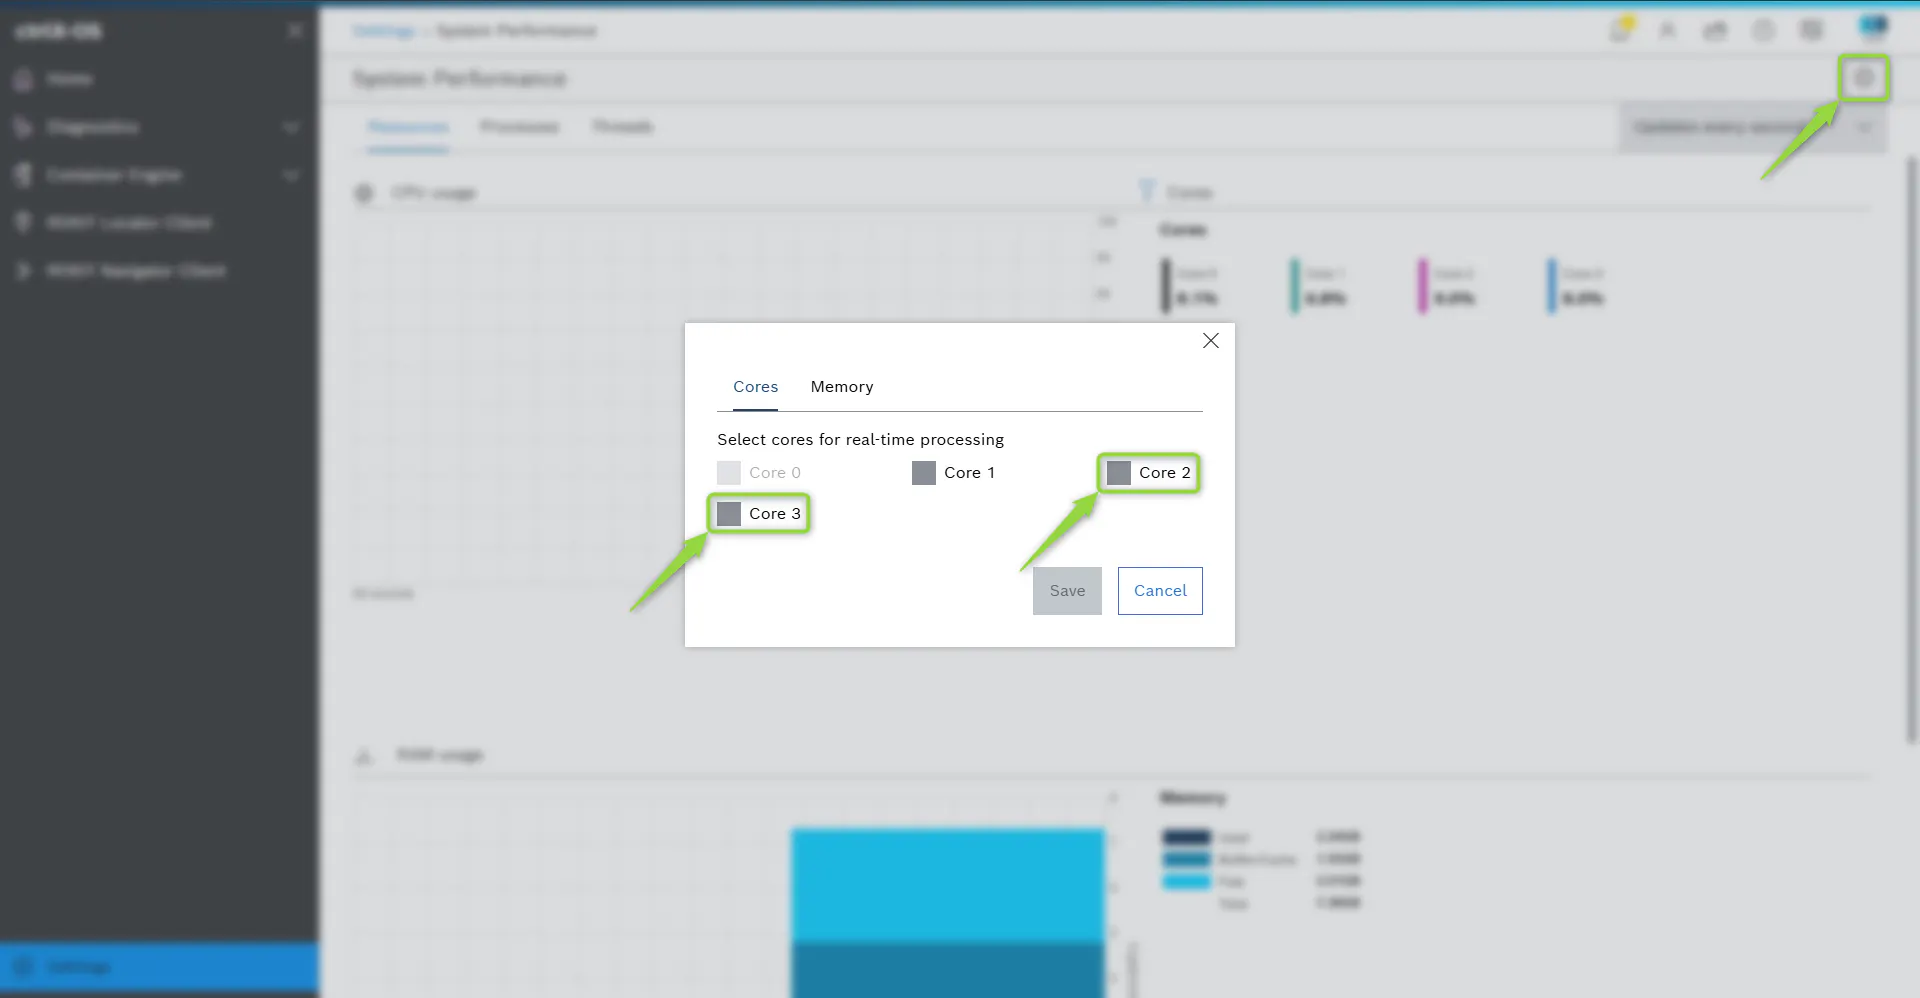
Click on System Performance and then on the Settings Icon in the top right corner.
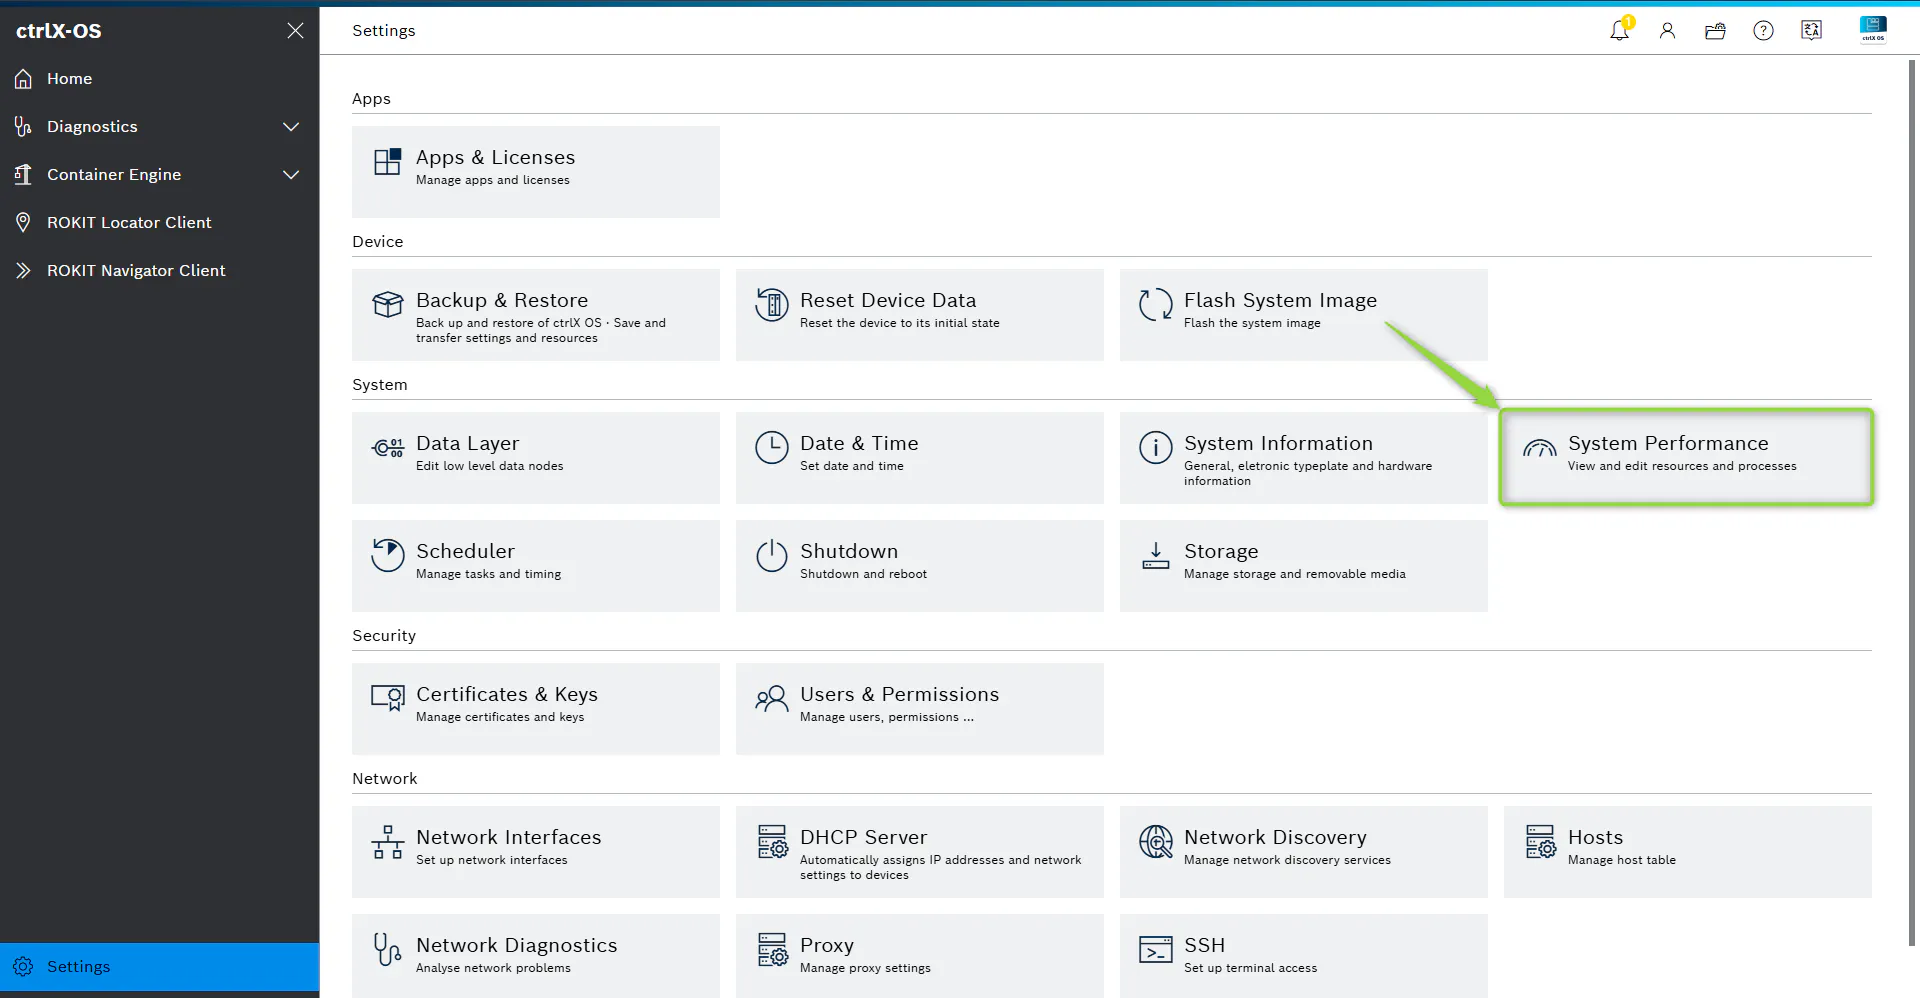
Make sure to disable Real Time processing on Core2 and Core3.
Install Required Apps :
Install the required Snaps on the Bosch Rexroth PR2200.2 - ROKIT.Box
ROKIT Locator :
Connect either via Wi-Fi or Ethernet on the XF6 interface to the ROKIT.Box and use a browser to connect to the web interface.
The ROKIT Locator Client is reachable at the IP address of the ROKIT.Box on port 18019.
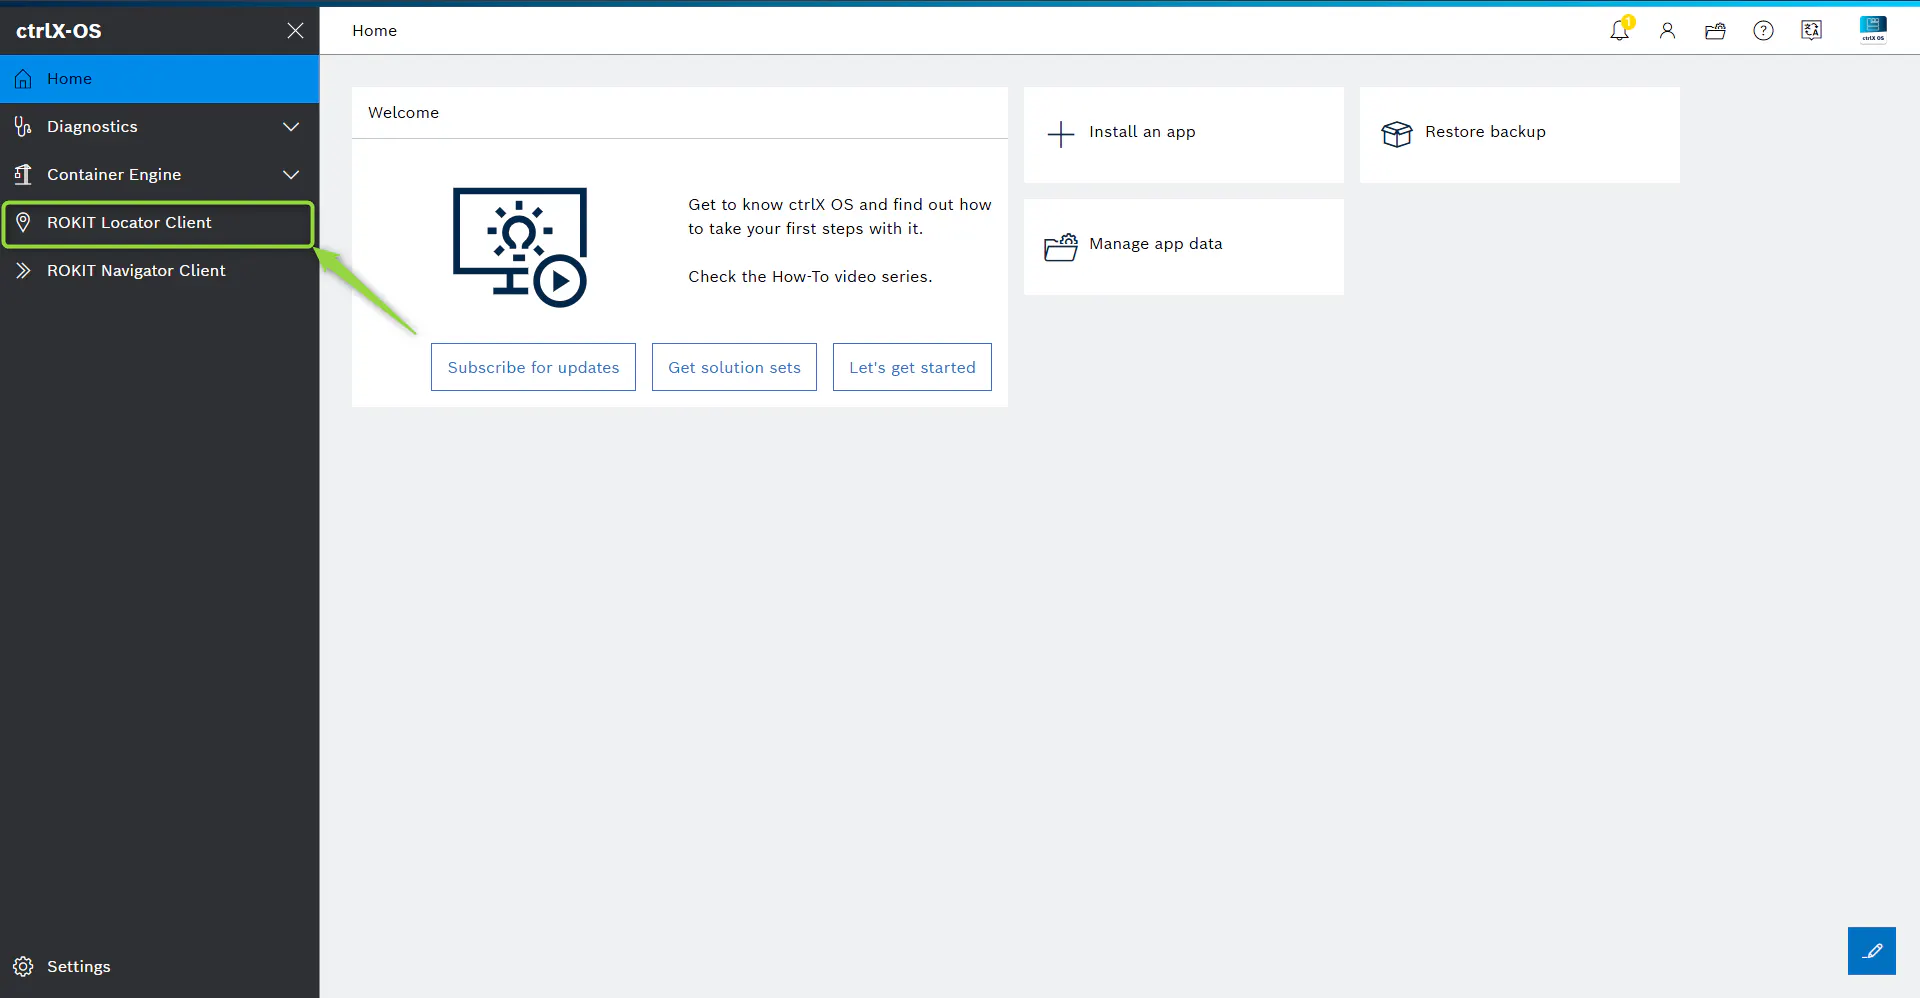
user : admin
password : bbZGs3wFsB35 (default)
Insert the credentials and LOG IN.
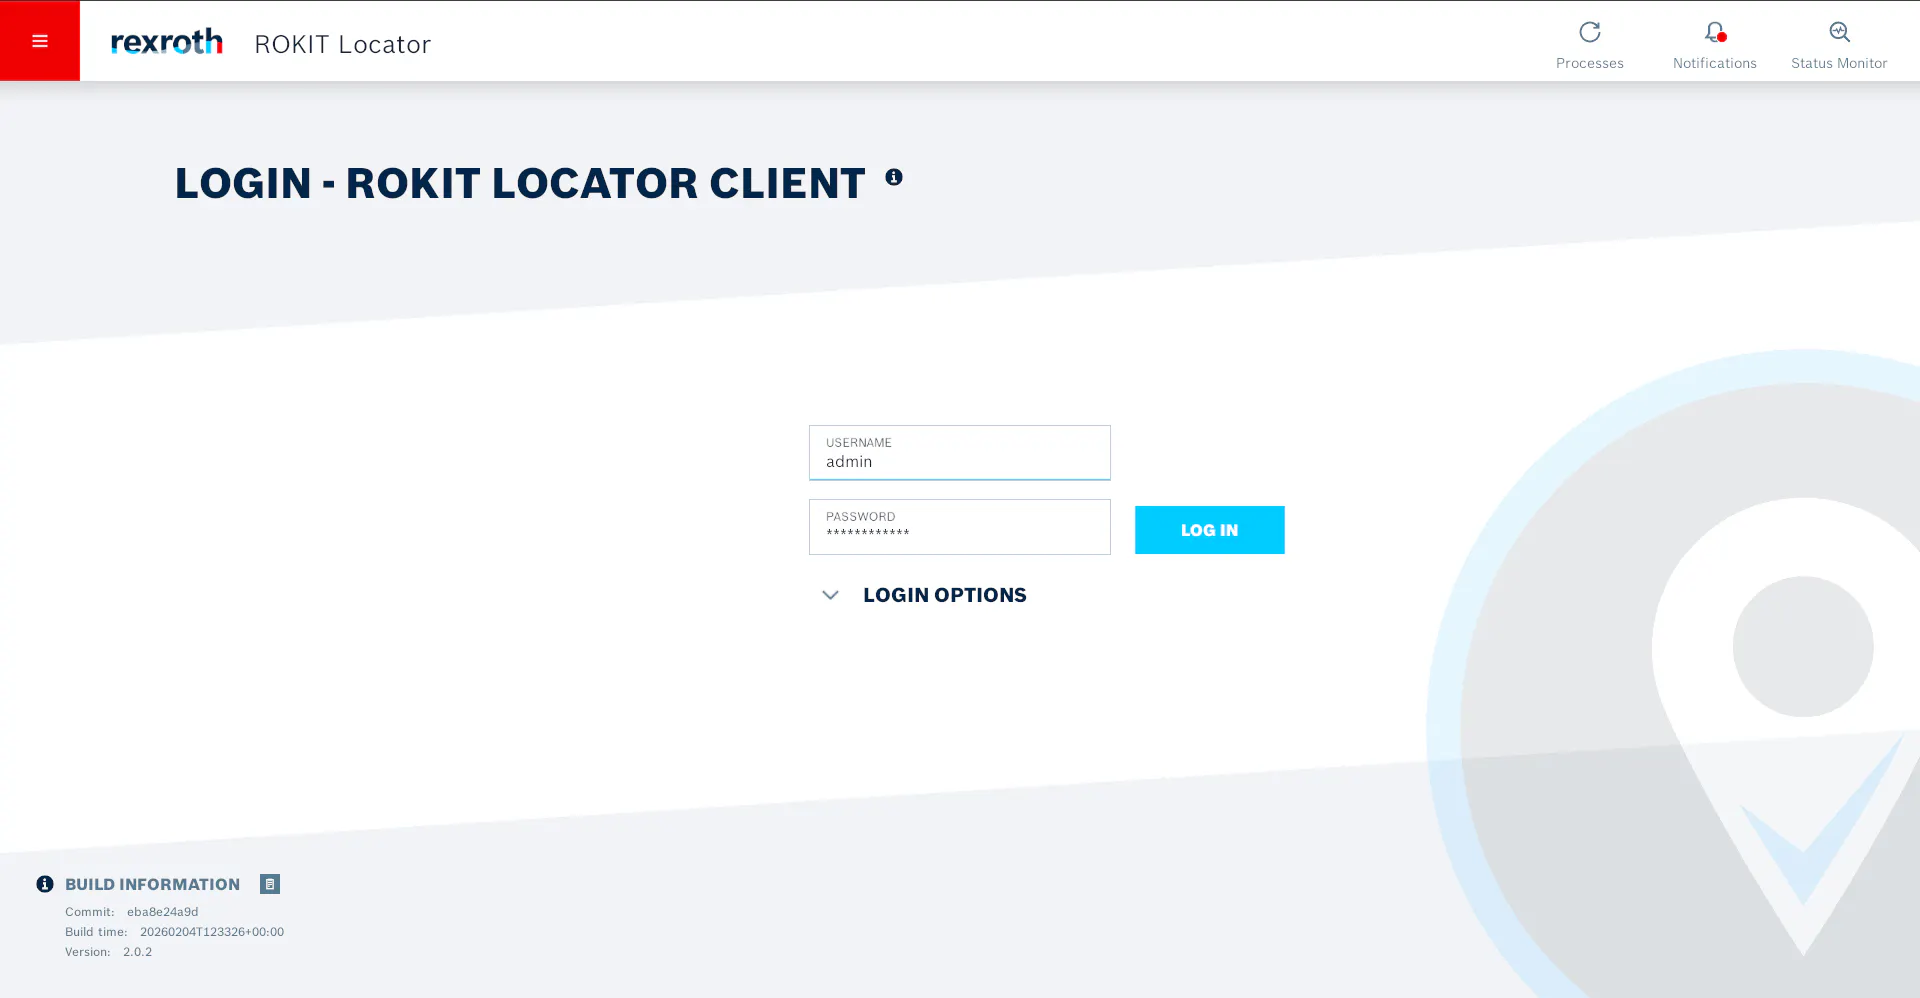
In the HOME screen select FLEET MANAGER.
Then click on the Unknown Vehicle and click CONFIGURATION.
You need to edit the following parameters according to your application:
NAME
Auto start is "ON"
ROKIT LOCATOR SERVER ADDRESS
ROKIT LOCATOR SERVER WEBSOCKET PORT
ROKIT LOCATOR SERVER STARTING PORT
Click on SAVE and return to the FLEET MANAGER.
Select the Device and click on SENSOR SETTINGS.
You need to edit the following parameters according to your application:
LASER TYPE → sicklms for Sick LMS151 or pfr2000 for OMD60M
LASER SCANNER ADDRESS → 192.168.0.1:2112 for Sick LMS151 or 10.0.0.9 for OMD60M (default)
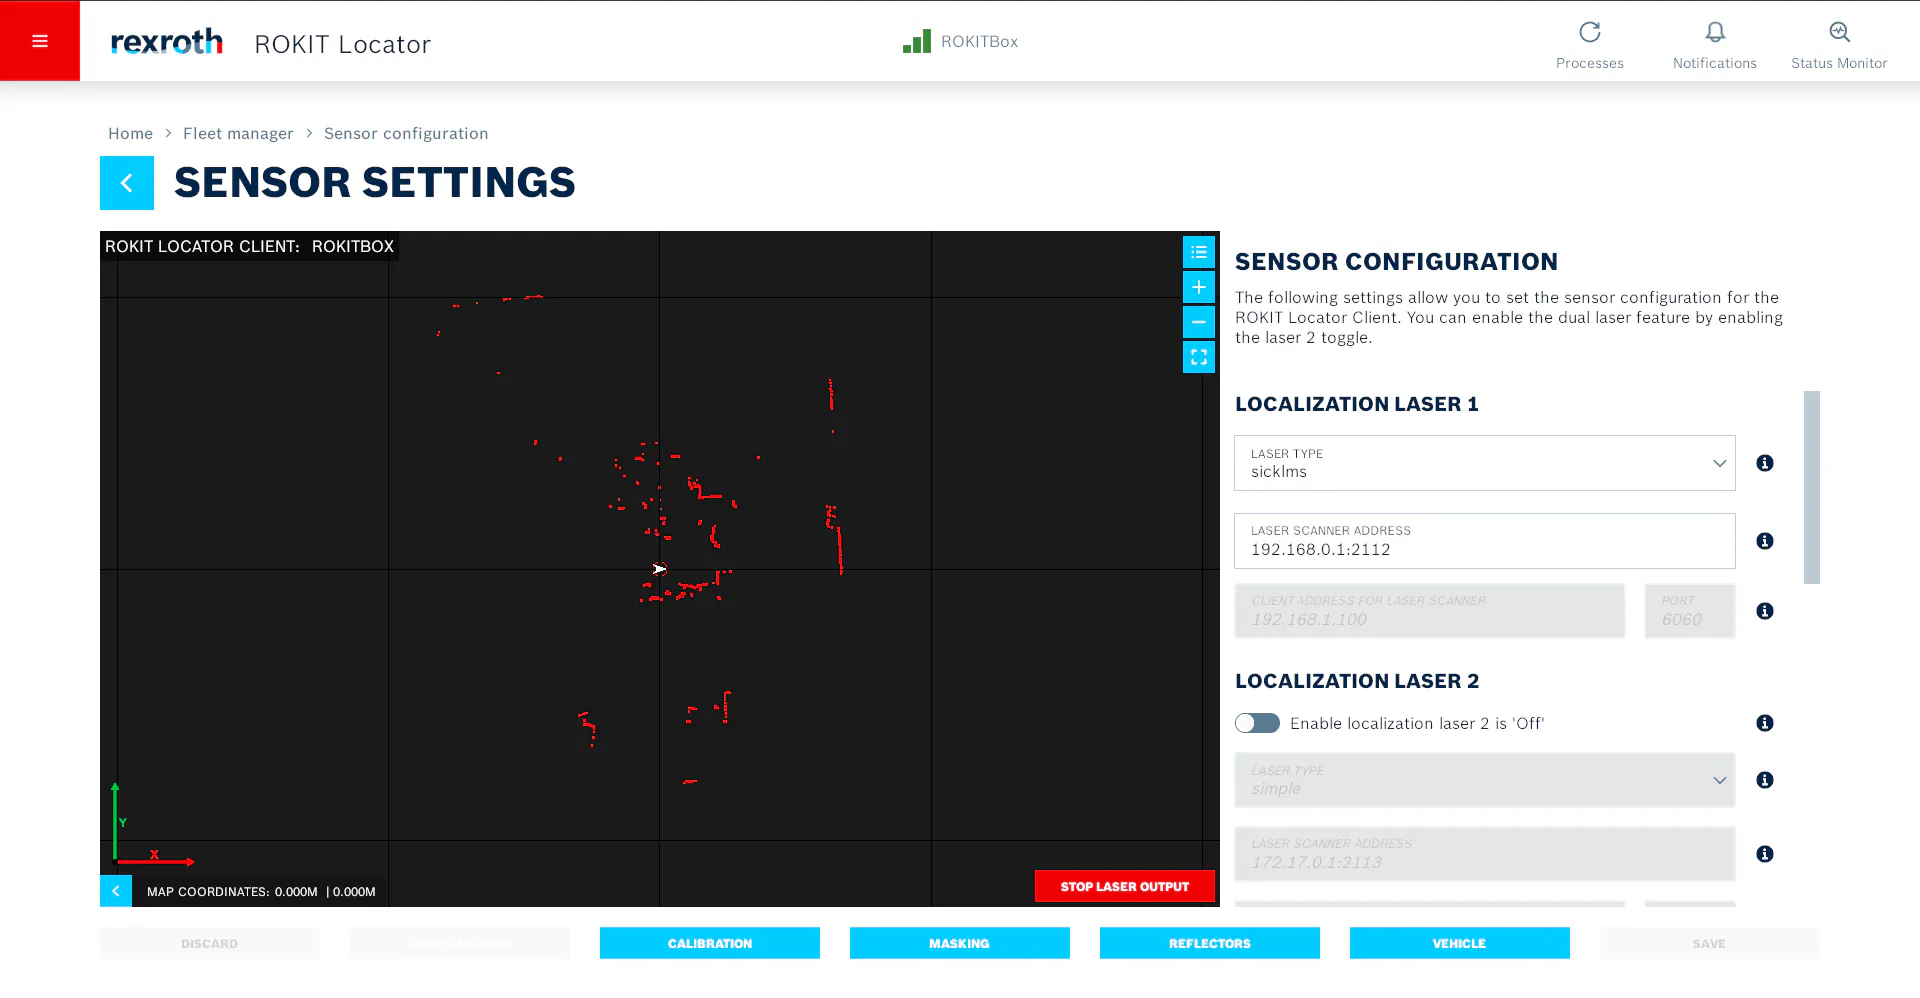
Click on SAVE.
You are done with the ROKIT Locator Client configuration
At this point you may want to record a localization map of the environment and send it to the server. This should be possible if the connection between the ROKIT Locator client and the server is set up correctly.
ROKIT Locator Client must be localized to proceed!
ROKIT Navigator :
Connect either via Wi-Fi or Ethernet on the XF6 interface to the ROKIT.Box and use the browser to connect to the web interface.
The ROKIT Navigator Client is reachable at the IP address of the ROKIT.Box at port 18020.
Similar to the ROKIT Locator, enter the credentials and LOG IN.
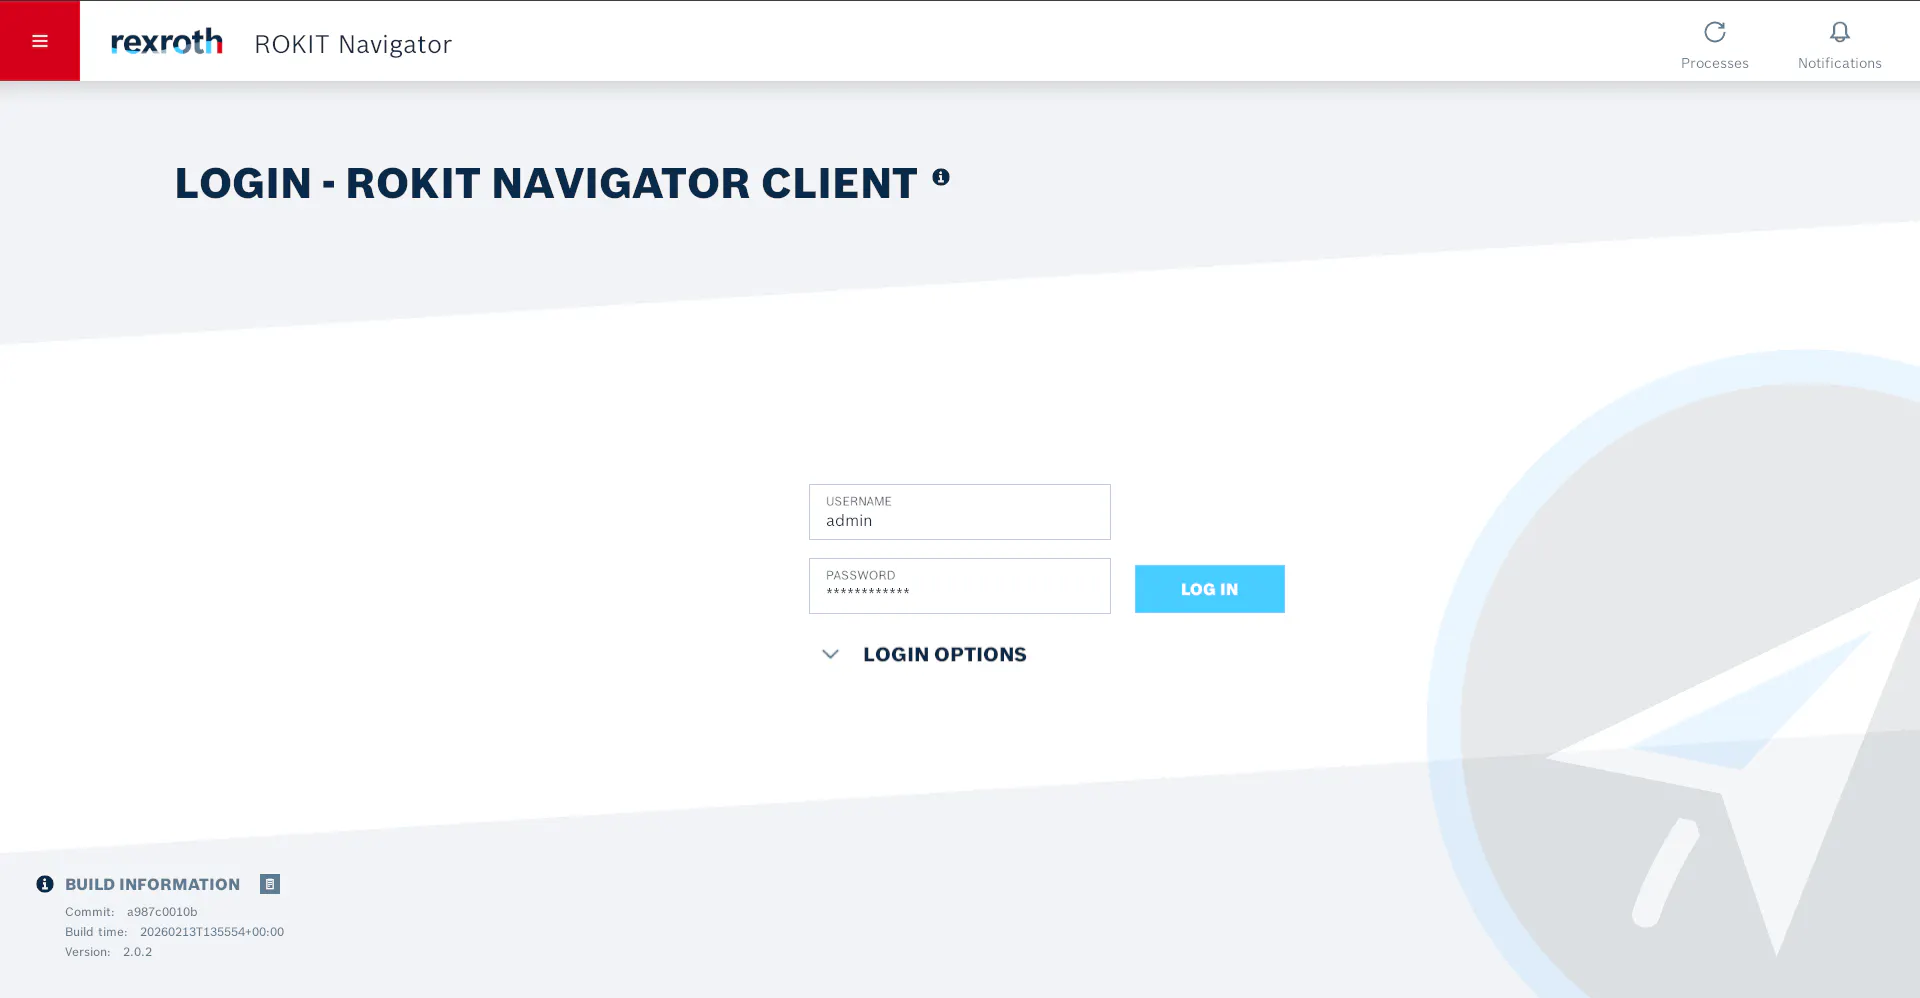
user : admin
password : bbZGs3wFsB35 (default)
Click on CONFIGURATION.
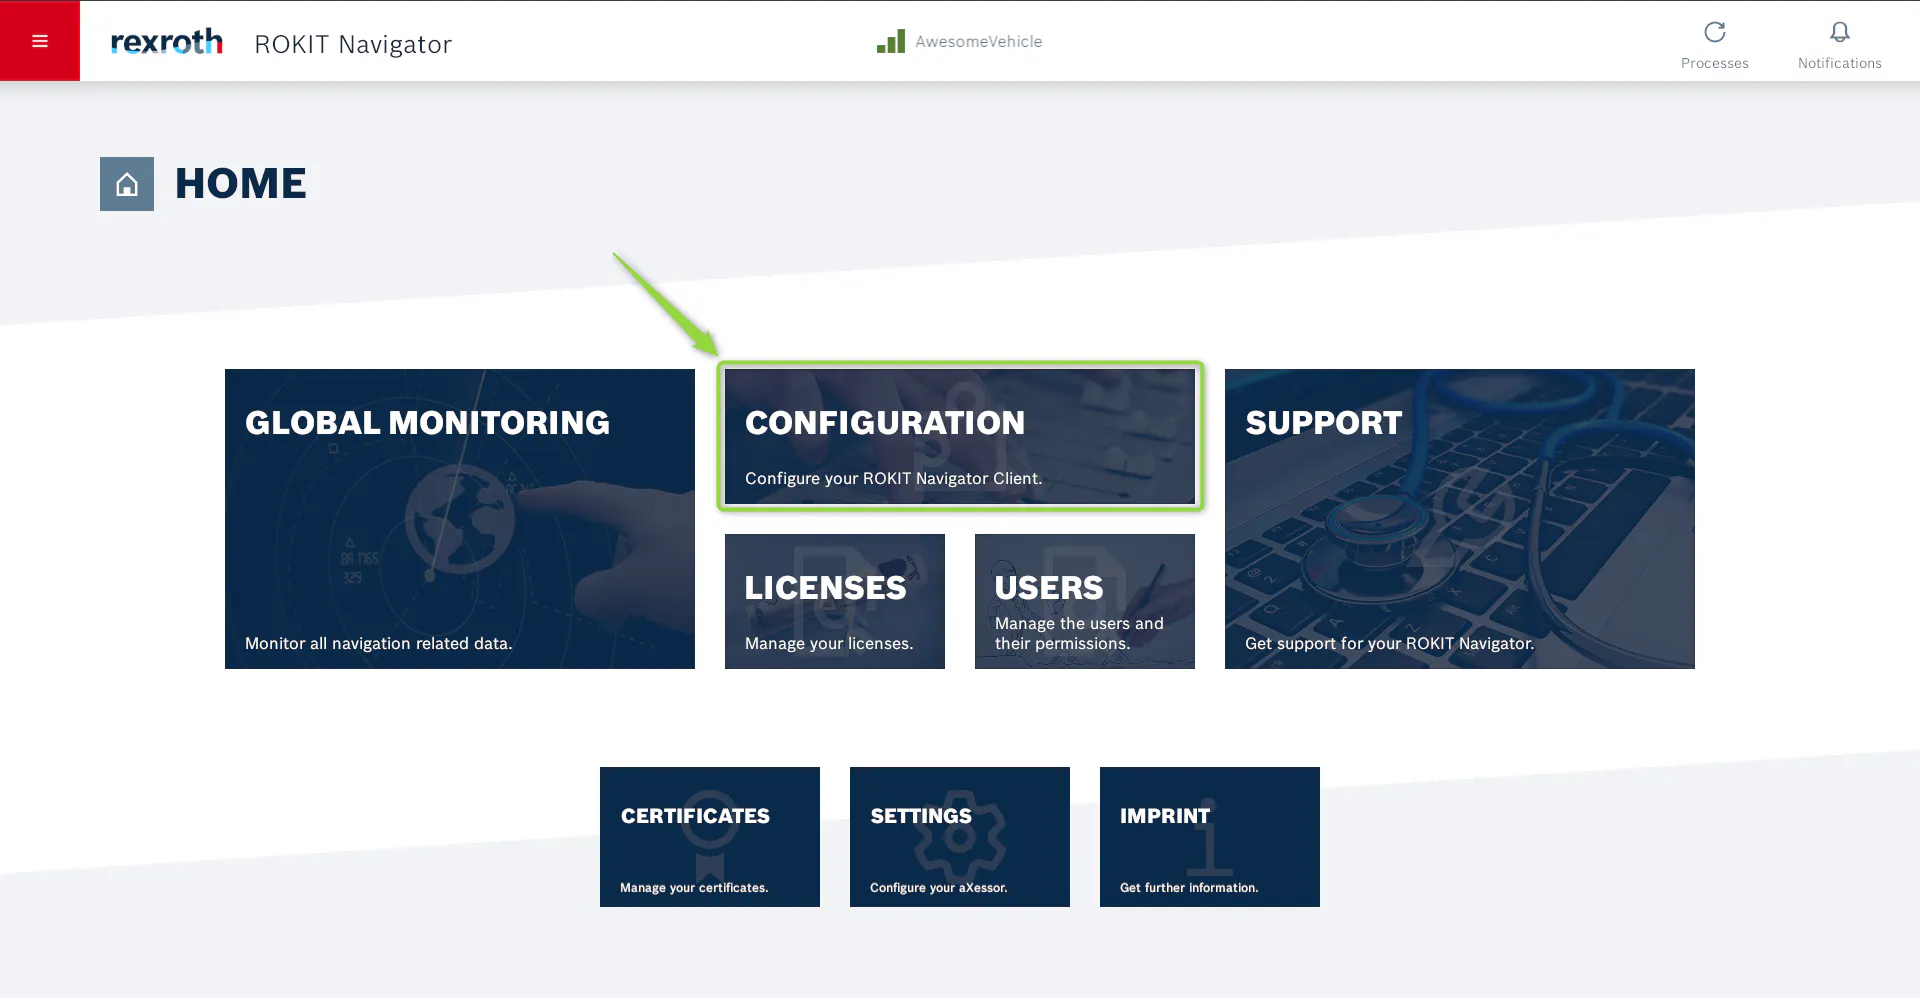
Image 15: ROKIT Navigator configuration
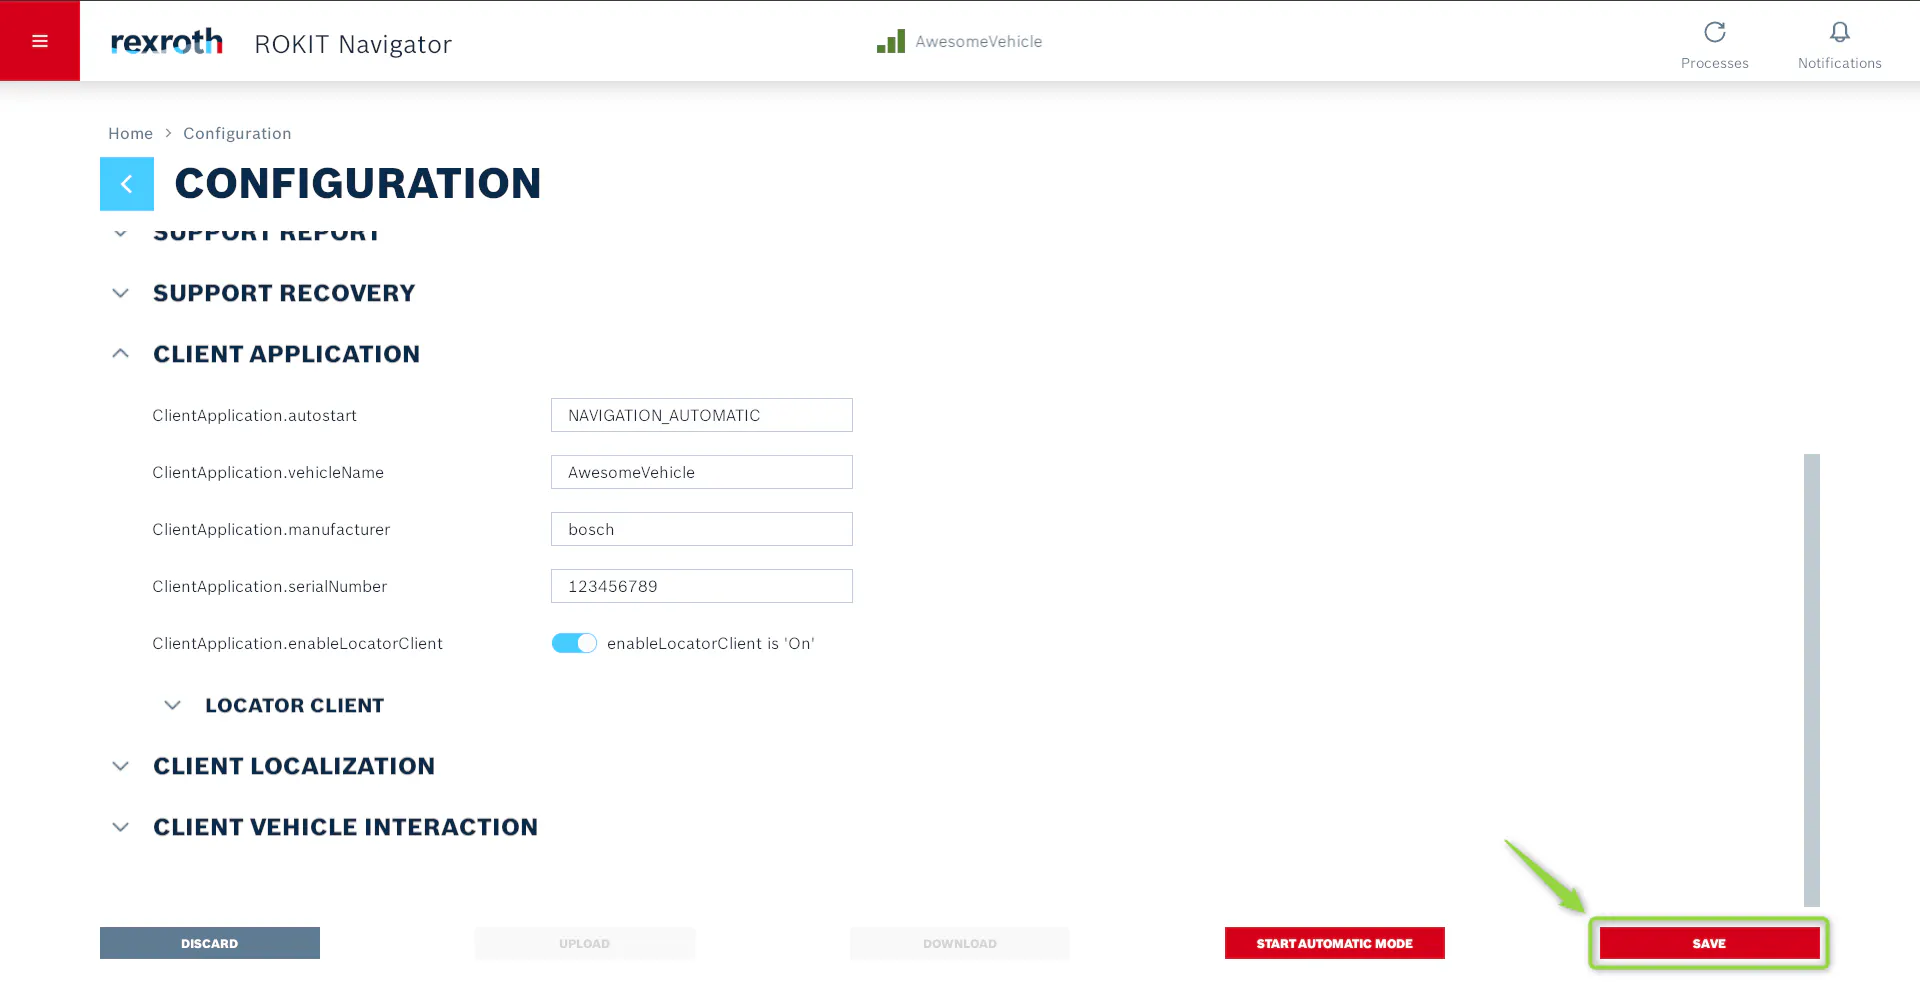
You need to edit the following parameters according to your application:
ClientMotion.feedback.address : 127.0.0.1:1230
ClientSensor.laser1.address : <ctrlX-Hostname>:19021
ClientOrder.vda5050.mqtt.server : ssl://<MQTT-ADDRESS>:<MQTT-PORT> (ssl for encrypted; tls for non encrypted)
ClientOrder.vda5050.mqtt.username : <8-DIGIT-NUMBER> // e.g. Serialnumber or actual username
ClientOrder.vda5050.mqtt.password : <8-DIGIT-NUMBER> // e.g. Serialnumber or actual password
ClientOrder.vda5050.mqtt.interface : uagv // should be default
ClientOrder.vda5050.mqtt.encryption : TRUE
ClientOrder.vda5050.mqtt.enableCertCheck : FALSE
ClientOrder.vda5050.mqtt.versionOverwrite : v2
ClientApplication.autostart : NAVIGATION_AUTOMATIC
ClientApplication.vehicleName : <SOME-NAME> // e.g. Mobile-1, Mobile-2,...
ClientApplication.manufacturer : rexroth
ClientApplication.serialNumber : <8-DIGIT-NUMBER> // e.g. Serialnumber
ClientLocalization.pose.address : <ctrlX-Hostname>:19011
ClientApplication.enableLocatorClient : True
ClientApplication.locatorClient.rpc.port : 18080
ClientApplication.locatorClient.webSocket.port : 18019
Click on Save and you are done with the ROKIT Navigator Client configuration
Test if everything works :
As the Bosch Rexroth PR2200.2 - ROKIT.Box has only two Ethernet ports, one for the Wi-Fi client and the other one for the LiDAR sensor it is recommended to make the components available in the network.
If all the mentioned conditions are met, restart the device and wait approximately 5 minutes. After this time, the device should be visible in the MQTT Broker with the given serial number.
If not check as following:
The device is visible in the network and it is possible to ping it from any other device such as the server that runs the ROKIT Locator Server or the MQTT Broker
The ROKIT Locator Client is localized
Check for any error message in the ROKIT Navigator Client
