DISCLAIMER! This guide is not an official documentation and not intended for production usage.
In this How-to guide we will show you how to create a snap for ctrlX CORE to connect Hikrobot industrial GigE cameras, industrial USB3 cameras or simple USB2.0 webcam and process the image based on preloaded .onnx or .hef models via onnx rutime and HAILO workflow. It detects objects in images and creates precise masks around each one. Unlike simple object detection (bounding boxes), it outlines the exact shape of each object.
Prerequisites:
ctrlX CORE X3/X5/X7 (2.X.X / 3.X.X for .onnx, and 3.6.X for HAILO .hef)
Optional AI accelerator module (HAILO)
Ubuntu 22.04 LTS build environment, either standalone Ubuntu, App build environment of ctrlX Works, QEMU or Virtual machine
ctrlX AUTOMATION SDK
I am going to build a snap for ctrlX CORE X3. Please be aware, since some of Python libraries, such as NumPy and wheel cannot be cross built, we need to use a device with the same architecture as your target device: ctrlX CORE X3 – arm64; ctrlX CORE X5/X7/Virtual – amd64.
If you don't have a native arm64 device and you want to build for ctrlX CORE X3, your options would be:
Using “snapcraft remote-build”, please see Snapcraft documentation for more information
Set up a custom QEMU configuration to emulate arm64
1. Preparing Hikrobot libraries
As a first step, assuming that your environment is already prepared for creating a snap we download the Hikrobot MVS software, which includes all the required .so libraries and Python samples to control the camera.

Download it based on your target architecture. When you install it on your Linux PC using the ./setup.sh script in the root folder, all required “tar” archives are unpacked. Therefore we need to unpack and prepare all the files inside this archive manually and than repack them. Configure environment variables in snapcraft.yaml. Specifically, we add code below to the “LD_library_path” in the apps client environment section:
    environment:
        "LD_LIBRARY_PATH": "$LD_LIBRARY_PATH:$SNAP/usr/include:$LD_LIBRARY_PATH:$SNAP/usr/lib/$SNAPCRAFT_ARCH_TRIPLET/lapack:$SNAP/usr/lib/$SNAPCRAFT_ARCH_TRIPLET/blas:$SNAP/usr/lib/python3.10/dist-packages:$SNAP/opt/MVS/bin:$SNAP/opt/MVS/lib/aarch64:$SNAP/opt/MVS/lib/aarch64:$SNAP/opt/MVS/lib/aarch64"
        MVCAM_SDK_PATH: $SNAP/opt/MVS
        MVCAM_COMMON_RUNENV: $SNAP/opt/MVS/lib/
        MVCAM_MVS_LIBENV: $SNAP/opt/MVS/lib/
        MVCAM_GENICAM_CLPROTOCOL: $SNAP/opt/MVS/lib/CLProtocol
        GENICAM_CACHE_V3_1: $TMP
        PATH": $PATH:$SNAP/usr/lib/
Next step: We add our archive with prepared archive to the snap, you can use both .zip and .tar formats. The command explicitly tells to take all the files from the source path and copy it into folder 'opt/' in our snap environment:
  hikdeb:
    plugin: dump
    source: https://github.com/AKRA-off/hik_arm/raw/main/opt.zip
    source-type: zip
    organize:
      '*': opt/
Next step is to add Hikrobot import files to the project, we can take them from our archive: 'MVS\Samples\aarch64\Python\MvImport' and create folder containing it to our project root folder:
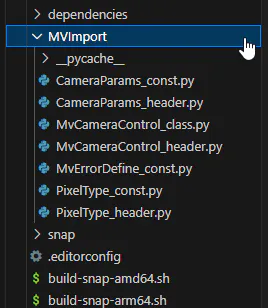
MVImport folder also has to be added to our snap environment, you can do it in snapcraft.yaml or setup.py, I do it in .py:
packages=["MVImport"],1. Project structure
Section
File / Path
What it does
Root
main.py
The entry point. Spins up four threads: the inference loop, a ctrlX Data Layer provider, a Data Layer client, and the Flask web server. Also handles Hikrobot and webcam capture, YAML config loading, and routing for the web UI.
Root
instance_segmentation.py
The Hailo inference pipeline — preprocessing, async inference via HailoInfer, and postprocessing running in parallel threads. Called by main.py when Hailo mode is active.
Root
setup.py / setup.cfg
Package setup, mainly needed for building the Cython NMS extension in post_process/.
Root
install-venv.sh
Shell script to create and populate a virtualenv.
Root
build-snap-amd64.sh / build-snap-arm64.sh
Build scripts that produce the Snap package for AMD64 and ARM64 targets respectively.
yoloseg/
YOLOSeg.py
Loads a YOLOv8-seg ONNX model via ONNXRuntime, runs inference, applies NMS, and generates segmentation masks. The main class used when Hailo is not enabled.
yoloseg/
utils.py
Utility functions shared across the ONNX path — bounding box conversions, NMS, drawing helpers, sigmoid, and class_init.
common/
hailo_inference.py
Wraps the Hailo SDK — loads a HEF model, configures the virtual device, and runs async inference with round-robin scheduling.
common/
toolbox.py
Miscellaneous helpers: opens image/video/camera inputs, loads JSON configs, reads label files, visualizes results, preprocesses frames, and tracks frame rate.
common/
tracker/byte_tracker.py
BYTETrack multi-object tracker — associates detections across frames using IoU and a low-score second pass.
common/
tracker/kalman_filter.py
Kalman filter used internally by BYTETracker for motion prediction.
common/
tracker/matching.py
Hungarian algorithm and IoU-based cost matrices for tracker assignment.
common/
tracker/basetrack.py
Base class that manages track states (New, Tracked, Lost, Removed) and assigns unique IDs.
post_process/
postprocessing.py
Decodes raw Hailo output tensors — applies NMS, sigmoid, softmax, and draws segmentation masks. Handles YOLOv5, YOLOv8, and FastSAM architectures.
post_process/
cython_nms.pyx
Cython implementation of NMS for speed. Gets compiled during setup.py build_ext.
helper/
ctrlx_datalayer_helper.py
ctrlX Data Layer client and provider connections, works both in the QEMU dev environment and on-device.
MVImport/
MvCameraControl_class.py
The main camera control class — enumerate devices, open/close, grab frames.
MVImport/
MvCameraControl_header.py
C struct definitions and constants mirrored from the SDK headers.
MVImport/
CameraParams_const.py / CameraParams_header.py
Camera parameter constants and type definitions.
MVImport/
MvErrorDefine_const.py
SDK error code definitions.
MVImport/
PixelType_const.py / PixelType_header.py
Pixel format constants (Mono8, RGB8, etc.).
dependencies/
default/config.yaml
Default runtime config (model name, camera selection, thresholds, Hailo flag).
dependencies/
default/config.json
Tracker and visualization parameters for the Hailo pipeline.
dependencies/
default/data0.yaml
COCO-style label file for the default model.
dependencies/
default/pre0.jpg
Default placeholder input image.
dependencies/
default/yolov8n-seg.onnx
Default YOLOv8n segmentation model in ONNX format.
dependencies/
default/yolov8n_seg.hef
Same model compiled for the Hailo-8 accelerator.
dependencies/
default/yolov8n.onnx
YOLOv8n detection-only ONNX model (no segmentation head).
dependencies/
static/
Bootstrap, jQuery, and custom CSS/images for the web UI.
dependencies/
templates/index.html
Main dashboard page — shows the live inference result and a start/stop toggle.
dependencies/
templates/login.html
Login page.
dependencies/
templates/settings.html
Settings page — pick model, camera source, thresholds, connect/disconnect camera, toggle Hailo.
configs/
set_env_path.sh
Sets up environment variables needed at runtime (library paths, etc.).
configs/
package-assets/active.package-manifest.json
ctrlX package manifest that registers the app in the ctrlX ecosystem.
customPackages/
hailort_4.19.0_amd64.deb / arm64.deb
Prebuilt Hailo runtime packages for both architectures, bundled so the snap build doesn't need internet access.
snap/
snapcraft.yaml
Snap package definition — defines the app, plugs (active-solution, network, etc.), build steps, and which files to bundle.
snap/
hooks/connect-plug-active-solution
Hook that runs when the active-solution plug is connected, used to copy default config files into place.
For the full source code please go to "Related Links"!
2. Build the app
When you have all the required files (see chapter 1. Project structure), we can process to build the snap, in my case it's a build for arm64 ctrlX CORE X3 on the native arm64 device:
snapcraft clean --destructive-mode
snapcraft --destructive-mode --target-arch=arm64 --enable-experimental-target-arch
ai-detector_1.0.0_arm64.snap will appear in the root folder after the build is complete.
3. Install snap on the ctrlX CORE
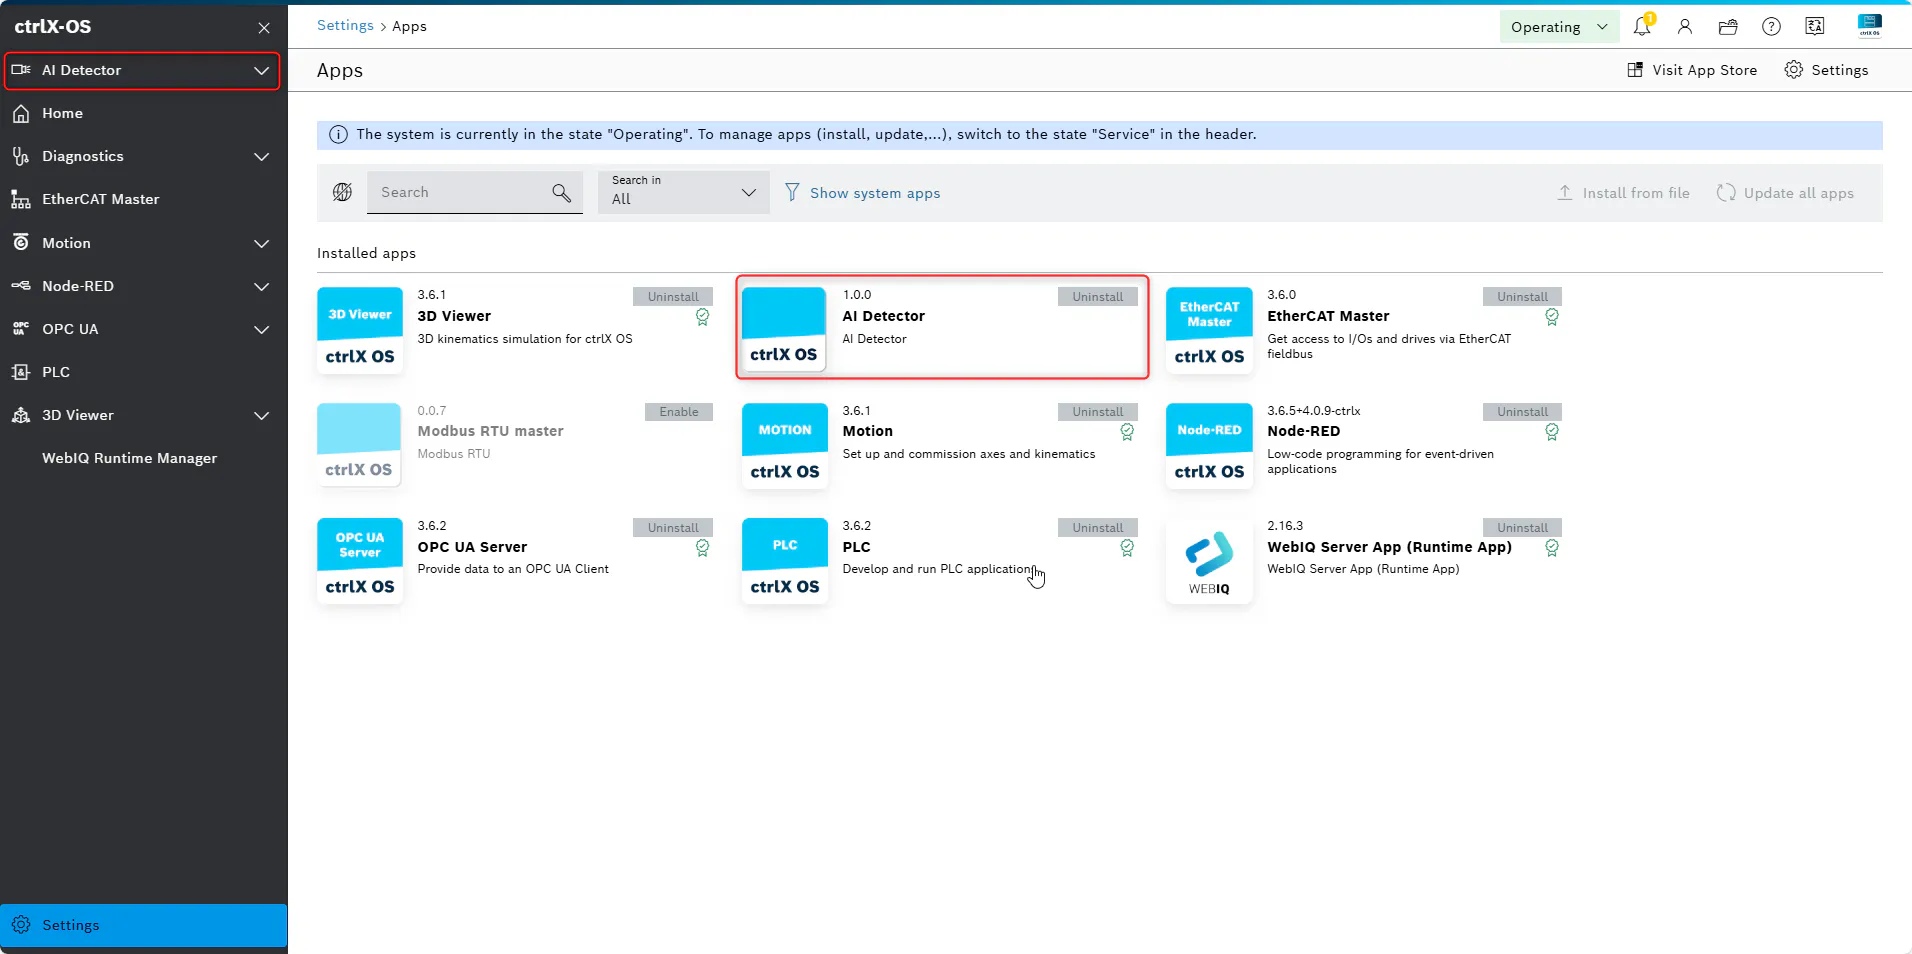
4. Check HAILO
Before running the inference, you can make sure that your HAILO chip is detected, this step is only possible if you have root access to your ctrlX CORE. Login via SSH and display messages mentioning HAILO:
ssh [email protected]
sudo dmesg | grep -i HAILO
You should see similar log:
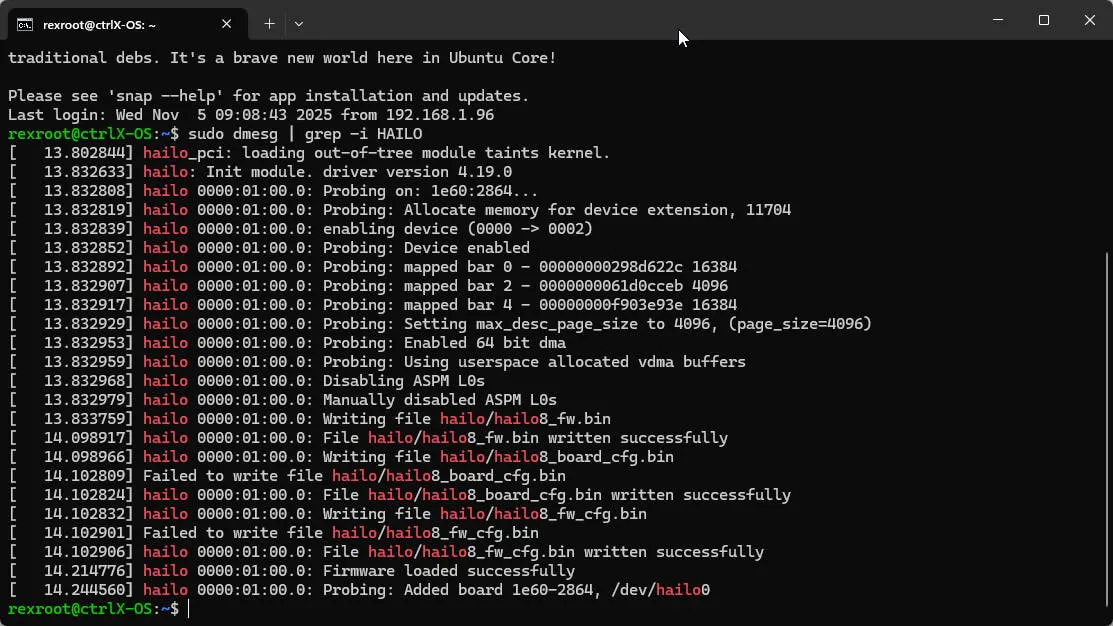
As you can notice, driver version is 4.19.0, it should be same as our HAILO dependencies in Chapter 6. If you use older Firmware, you may need to change the dependencies versions and modify processing accordingly.
5. Run the app
When you access the app from the side menu, you will land on the login webpage, login and password is boschrexroth:
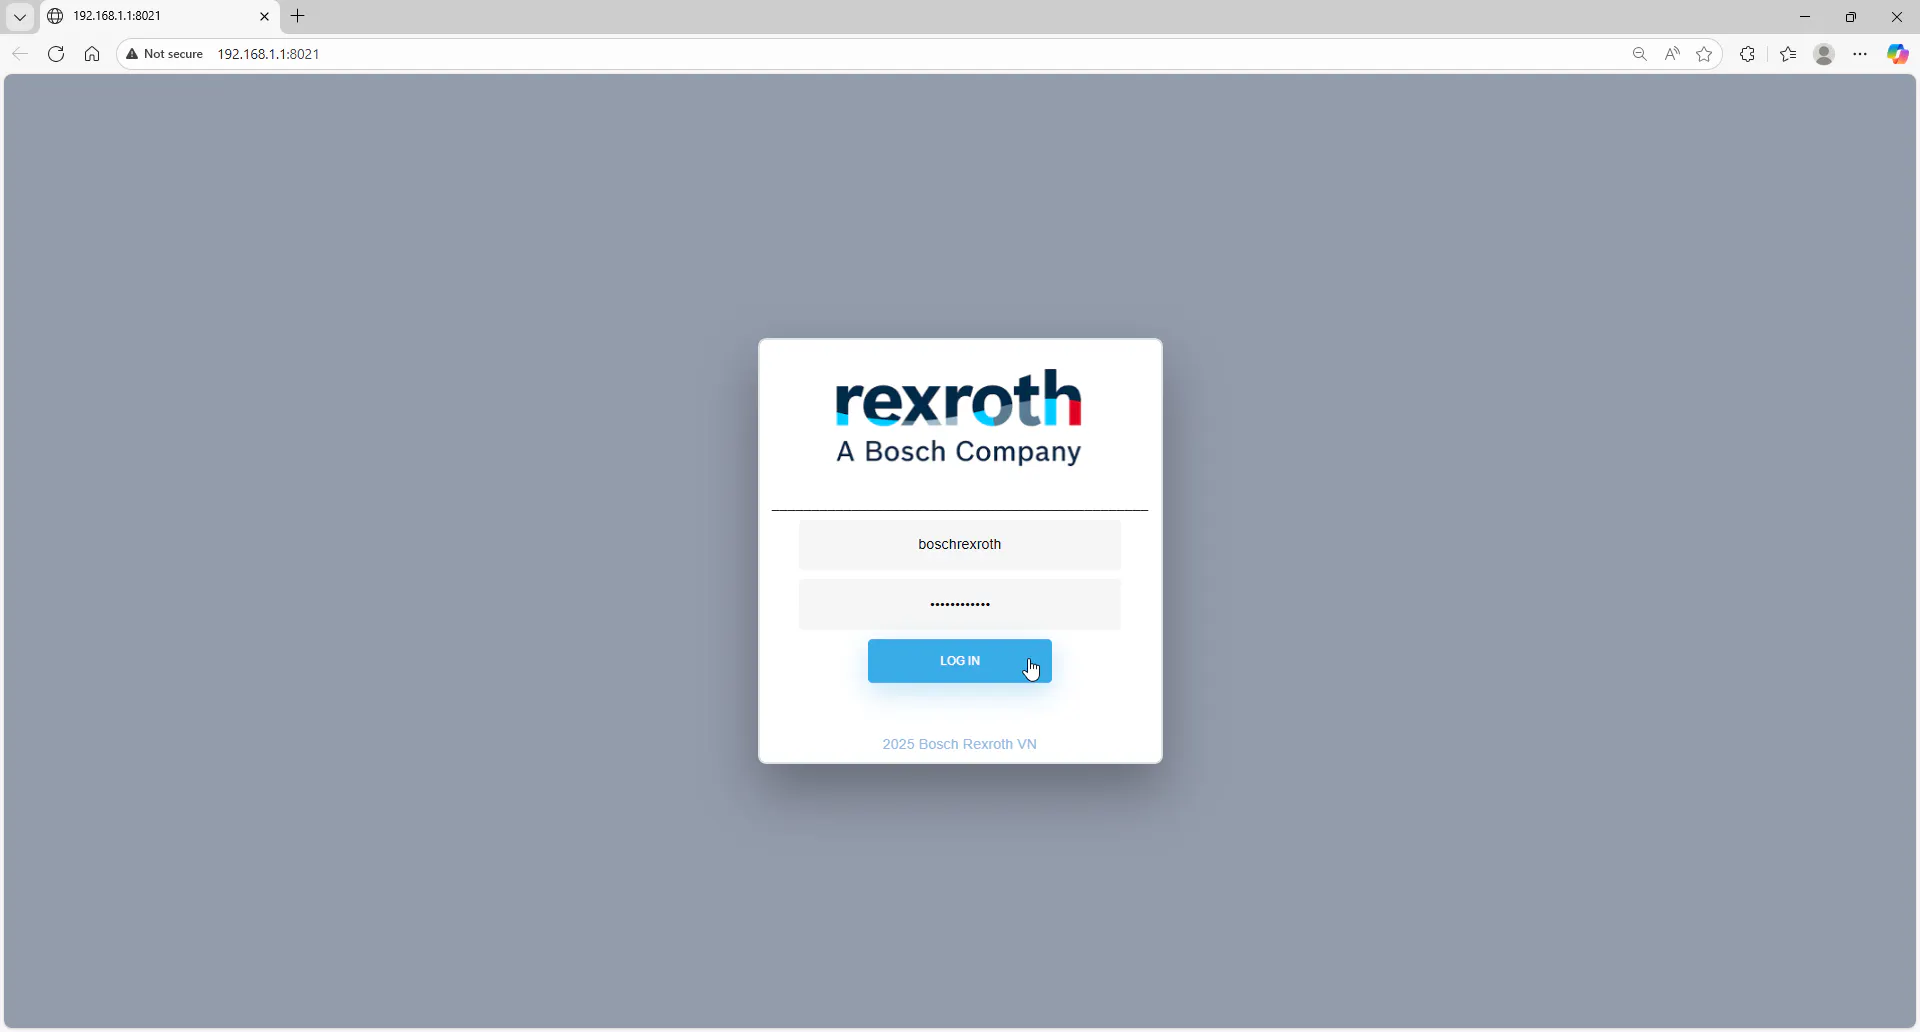
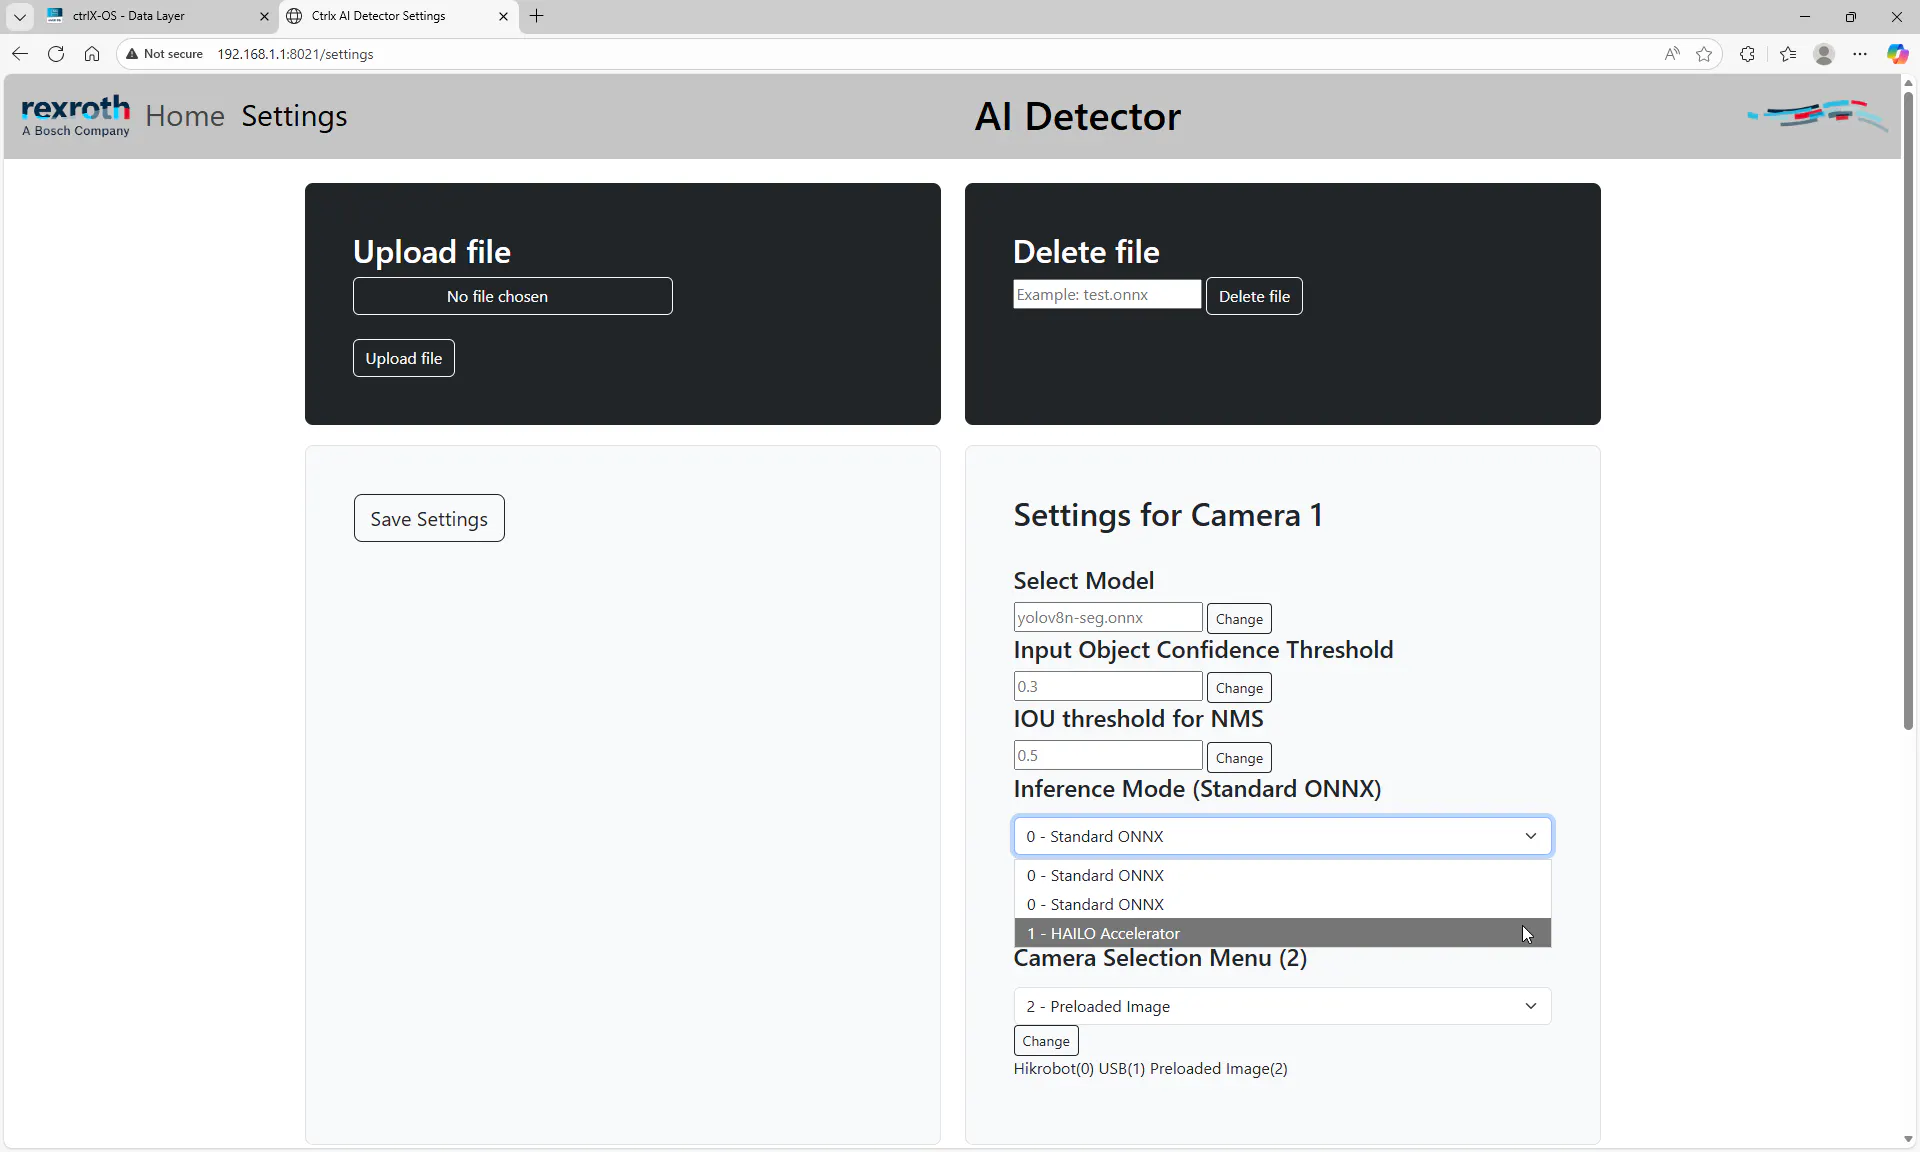
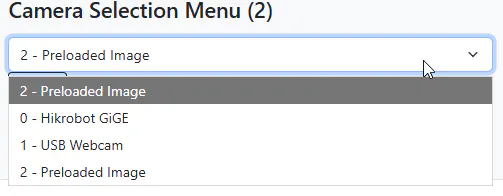
Browse to Settings webpage, you load/delete files, change models, select camera and enable HAILO accelerator:
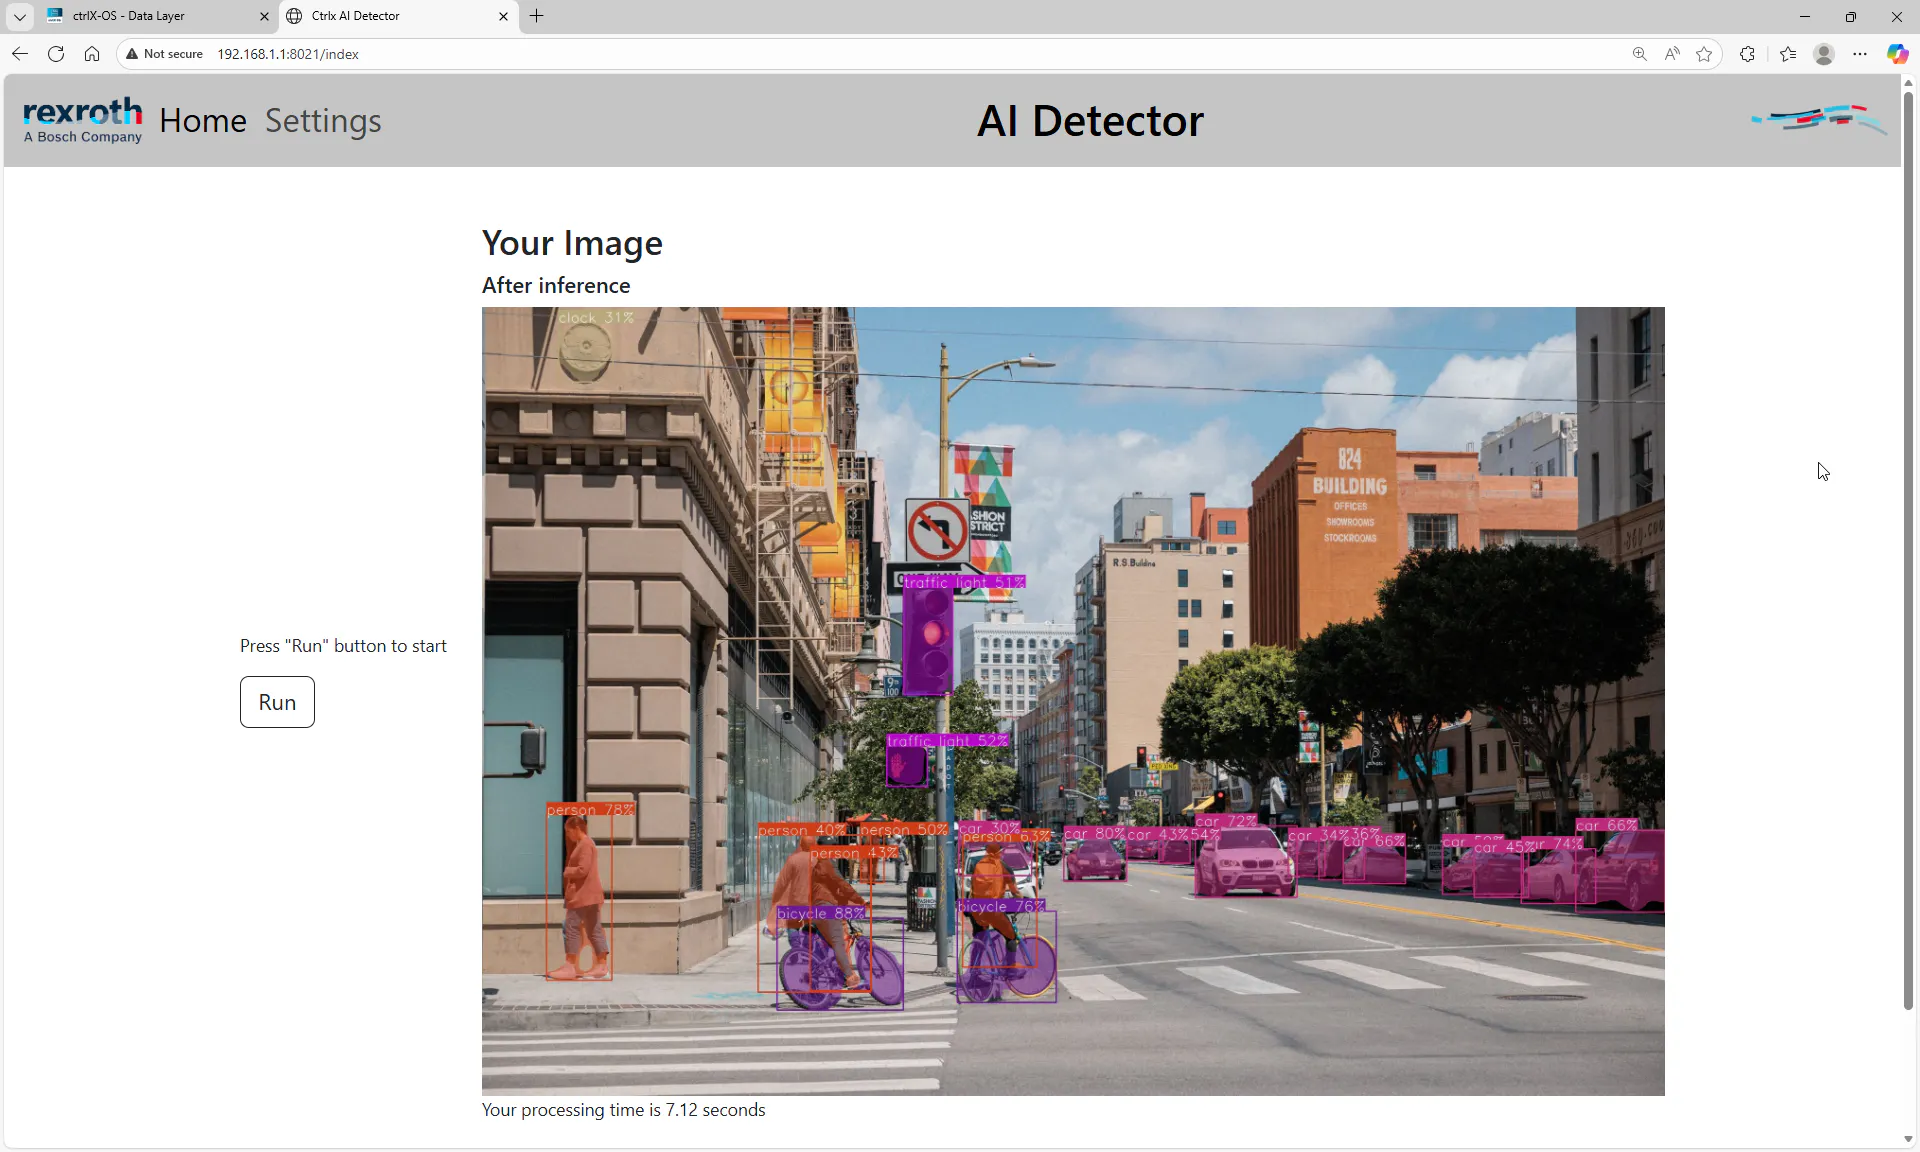
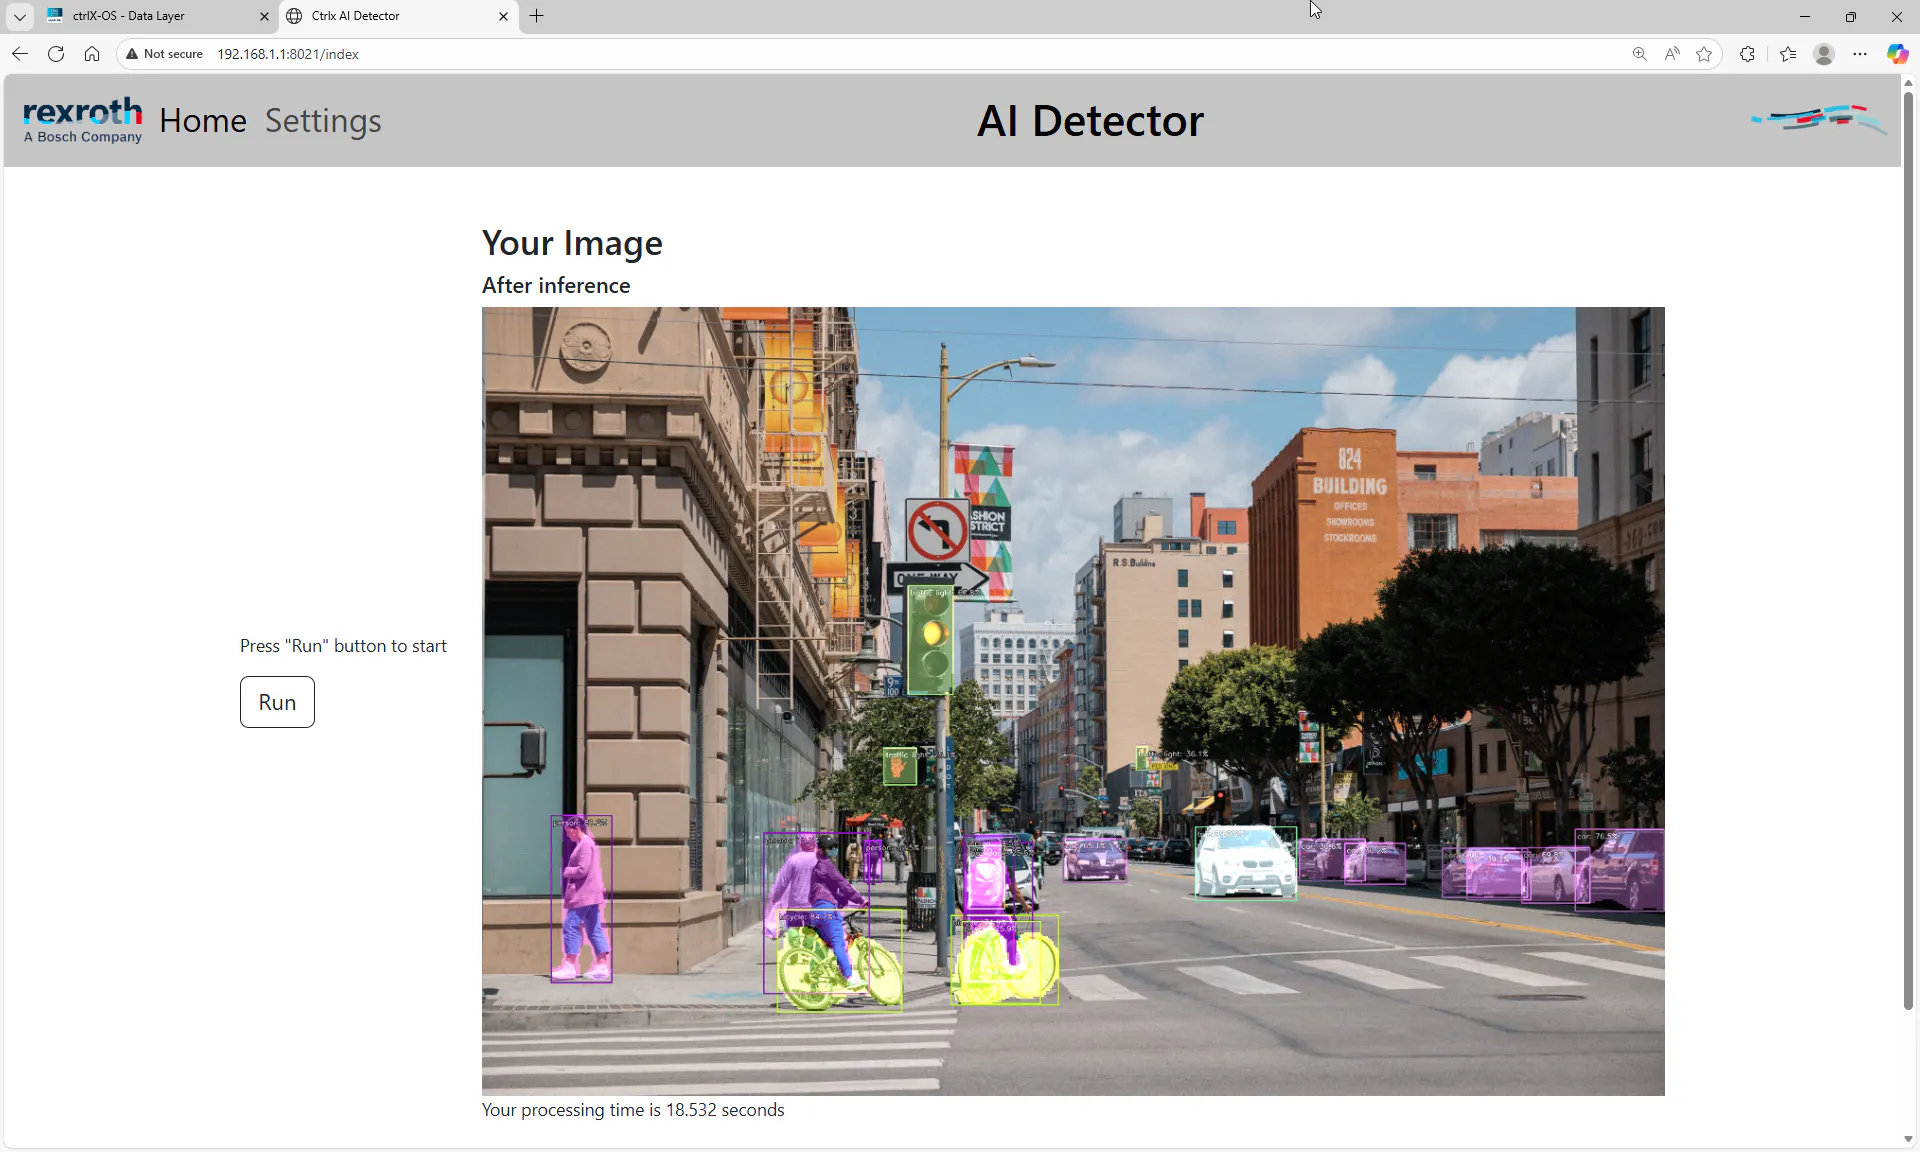
Get back to Home page and run Inference:
ONNX model processing:
HEF model with HAILO acceleration:
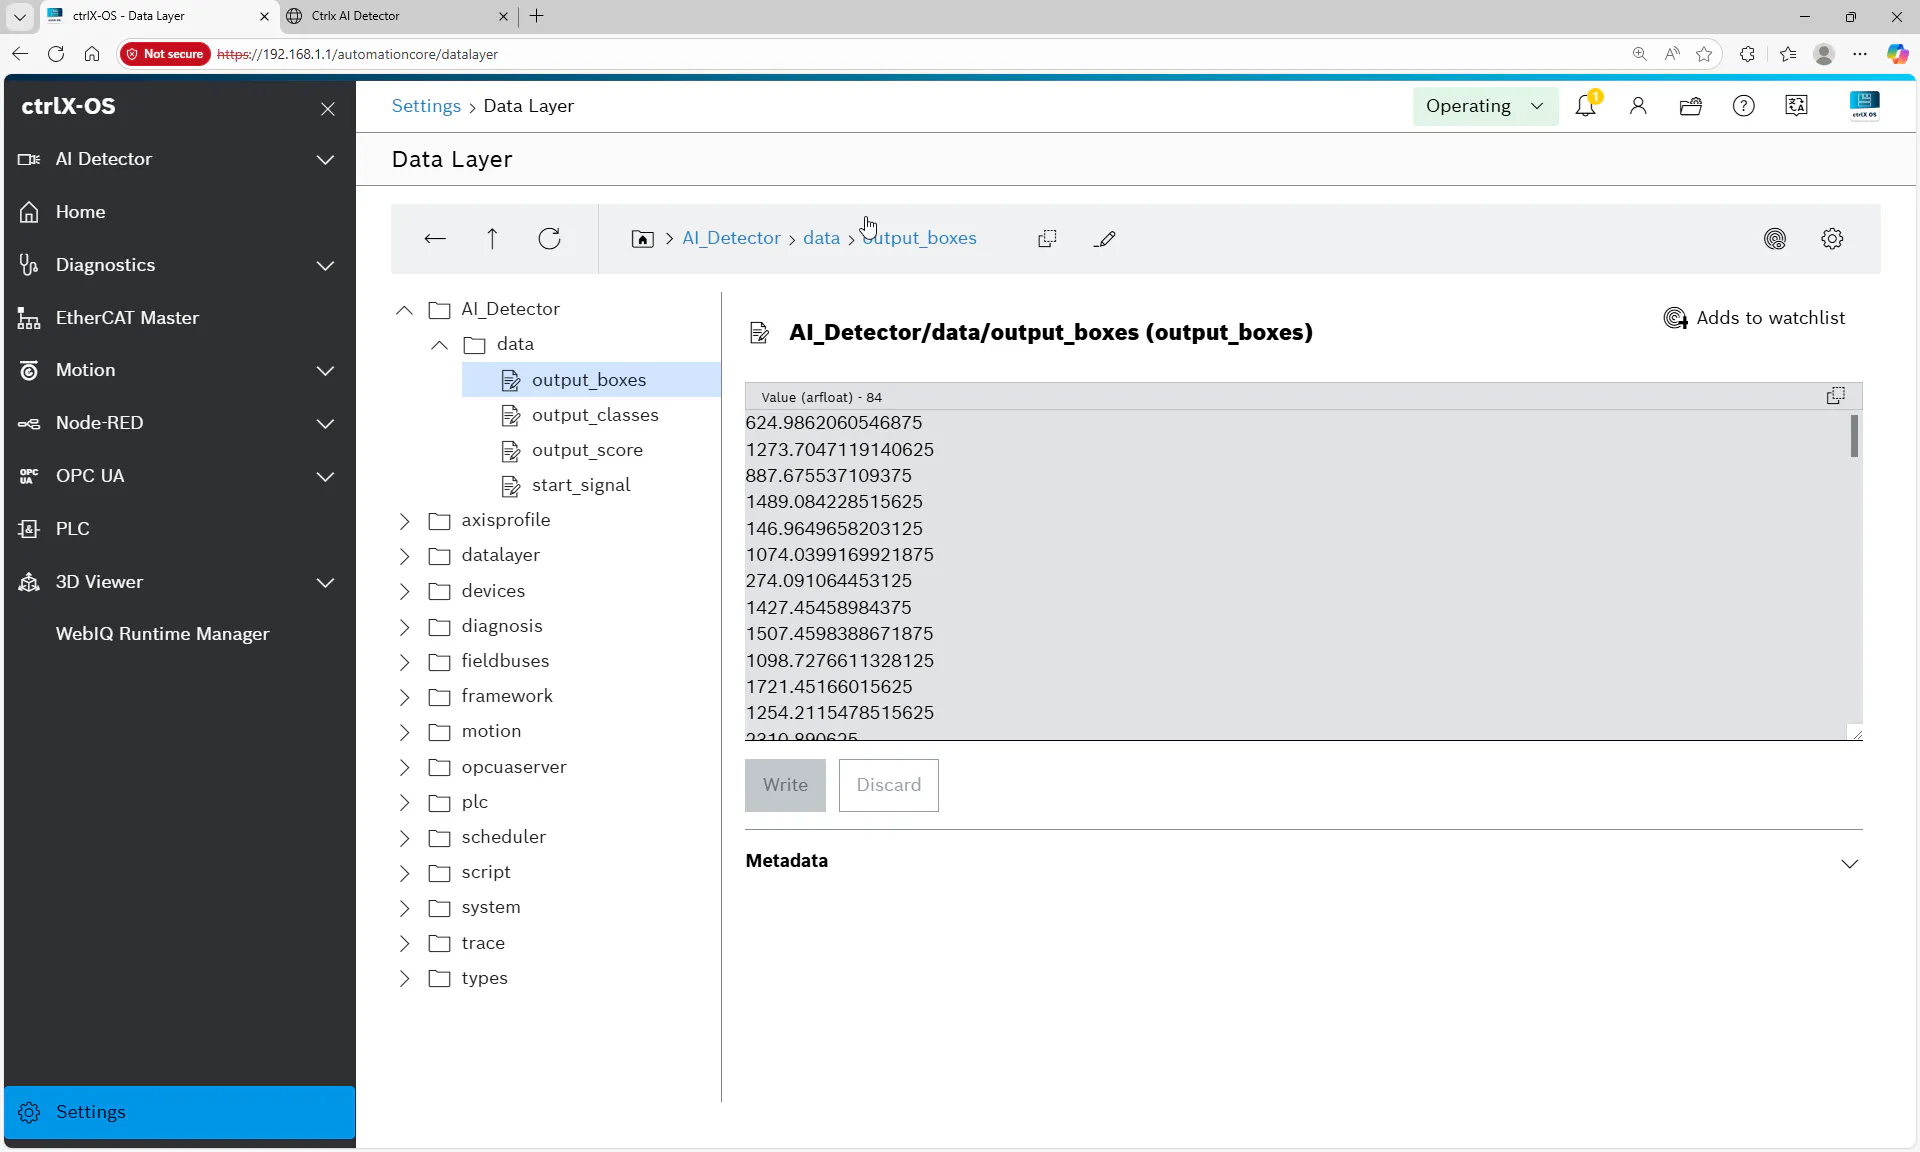
Now you can browse Data Layer for the results, you can see array of XY positions of image coordinates:
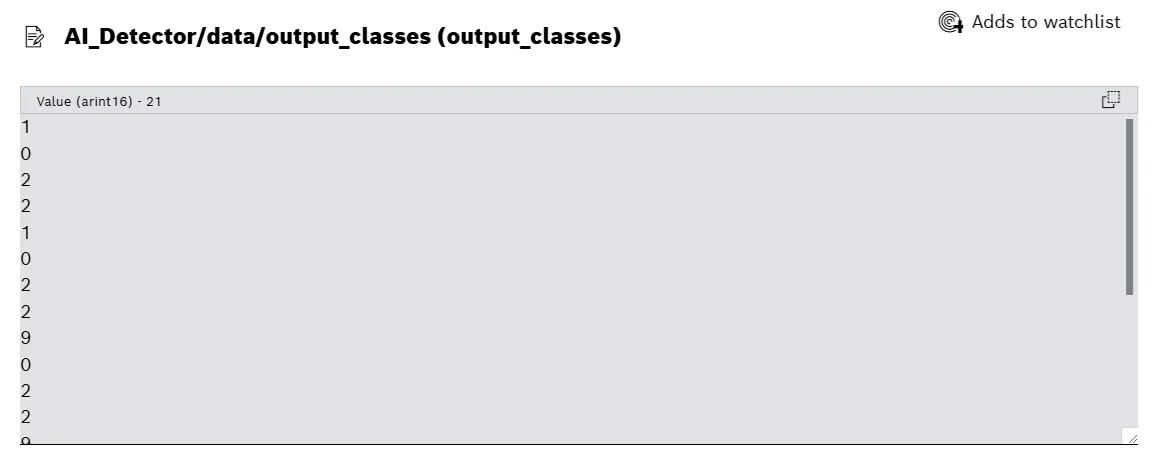
Each detection has its own corresponding class
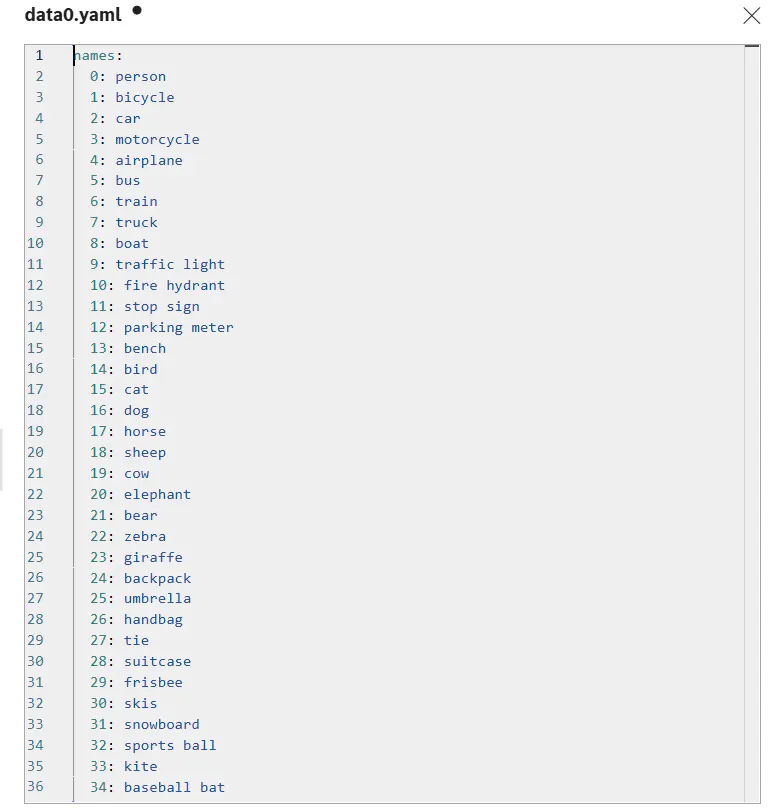
You can go back and check definition of each class in your data0.yaml file:
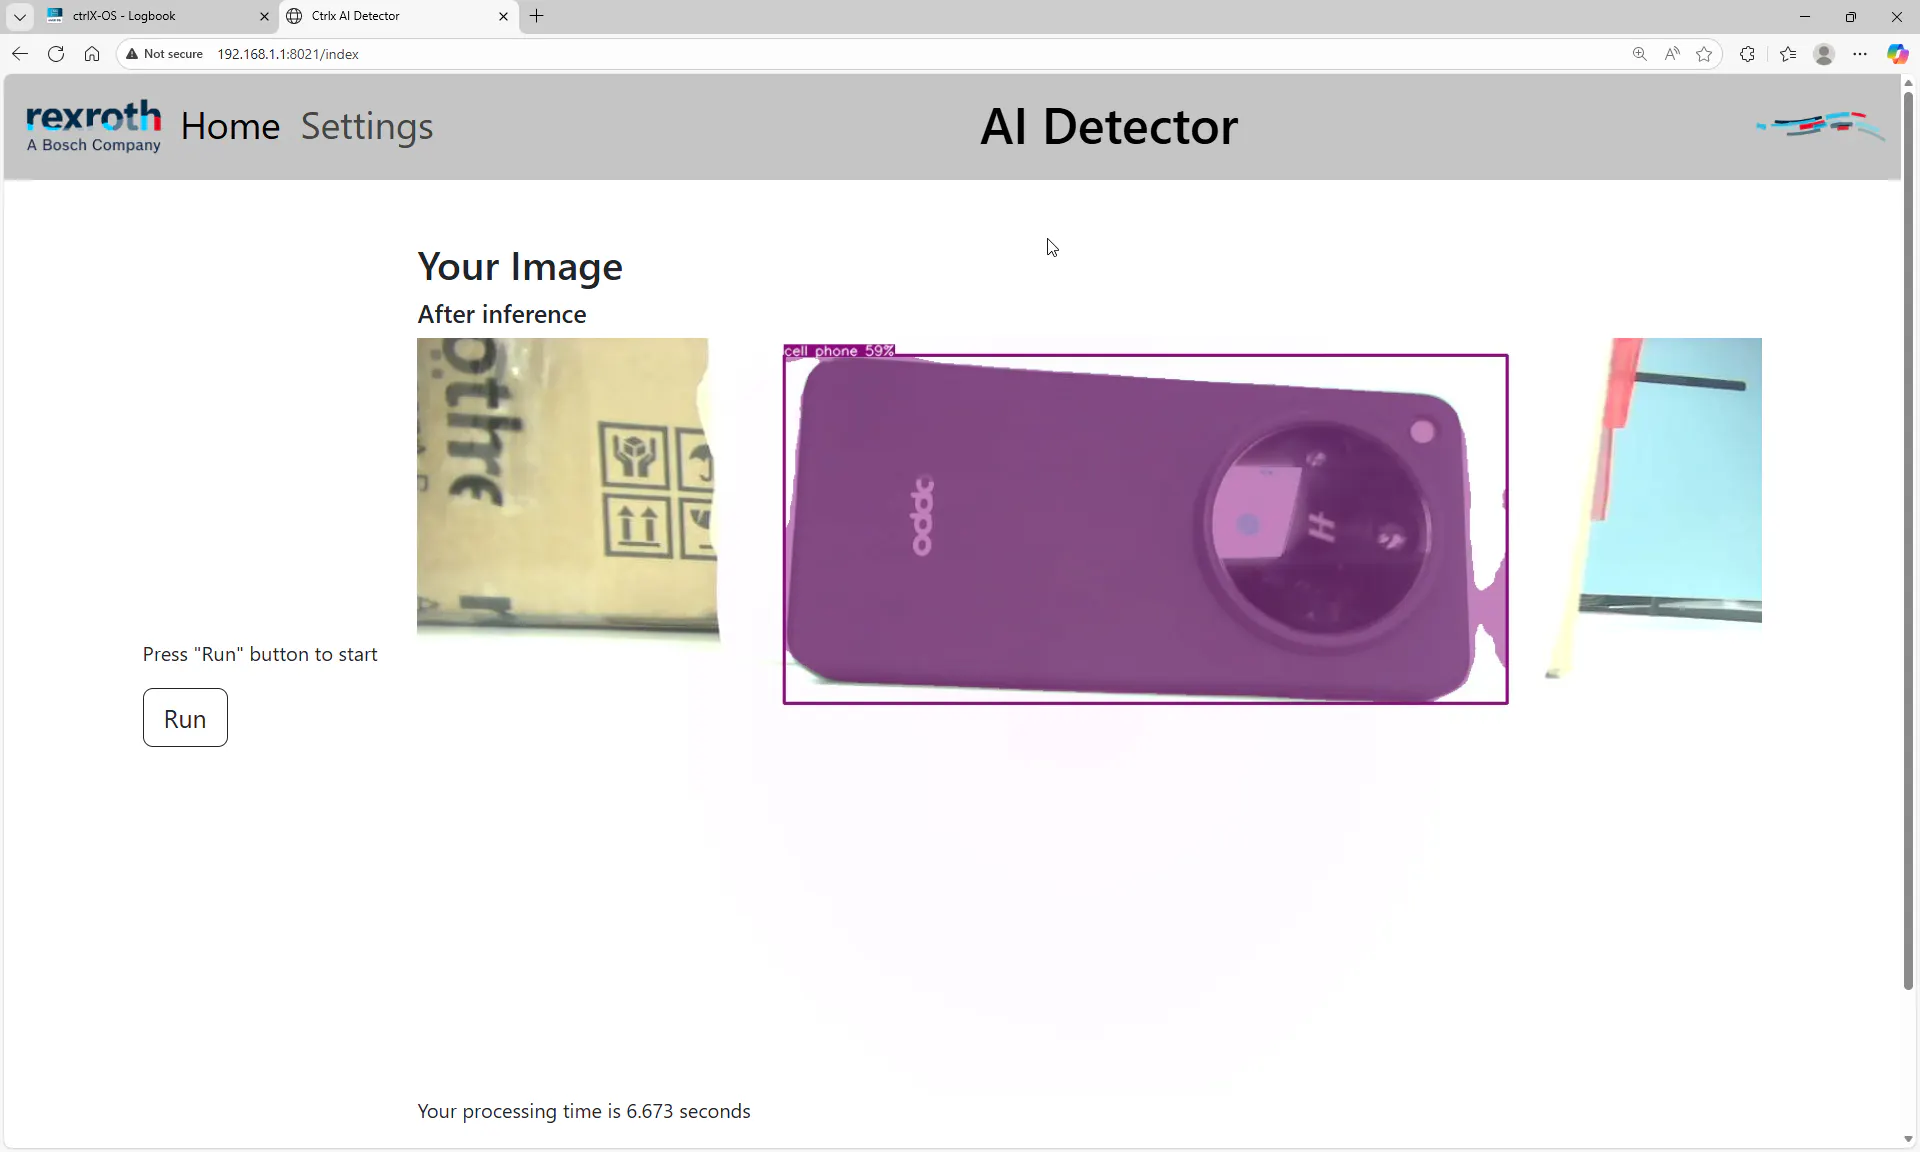
Now we can switch to using real cameras. Connect USB Webcam to USB-C port of ctrlX CORE using a adapter and set the preloaded image to USB Webcam in settings, it will detect camera automatically, and you are ready to run.
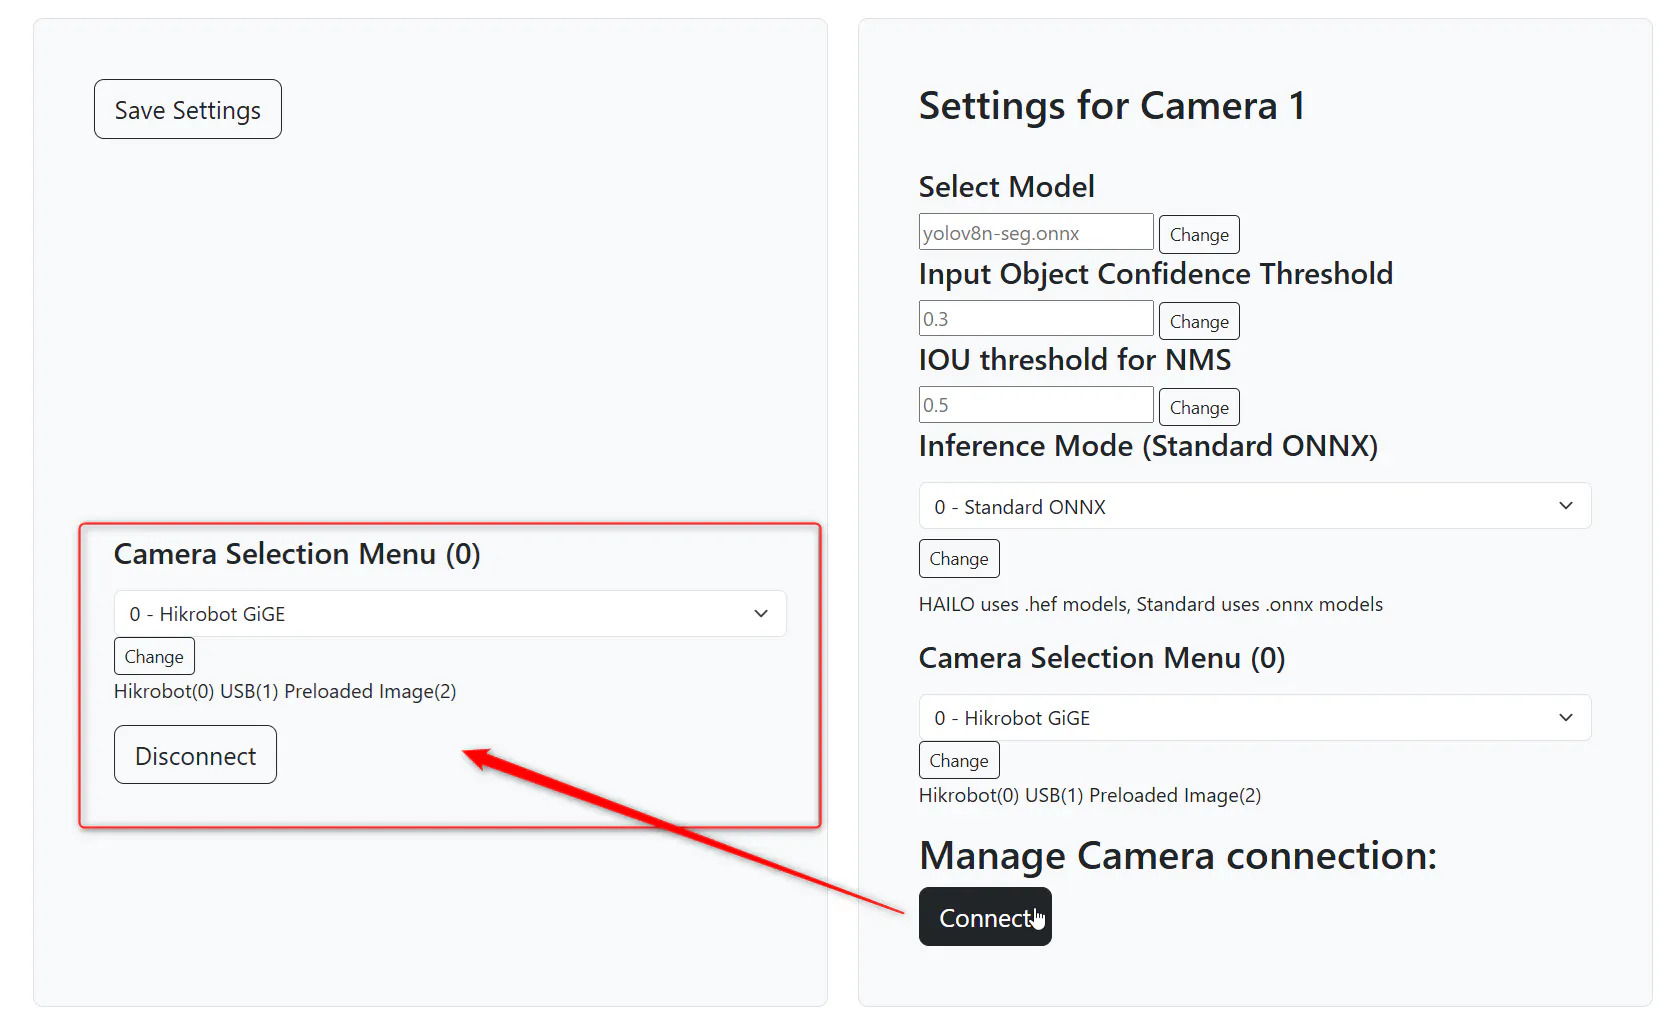
Next step is to try it with Hikrobot camera, first you will need to connect it, there is a special button in settings menu for that:
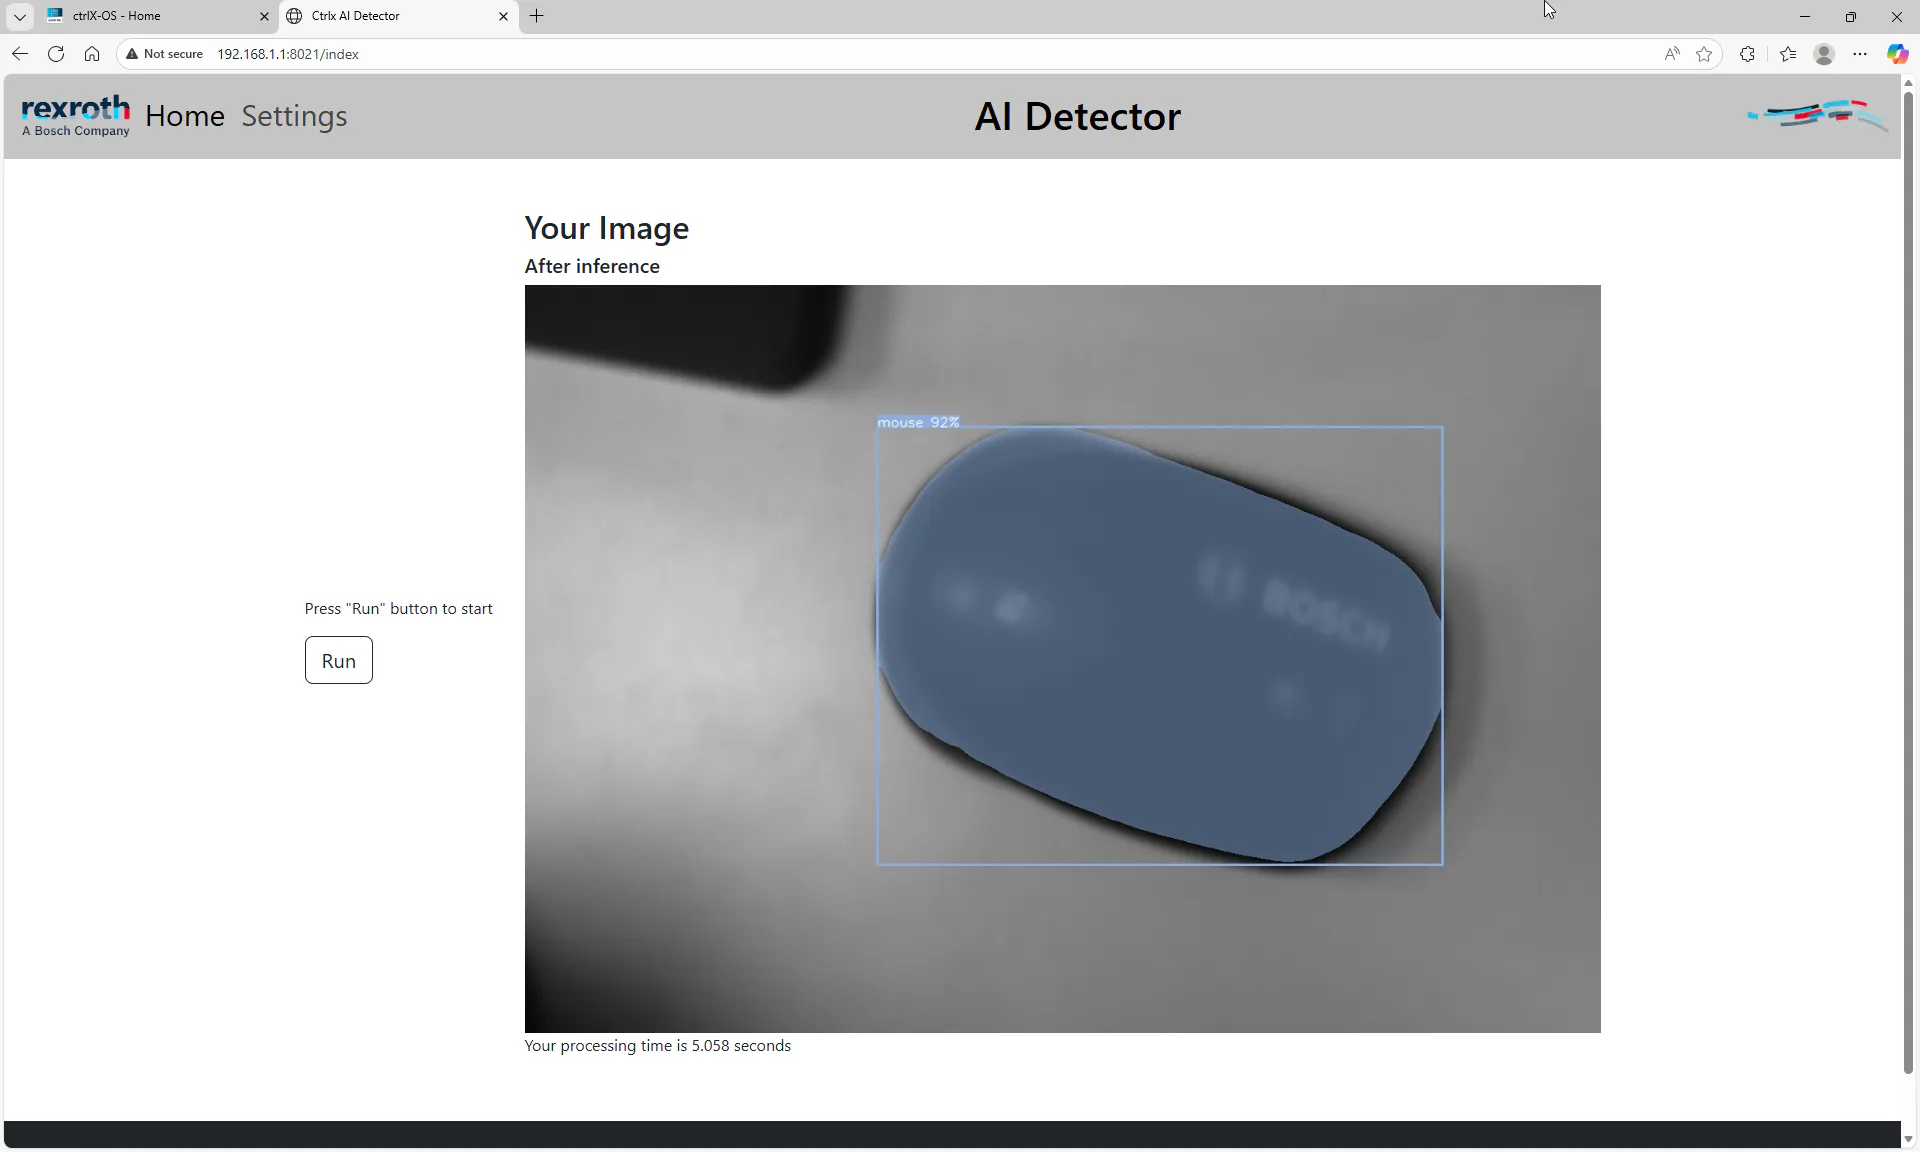
You are ready to run inference with it:
Try it on your own!
Related Links:
GitHub - boschrexroth/ctrlx-automation-sdk: ctrlX AUTOMATION Software Development Kit
GitHub - hailo-ai/Hailo-Application-Code-Examples
Build a snap with HAILO 8 integration
Create and delete files and folders in Active configuration
Python snap to stream USB webcam images to Datalayer
Hikrobot - Machine Vision - Service - Download Center
