Introduction
This guide explains how to replace a ctrlX CORE controller and a ctrlX DRIVE using a backup-based recovery workflow. It covers creating an encrypted backup, building a bootable recovery SD card with ctrlX WORKS, and restoring a ctrlX DRIVE via its panel.
IntroductionStepsStep 1: Create an Encrypted Backup on the ctrlX COREStep 2: Create a Recovery SD Card with ctrlX WORKSStep 3: Insert the SD Card and Start the ctrlX COREStep 4: Verify the Recovery Was SuccessfulStep 5: Prepare the ctrlX DRIVE panel with firmwareStep 6: Back Up and Restore the ctrlX DRIVEConclusion
Steps
Step 1: Create an Encrypted Backup on the ctrlX CORE
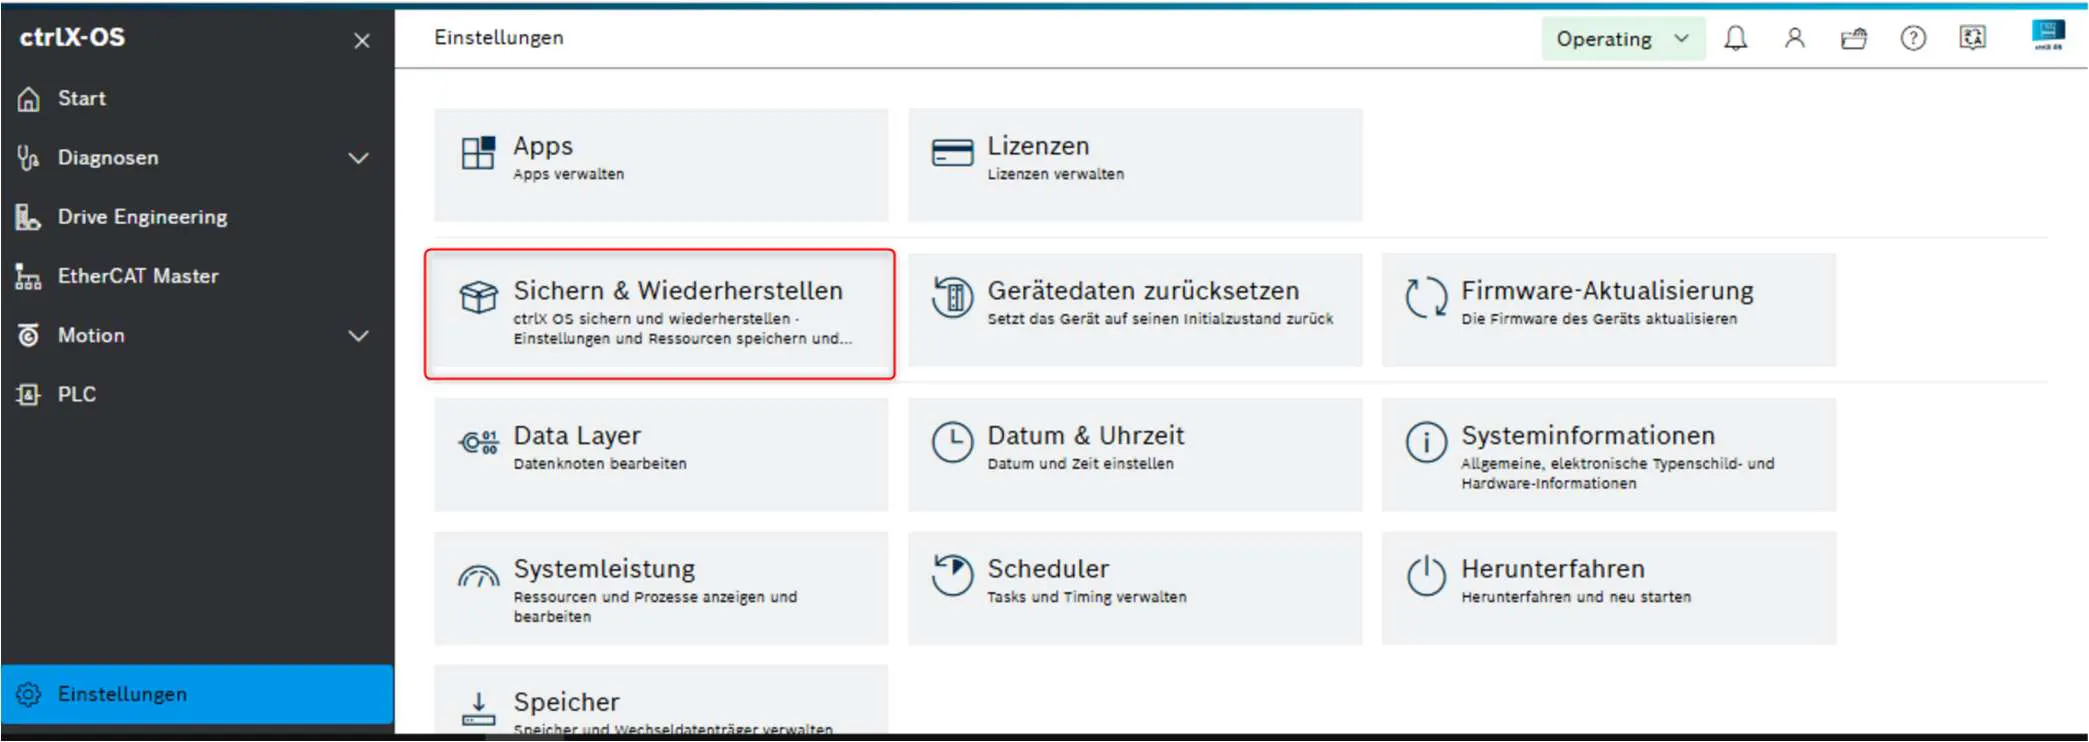
In the ctrlX OS web interface, navigate to Settings and open "Backup & Restore" to create a backup of the device configuration.
• Navigate to Settings → Backup & Restore in the ctrlX OS interface.
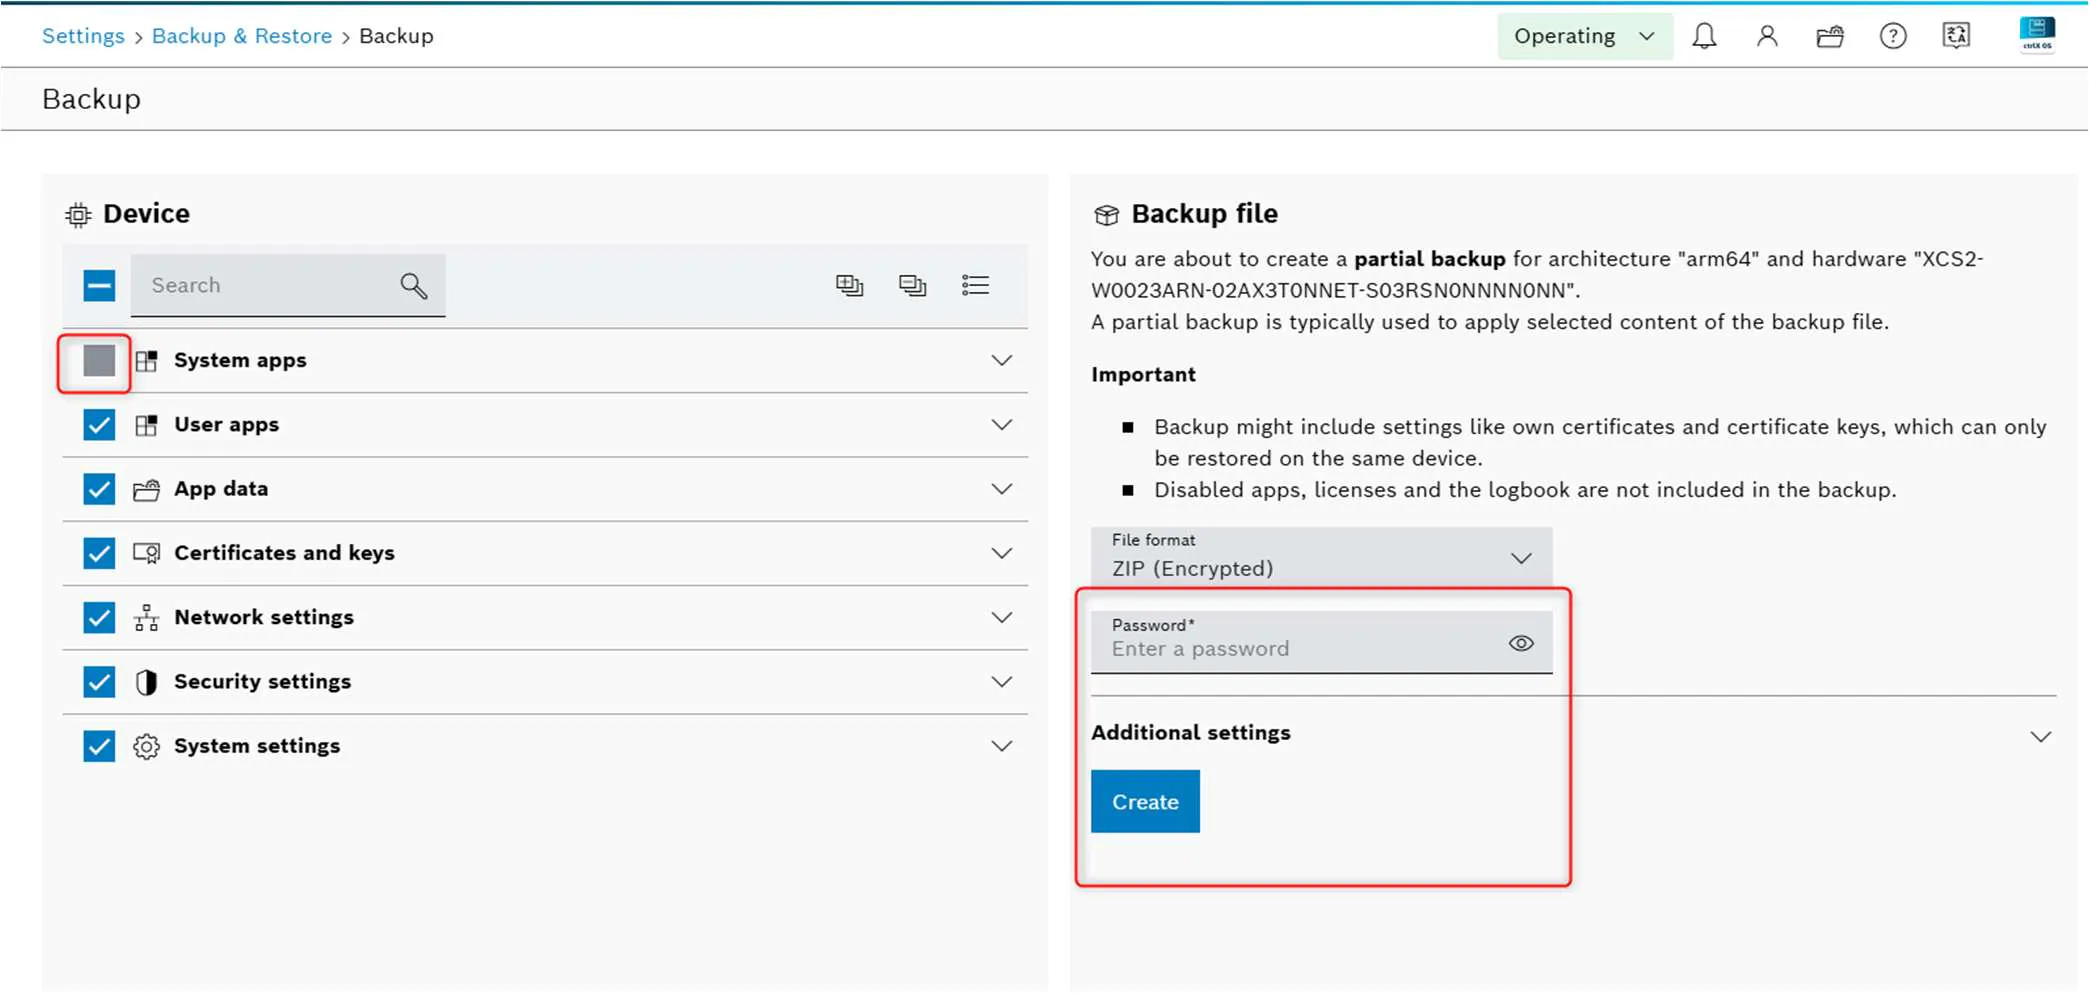
• Deselect System apps — these will be reinstalled via the system image.
• Select ZIP (Encrypted) as the file format and enter a secure password.
• Click Create to generate and download the backup file.
Step 2: Create a Recovery SD Card with ctrlX WORKS
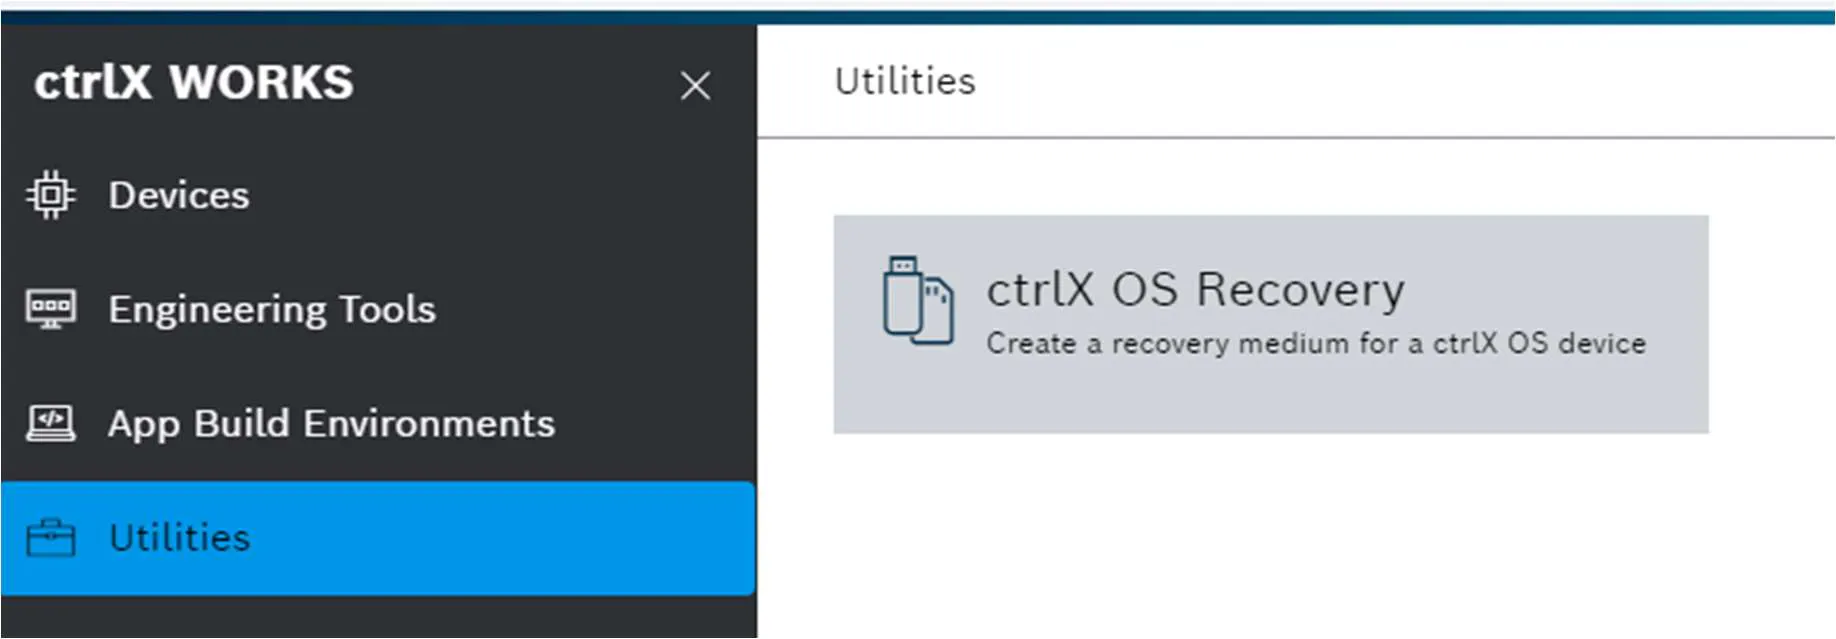
Use the ctrlX WORKS Utilities tool to write the system image and backup file onto the SD card.
• Open ctrlX WORKS, go to Utilities → ctrlX OS Recovery.
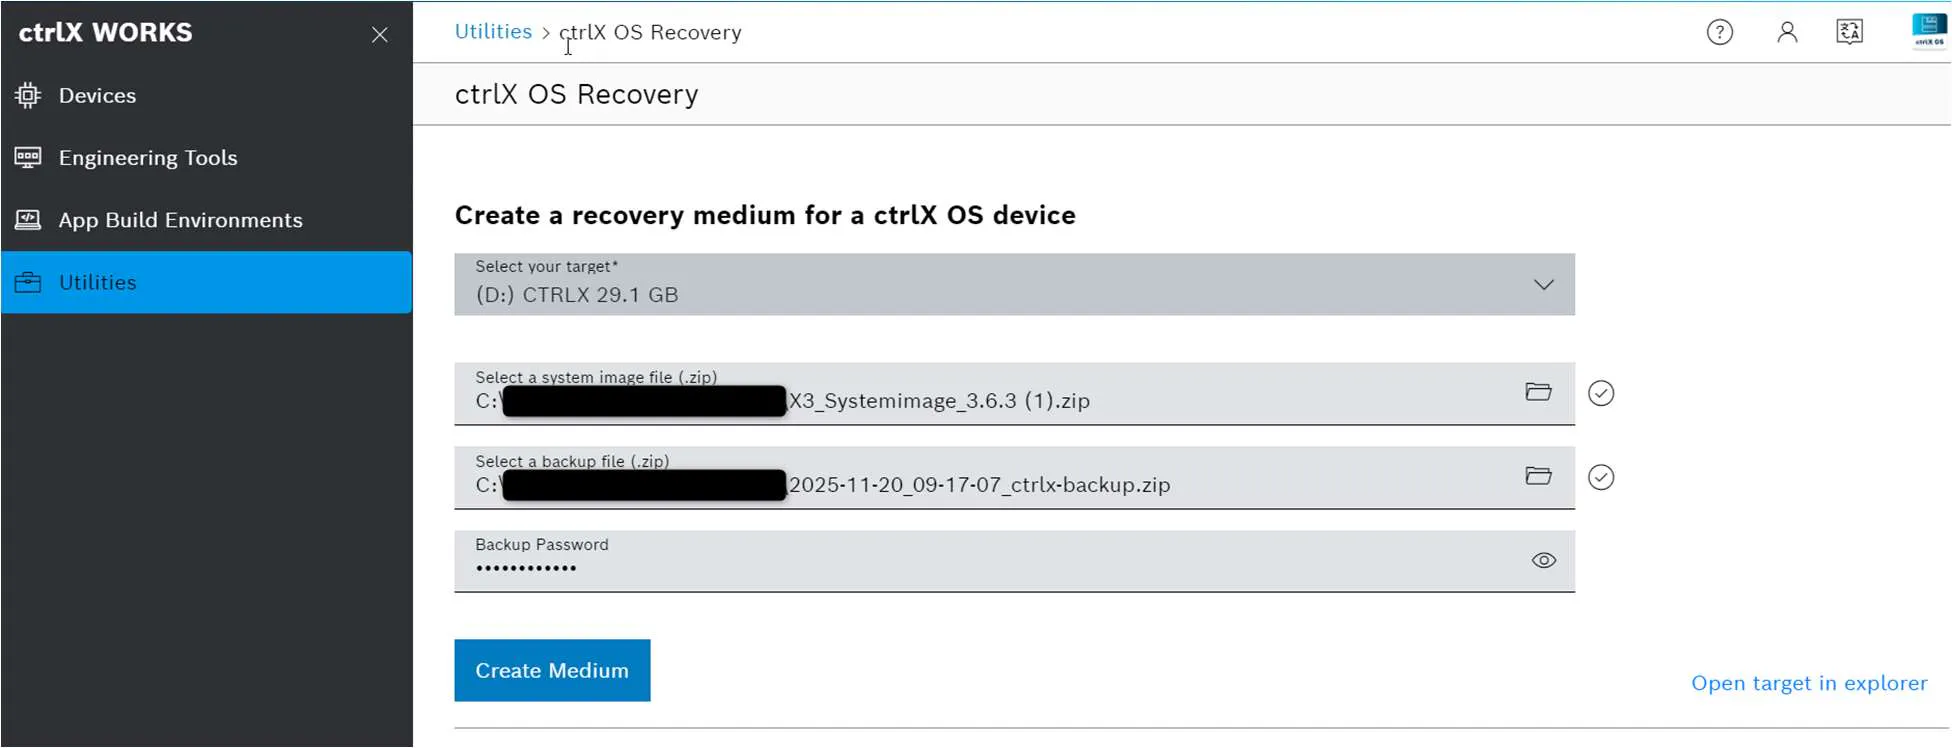
• Select the SD card as the target drive (e.g., D: CTRLX 29.1 GB).
• Browse and select the system image (.zip) and the backup file (.zip) created in Step 1.
• Enter the backup password, then click "Create Medium" to write the recovery media.
Step 3: Insert the SD Card and Start the ctrlX CORE
After the recovery medium is created, boot the replacement ctrlX CORE from the SD card.
• Eject the SD card safely from the PC after ctrlX WORKS has completed writing.
• Insert the SD card into the powered-off replacement ctrlX CORE.
• Power on the CORE and wait for the update and restore process to finish.
• Monitor the LED: the CORE will blink blue/red alternately, then it will restart a few times to activate the update, and finally blink a solid single color (red, blue, or green) when complete. This can take up to 30 minutes depending on the backup size.
Step 4: Verify the Recovery Was Successful
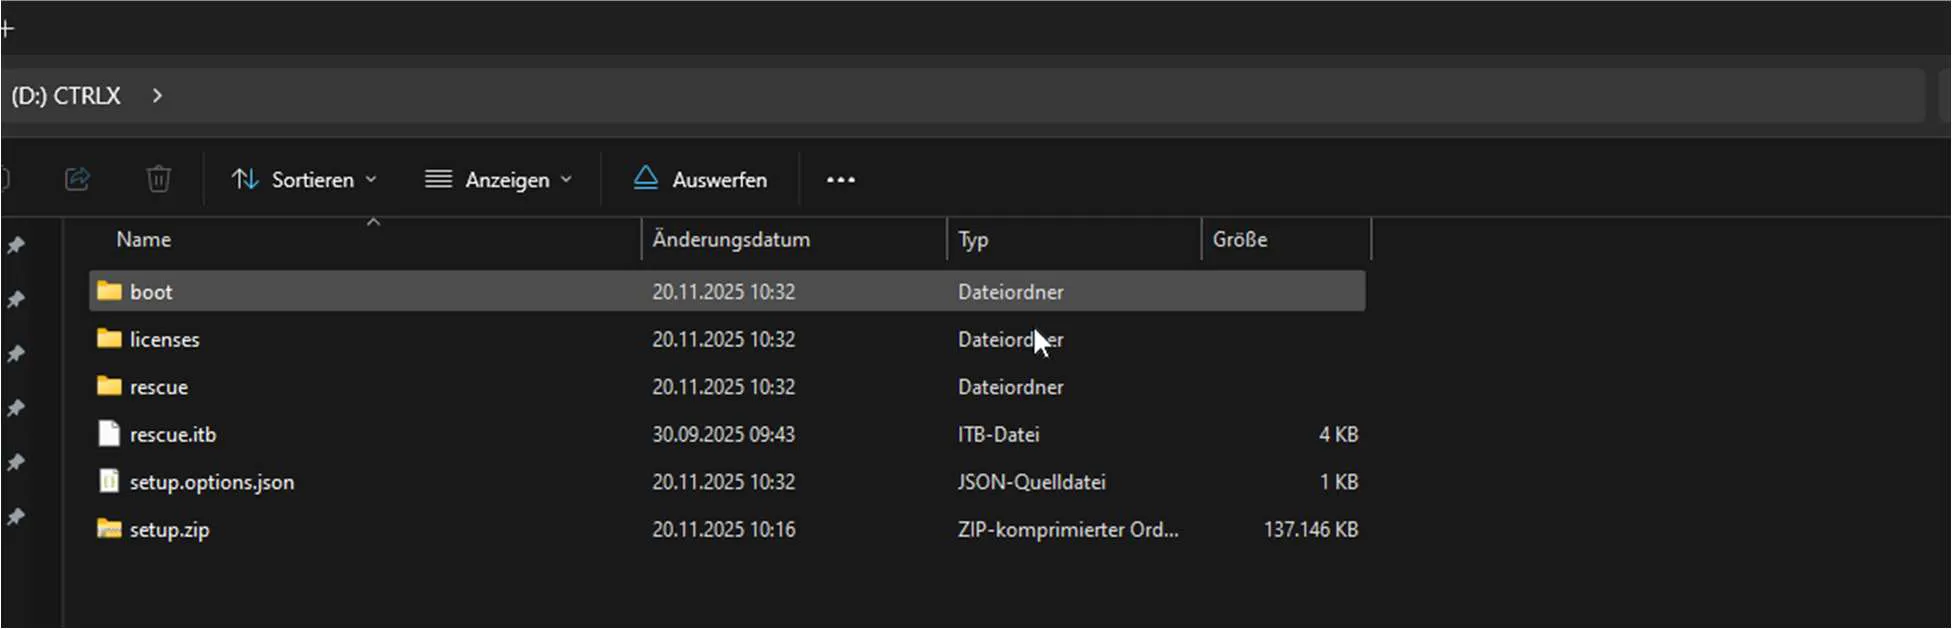
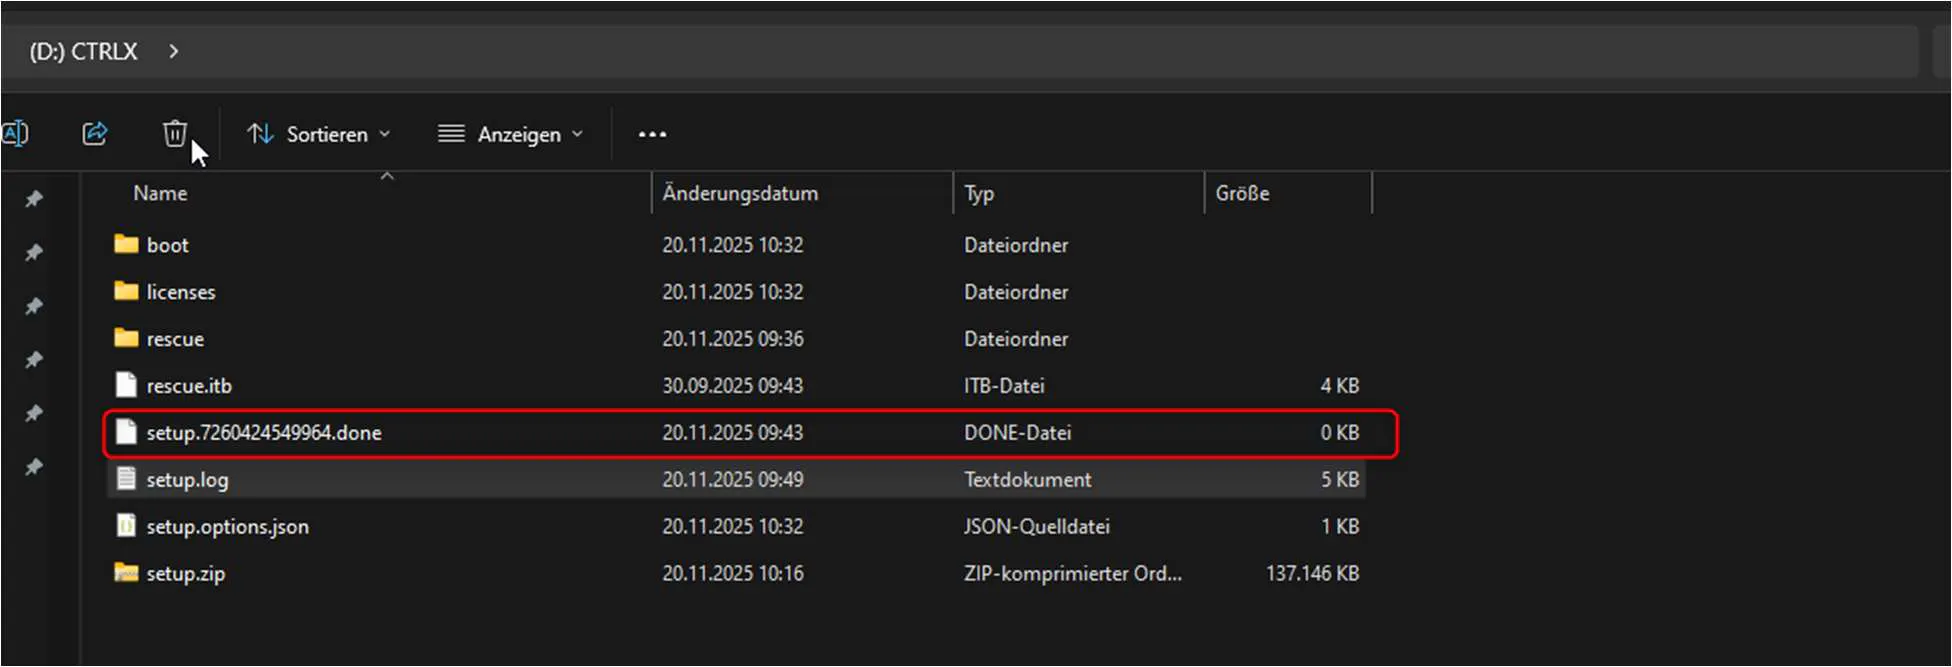
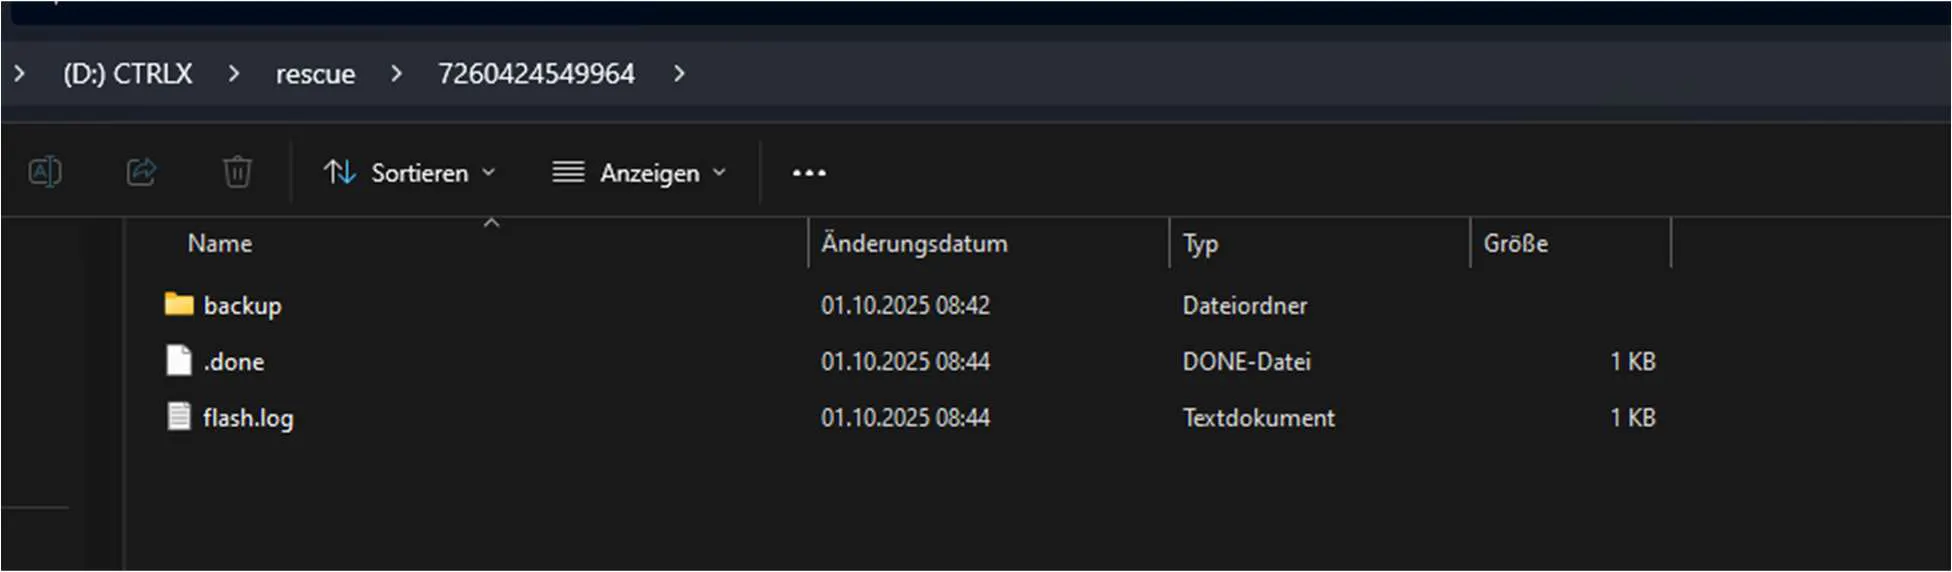
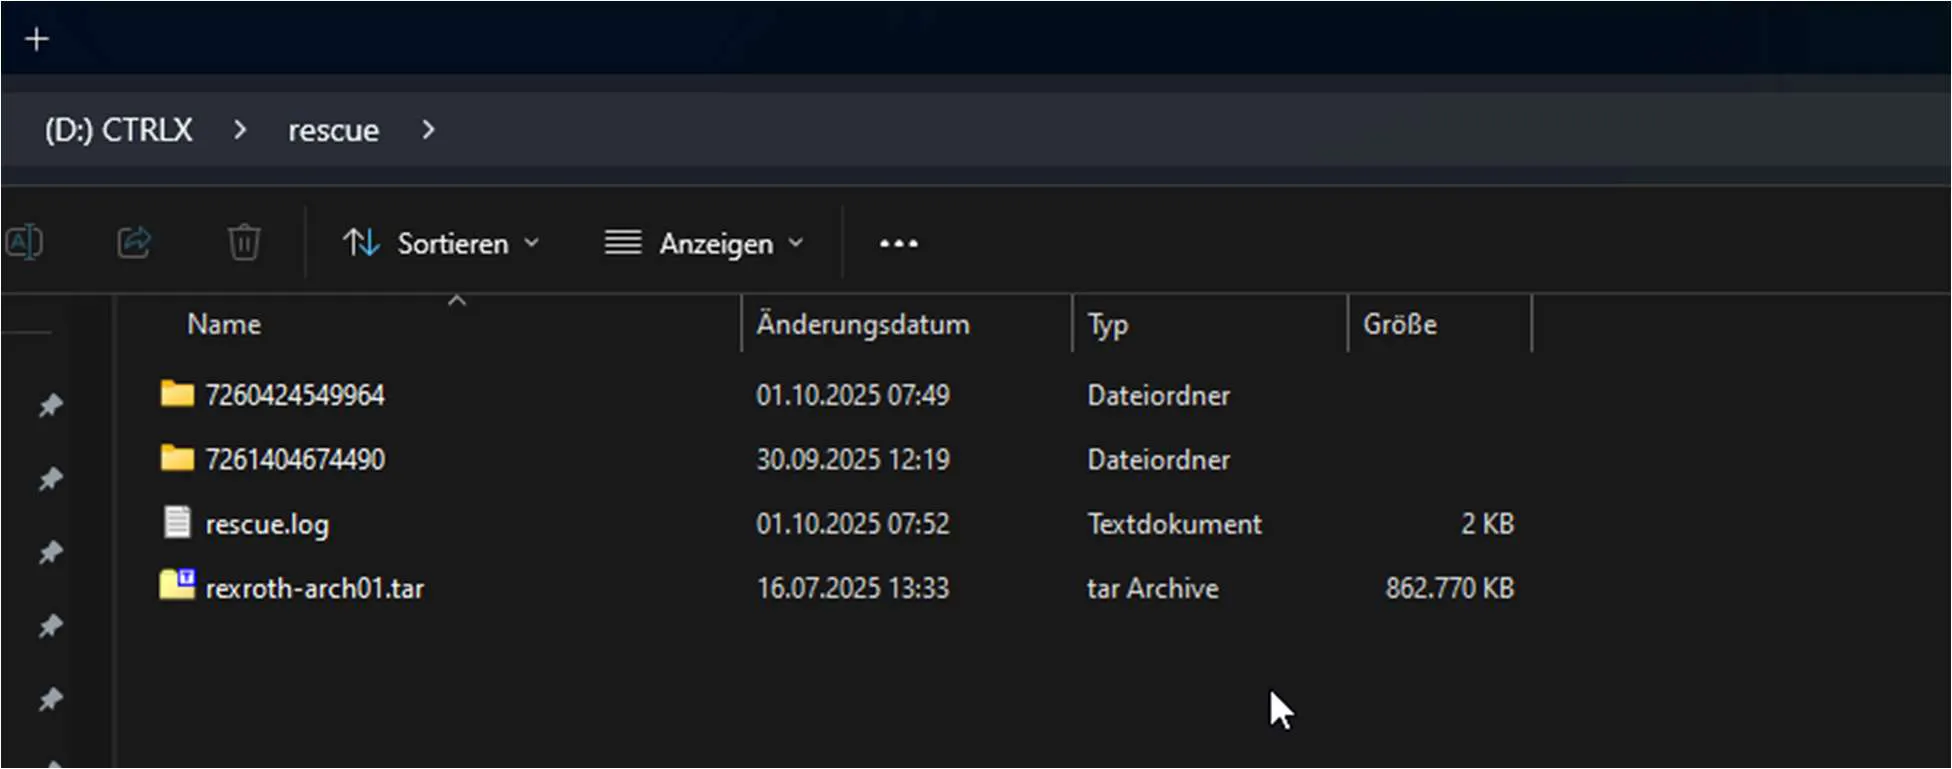
Check the SD card contents to confirm both the firmware update and backup restore completed successfully.
• Re-insert the SD card into the PC after the CORE has finished booting.
• Verify that a setup.[timestamp].done file exists in the SD card root — this confirms a successful setup.
• Navigate to the rescue → [device-ID] folder and verify that a .done file and a flash.log are present — this confirms a successful restore.
• If no .done file exists, re-insert the SD card and repeat the boot process.
Step 5: Prepare the ctrlX DRIVE panel with firmware
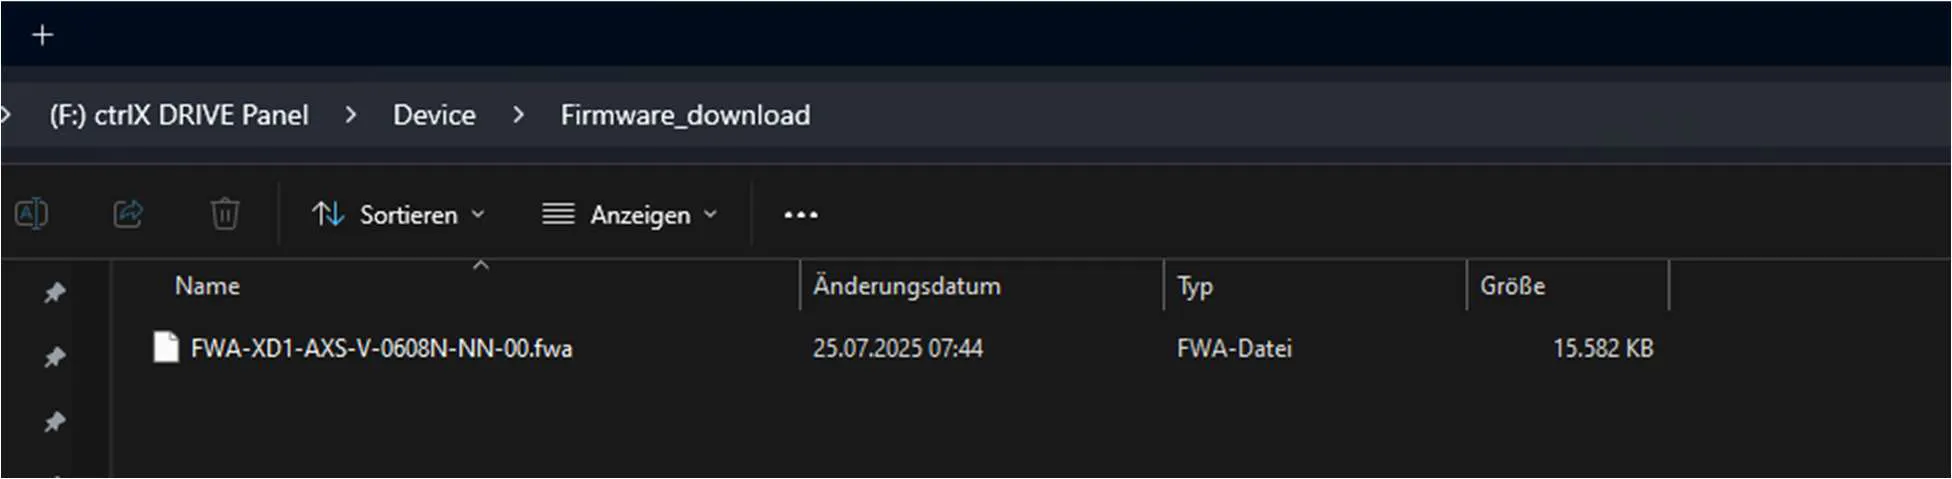
Before replacing a ctrlX DRIVE, store the correct firmware file on the panel's USB storage so it can be applied independently of the new device's factory firmware version.
• Connect the ctrlX DRIVE panel to the PC in USB mass storage mode by attaching and then removing it from the drive.
• On the PC, navigate to F:\Device\Firmware_download.
• Copy the correct drive firmware file (.fwa) into this folder.
• Safely disconnect the PC and re-attach the panel to the drive.
Step 6: Back Up and Restore the ctrlX DRIVE
Use the drive panel menu to create a device-replacement backup and restore it on the new drive.
• On the attached panel, navigate to Device Functions → Backup → Device Replacement to create the backup. A warning appears if the firmware file was not pre-loaded.
• Locate the backup file on the panel at: F:\Device\Backup_restore\Device_replacement.
• After swapping the physical drive hardware, re-attach the panel and navigate to Device Functions → Restore → Device Replacement.
• Select the backup file and confirm the restore process to restore the configuration and firmware to the new drive.
• If the drive uses Safe Motion (SMO) as safety, the axis identification must be confirmed in the panel as well
• Note: SafeMotion (SMO) parameters cannot be backed up or restored via the panel. If your drive uses safety functions, these parameters must be transferred separately using ctrlX DRIVE Engineering.
Conclusion
Once both the ctrlX CORE SD card shows valid .done files and the ctrlX DRIVE restore has completes via the panel, the device replacement is finished and both devices will operate as configured.