Introduction
This how-to guide explains how to connect and operate an Ethernet-based, GenICam-compliant camera with ctrlX OS device like ctrlX CORE using the LumiScan CamDriver application.
By following this guide, you will learn how to:
Establish the physical connection between camera and ctrlX OS device
Configure the LumiScan CamDriver
Access the camera via the ctrlX Data Layer
Trigger image acquisition
Retrieve captured images
Optionally store images
The LumiScan CamDriver is fully controlled via the ctrlX Data Layer and supports all Ethernet cameras compliant with the GenICam standard.
Prerequisites
Hardware
ctrlX OS device (e.g. ctrlX CORE X3)
Ethernet-based, GenICam-compliant camera
Ethernet switch (optional)
Engineering PC
Shielded Ethernet cables
Software
LumiScan CamDriver
ctrlX OS 3.6
ctrlX Data Layer access (e.g. via browser or tools)
Camera manufacturer configuration software
Requirements
Before starting, ensure that:
The LumiScan CamDriver app is installed
A valid license is available
The camera supports GenICam over Ethernet
System Overview
The LumiScan CamDriver is configured and controlled entirely via the ctrlX Data Layer.
The system uses a two-level configuration structure:
One application configuration (
lumiscan-cam-driver.json)One configuration file per camera
All configuration files are located in:
Manage App Data → active → lumiscan-cam-driverControl Mechanism (Handshake)
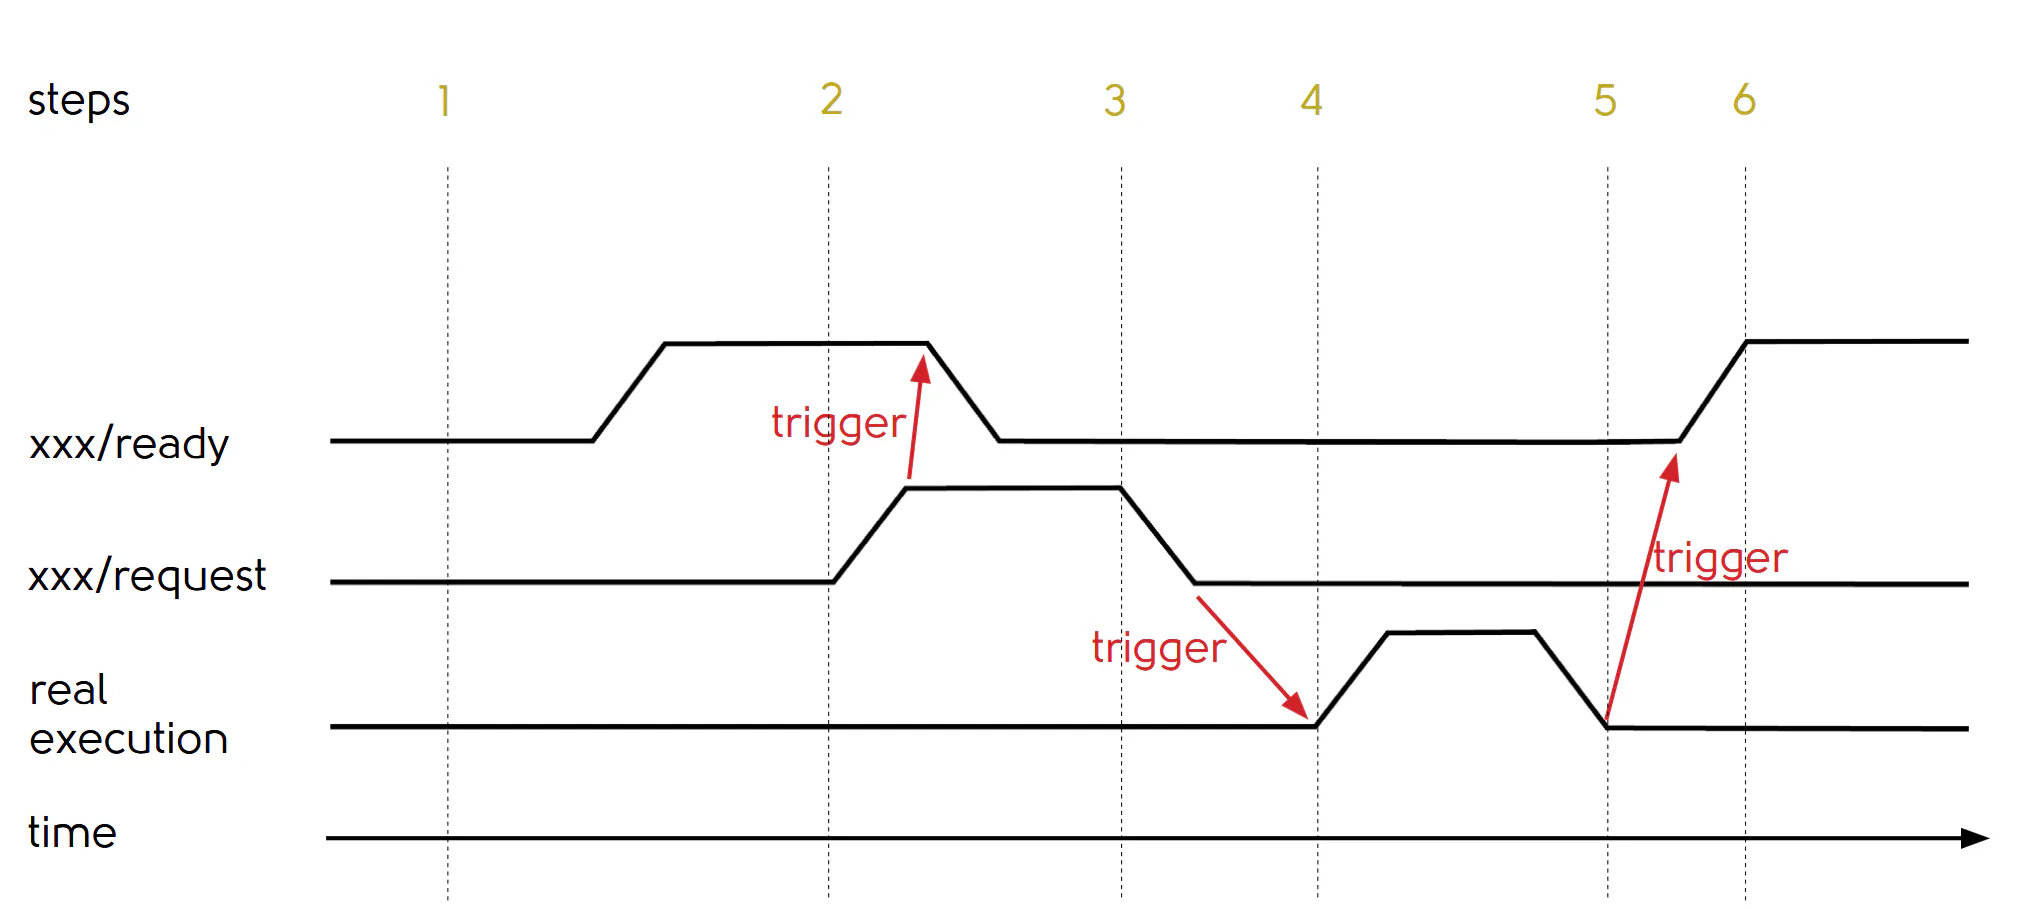
All operations (connect, capture, save, disconnect) are executed using a standardized handshake mechanism:
Wait until
ready = trueSet
request = trueWait until
ready = falseReset
request = falseWait until
ready = trueagain
This mechanism is used for:
Camera connection
Image acquisition
Image storage
Step 1: Hardware Setup
Connect the camera to the engineering PC
Configure the camera network using the manufacturer’s tool:
Assign a static IP address
Disable DHCP
Disable Auto IP / Link Local
Enable persistent IP (if supported)
Example:
Camera IP:
192.168.1.21Subnet mask:
255.255.255.0
Disconnect the camera from the PC
Connect the following devices to the switch:
Camera
ctrlX CORE
Engineering PC
Configure the PC network:
IP:
192.168.1.XSubnet:
255.255.255.0
(X ≠ 1)
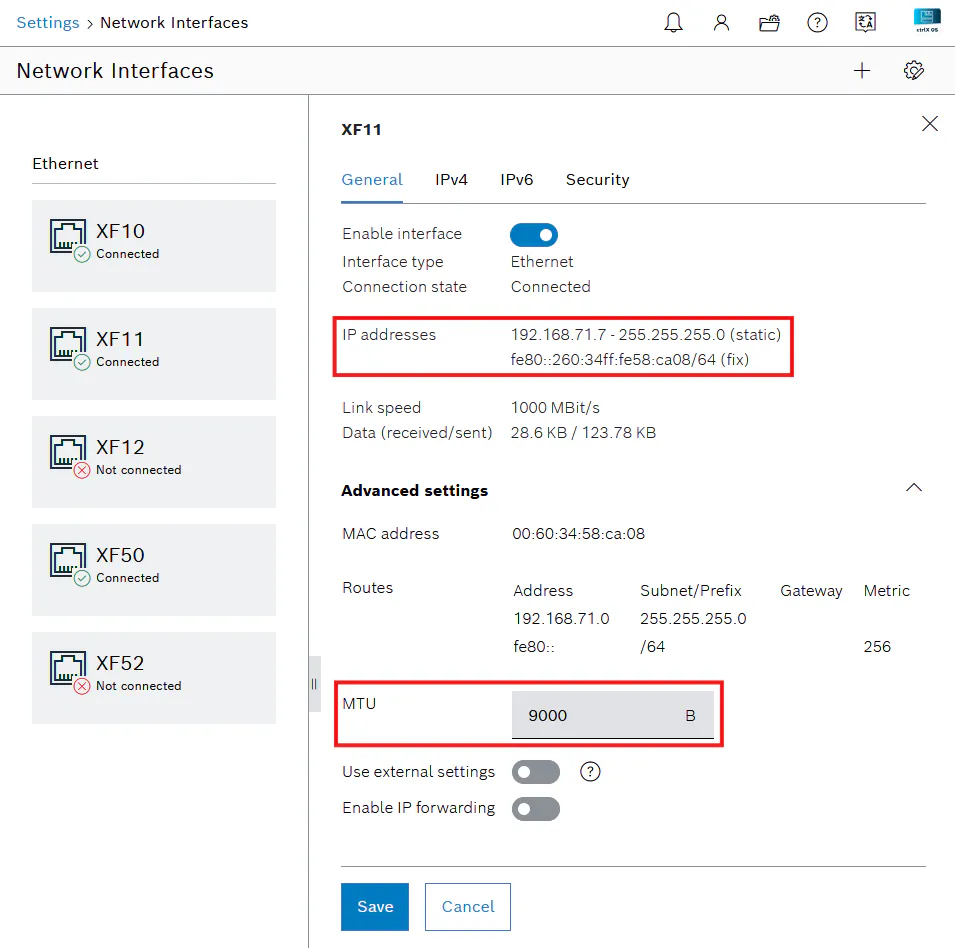
Open ctrlX CORE Web UI →
Settings → Network InterfacesConfigure the interface (e.g. XF10):
IP:
192.168.1.1MTU:
8000
Save settings
Note: Jumbo-frame-capable switches are recommended
Step 2: Configure LumiScan CamDriver
Navigate to:
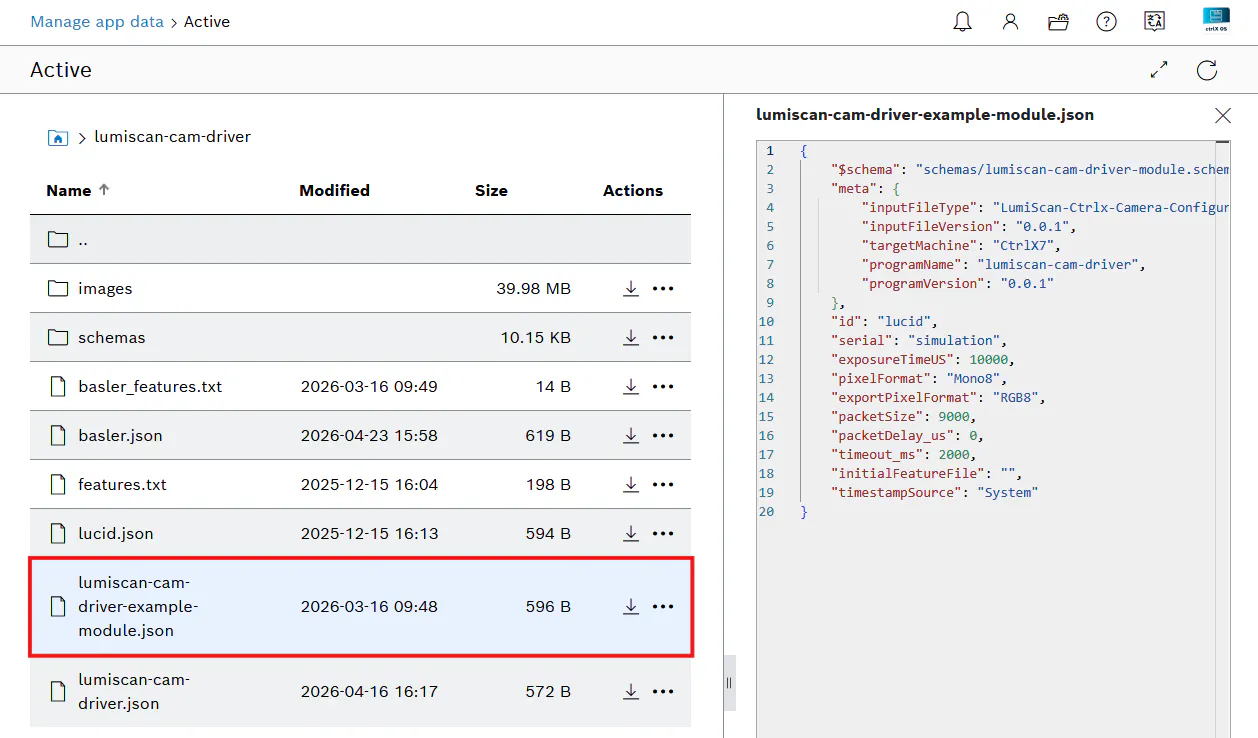
Manage App Data → active → lumiscan-cam-driver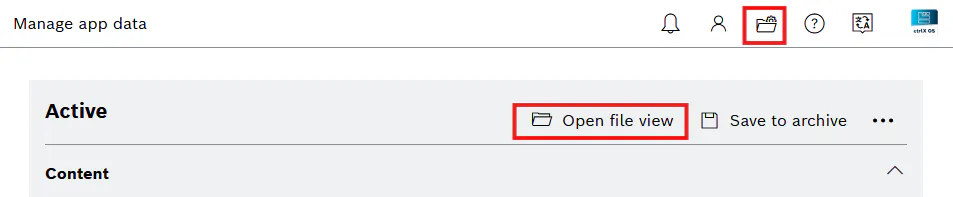
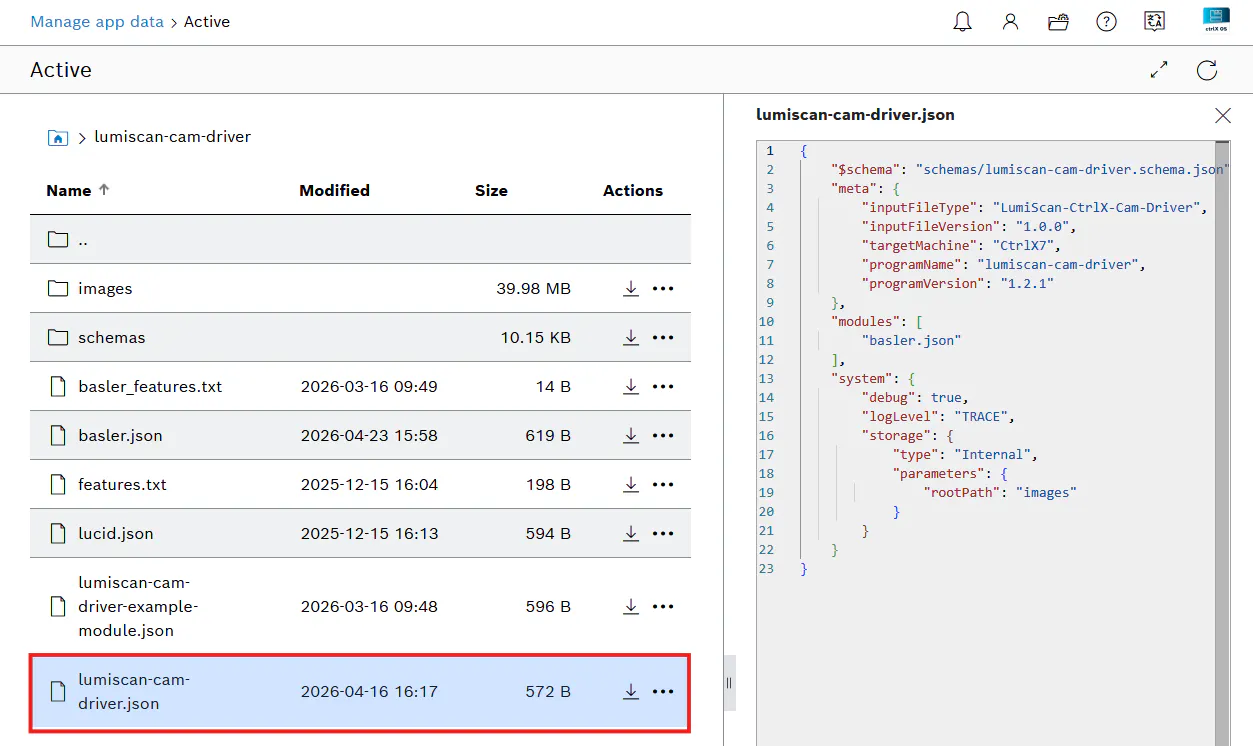
2.1 Configure Application Settings
Open:
lumiscan-cam-driver.jsonExample:
{
  "configurations": [
    "camera_example.json"
  ],
  "system": {
    "debug": true,
    "logLevel": "INFO"
  }
}
Ensure that:
All referenced configuration files exist
Configuration names are correct
No duplicate camera serial numbers are used
2.2 Configure Camera Settings
Open:
camera_example.jsonExample:
{
  "id": "camera1",
  "serial": "LX123456",
  "exposureTimeUS": 4321,
  "pixelFormat": "RGB8"
}
Parameters:
id: Camera identifierserial: Camera serial numberexposureTimeUS: Exposure timepixelFormat: Image format
Supported formats:
RGB8
Mono8
After modification:
Save file
Restart LumiScan CamDriver
Step 3: Verify Camera Detection
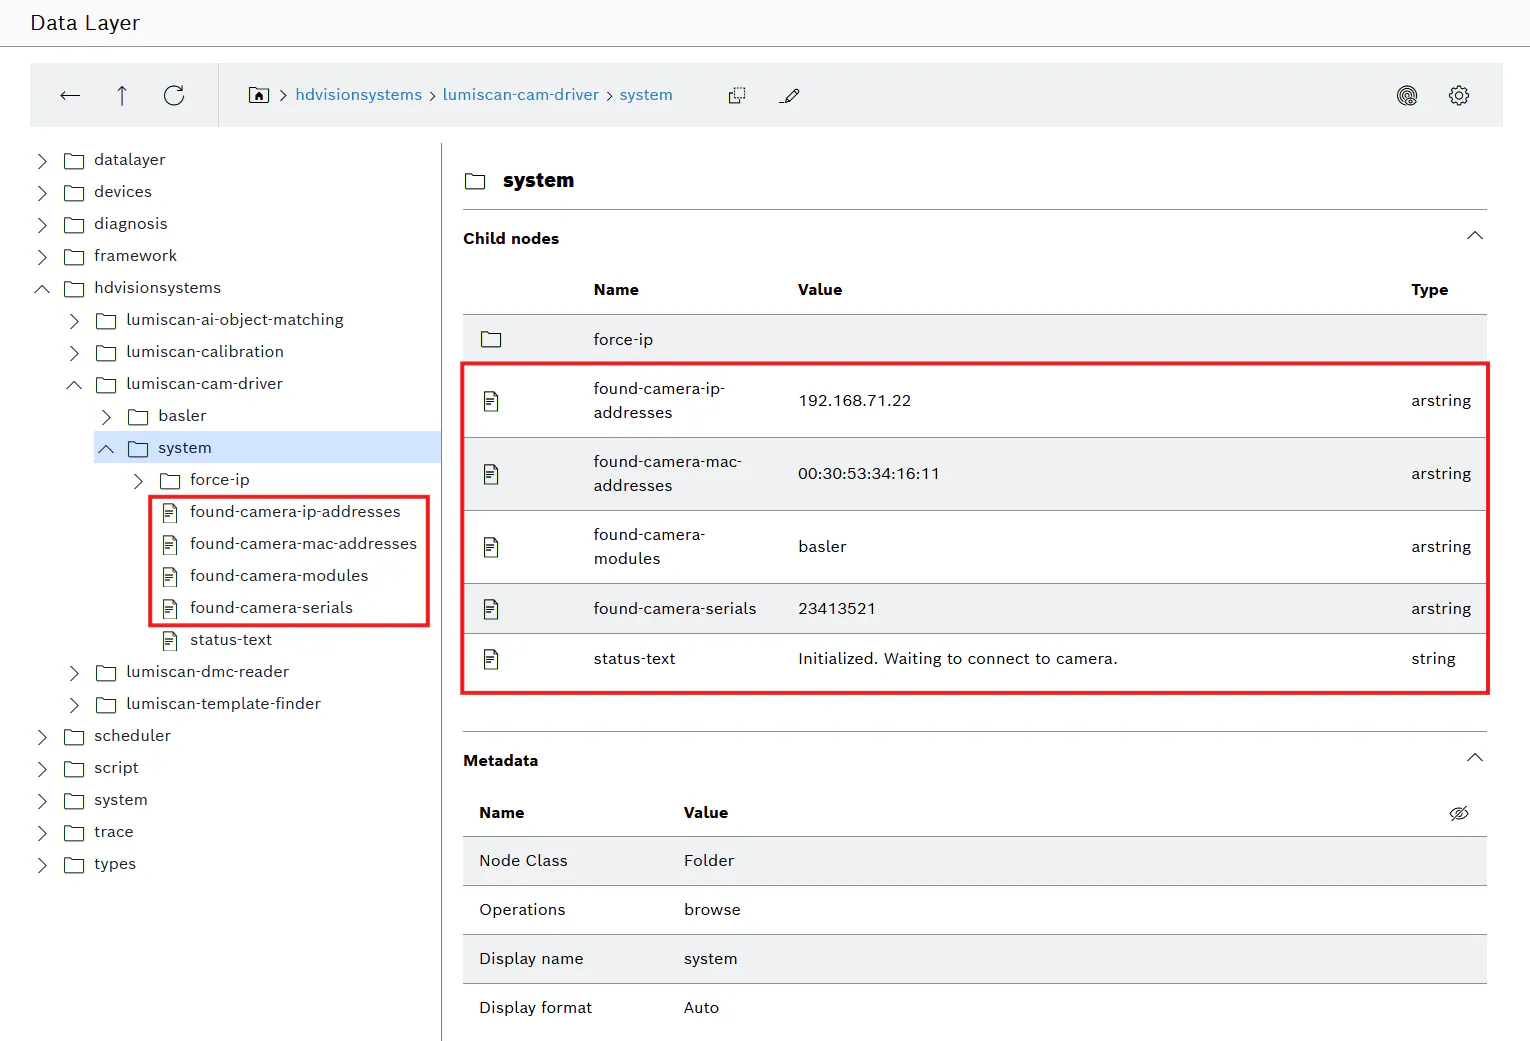
Detected cameras appear in:
/hdvisionsystems/lumiscan-cam-driver/systemRelevant nodes:
found-camera-ip-addressesfound-camera-mac-addressesfound-camera-modulesfound-camera-serials
Use these to verify:
Camera detection
IP configuration
Serial number mapping
Fig. 6: Data Layer system nodes with detected cameras
Step 4: Connect to the Camera
Path:
/hdvisionsystems/lumiscan-cam-driver/<module>/control/connect-cameraProcedure:
Check:
ready = trueSet:
request = trueWait until:
ready = falseReset:
request = falseWait until:
ready = true
Verify:
/control/status/code = 0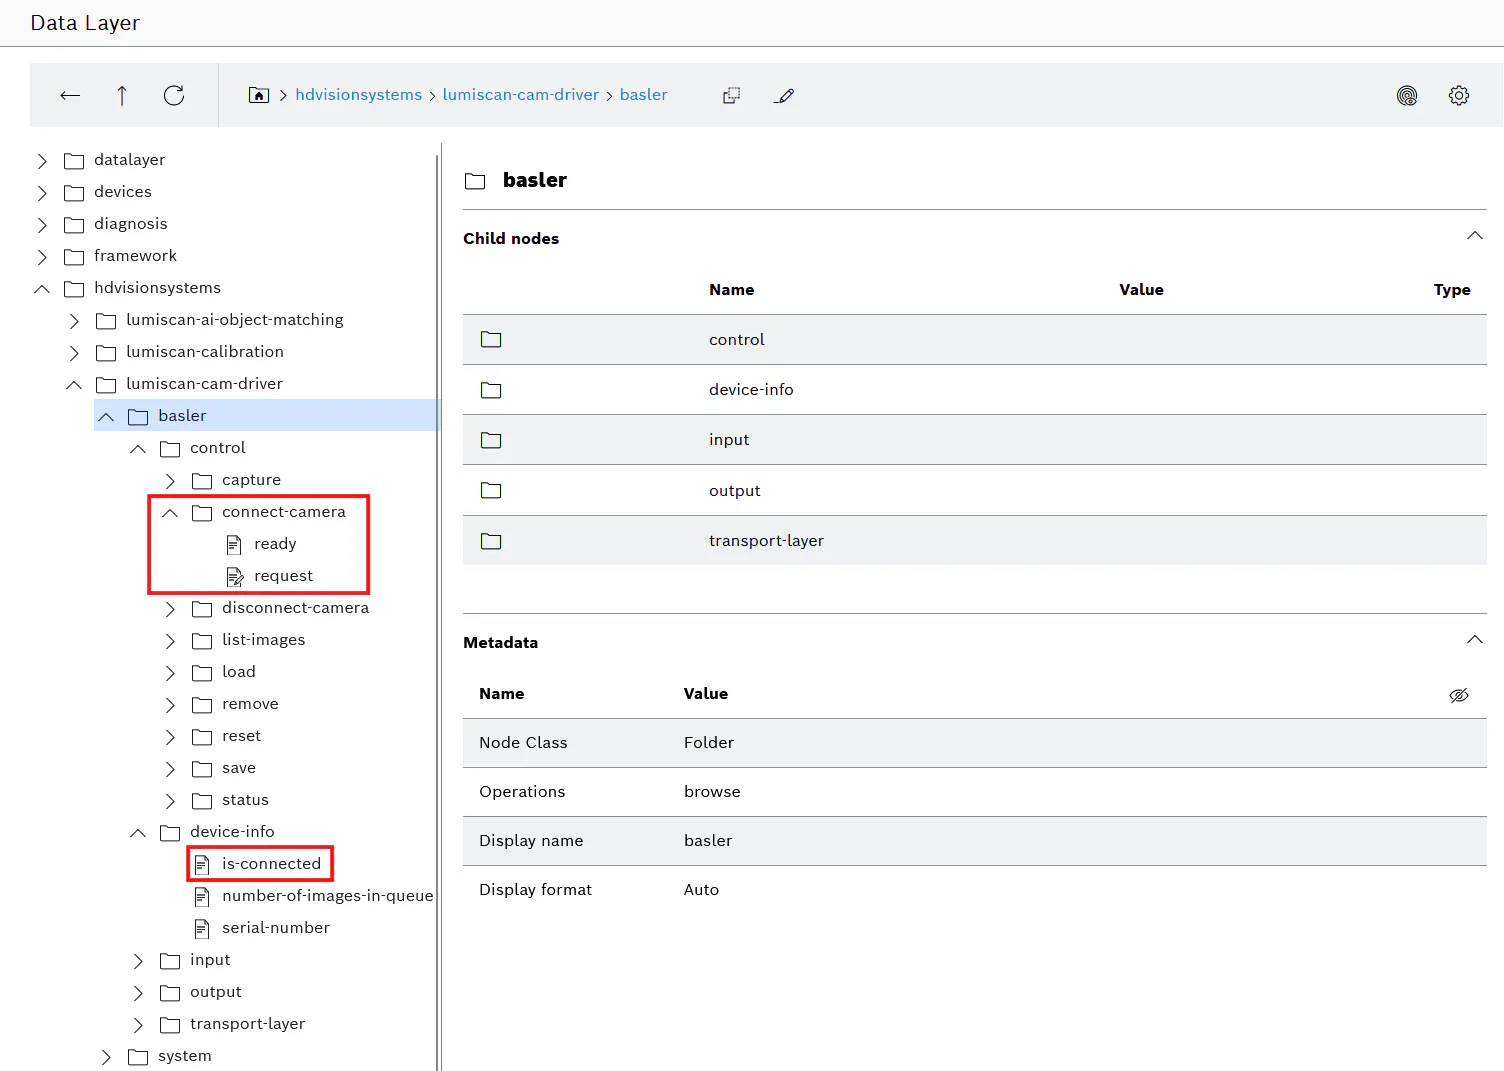
Step 5: Trigger Image Acquisition
Path:
/hdvisionsystems/lumiscan-cam-driver/<module>/control/captureProcedure:
Execute handshake sequence (same as above)
Verify:
/control/status/code = 0Captured image available at:
/hdvisionsystems/lumiscan-cam-driver/<module>/output/image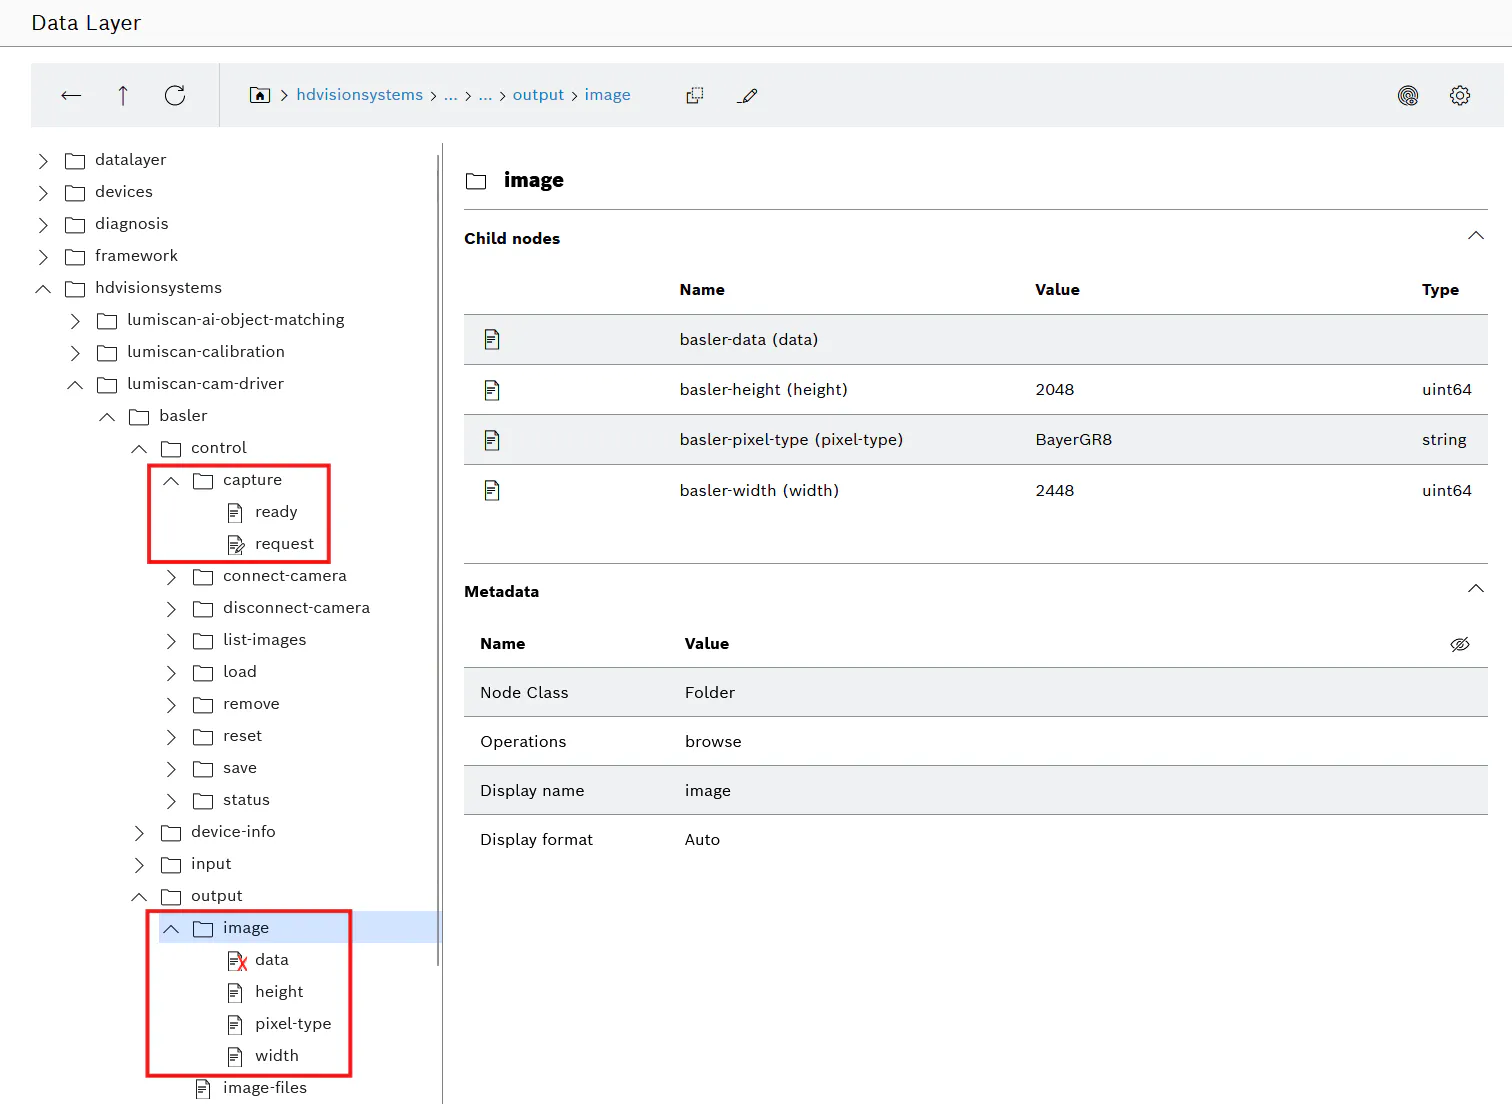
Step 6: Save Captured Images (Optional)
Supported storage:
Internal storage
USB
SD card
Samba network share
Example configuration:
"storage": {
  "type": "Internal",
  "parameters": {
    "remotePath": "images"
  }
}
After changes:
Save configuration
Restart application
Trigger saving via:
/control/save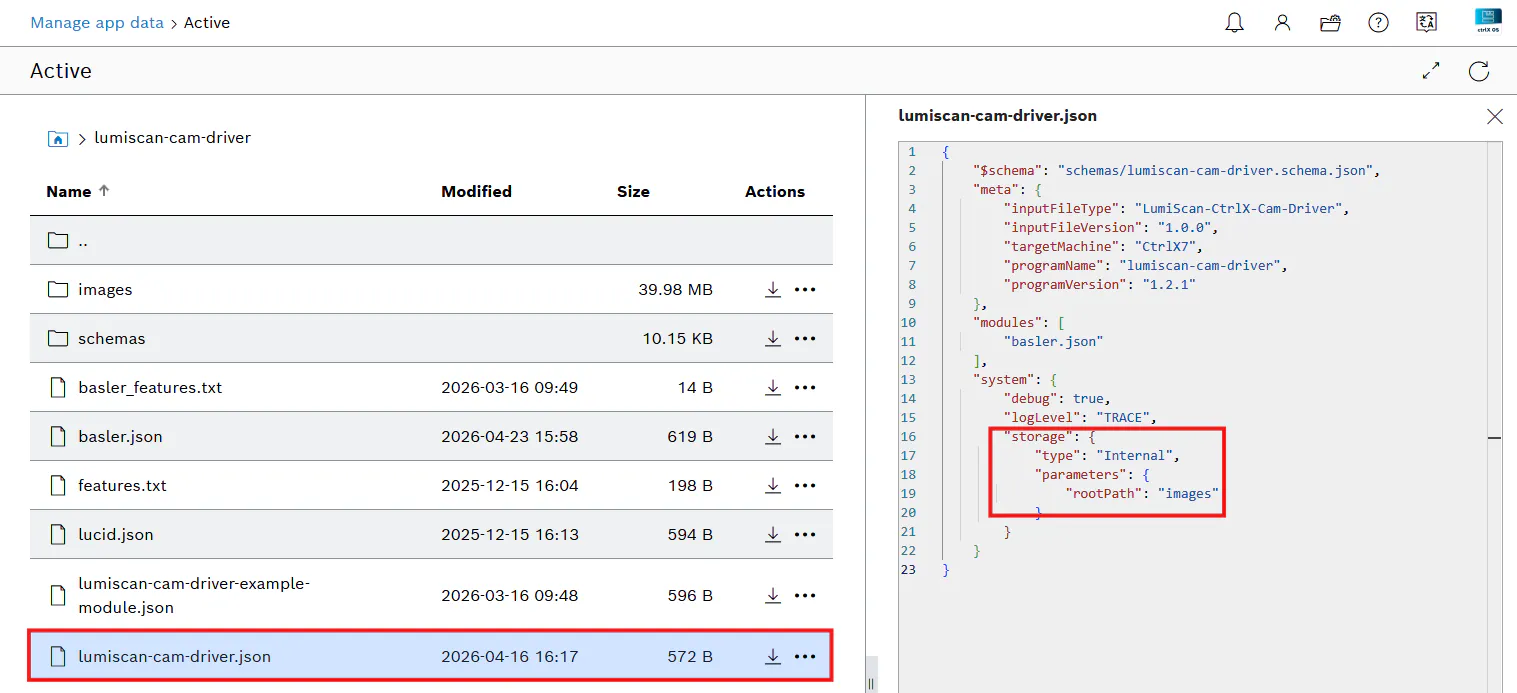
Result
After completing this guide:
The camera is successfully connected to ctrlX CORE
The LumiScan CamDriver is correctly configured
The camera is accessible via the ctrlX Data Layer
Image acquisition can be triggered programmatically
Captured images can be stored locally or on external systems
The Company
HD Vision Systems is a leading provider of industrial image processing and AI-based automation solutions. Our hardware-agnostic platform enables seamless integration across a wide range of cameras, sensors, robots, and industrial systems, giving customers maximum flexibility and future-proof scalability. By combining advanced machine vision software with strong partnerships across the automation ecosystem, we deliver tailored, high-performance solutions for quality inspection, process optimization, and intelligent manufacturing. Together with our technology partners, we help companies accelerate digital transformation and unlock the full potential of Industry 4.0.